Chapter 6: Making Hardware Connections 55
Connecting a Microphone to the Mbox 2 Mini
Mic Cables and Connectors
There are several ways to use Mbox 2 Mini with a microphone, depending on the type of mi-
crophone and cable you use.
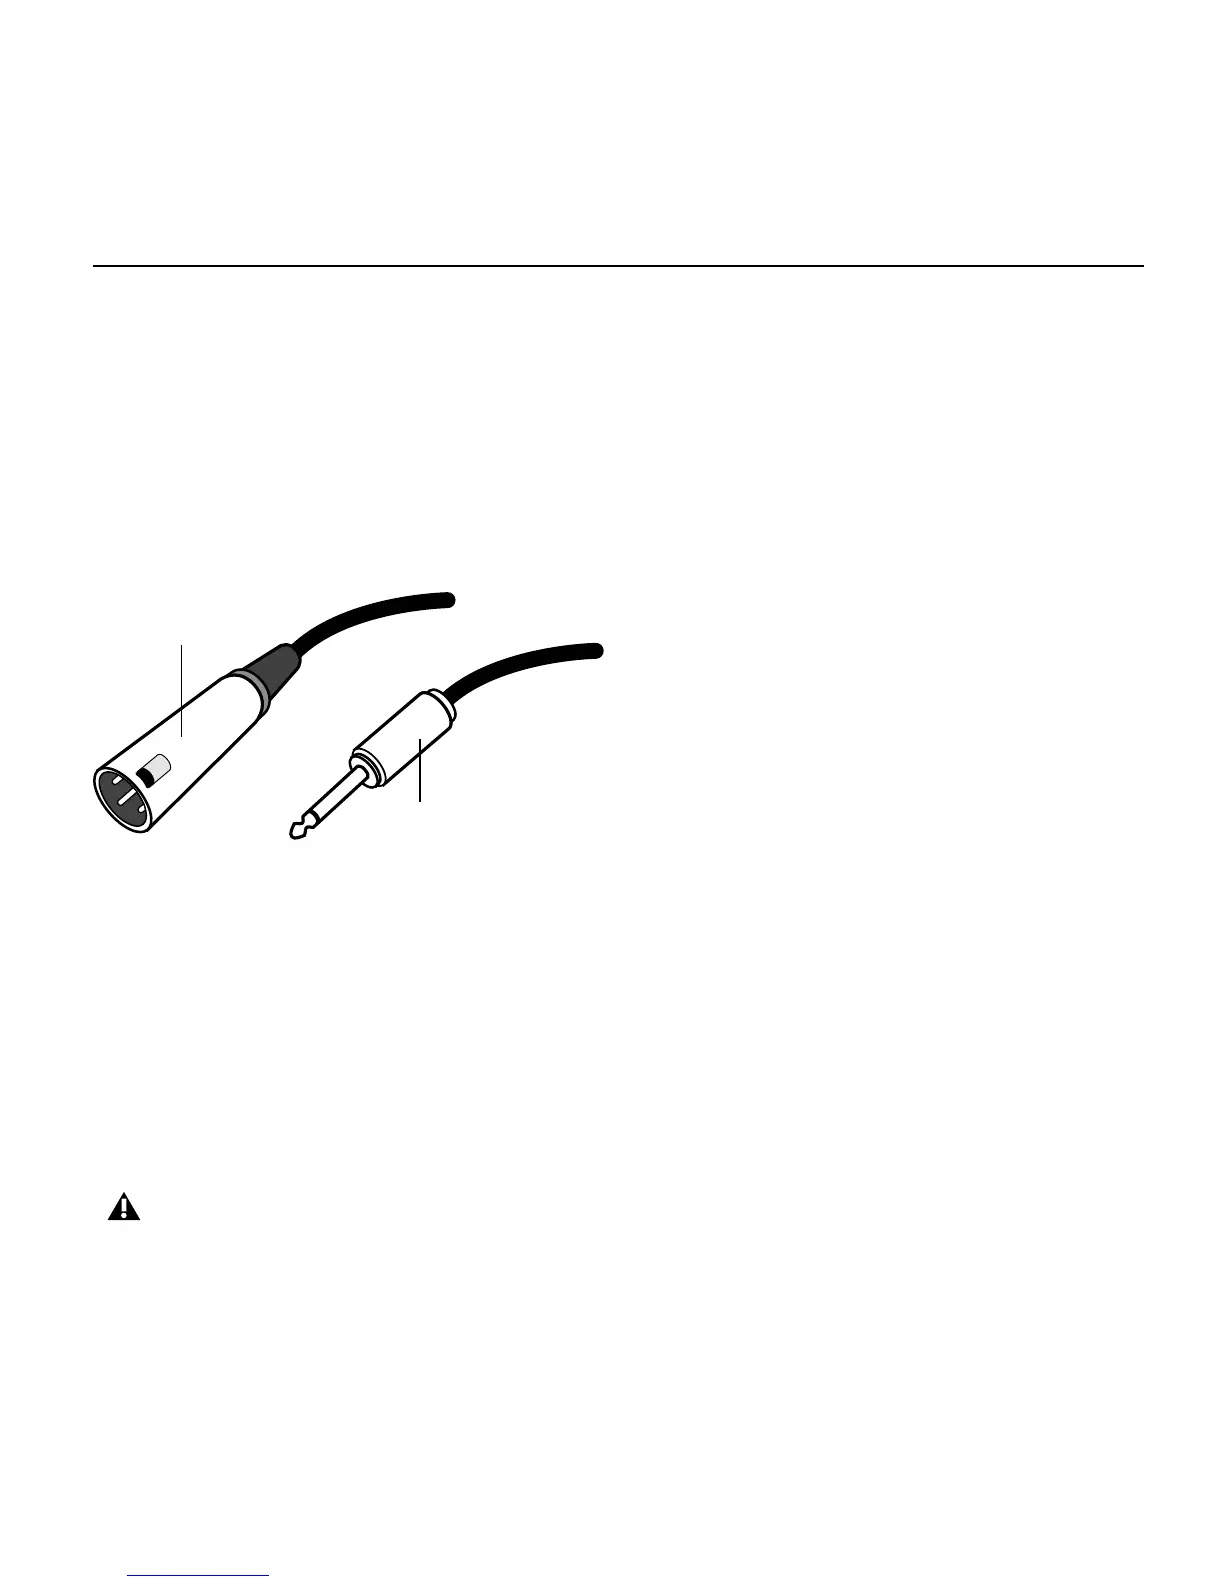
Some microphone cables use an XLR connector to attach a microphone to an input (such as
those on the Mbox 2 Mini); other microphones use a 1/4-inch connector. If you have a choice,
use an XLR connector to connect the microphone to the Mbox 2 Mini to yield better results.
Phantom Power
Some microphones require power to operate. This power, called phantom power, is supplied ei-
ther by a battery in the microphone, or through an audio interface (such as Mbox 2 Mini) that
can supply power through the microphone cable.
Most condenser microphones (such as an AKG C3000) require phantom power to operate. Dy-
namic microphones (such as a Shure SM57) do not require phantom power to operate, but are
not harmed by it.
XLR and 1/4-inch connectors
Although phantom power can be used safely with most microphones, it is possible to damage
some ribbon microphones with it. Always turn off phantom power and wait at least ten seconds
before connecting a ribbon microphone.