Do you have a question about the Disaster Area Designs DMC.micro PRO and is the answer not in the manual?
Details the DMC.micro PRO as an updated, smaller controller with full-sized performance.
Press and hold both footswitches after boot to access the Setup Menu.
Tap to select items, hold to edit, tap again to change values, and hold to return to main menu.
Hold the right footswitch to save all changes and exit the Setup Menu.
Covers MAX PRESET, DEVICE assignments, CLOCK MODE, and UTIL MOD settings for device and mode configuration.
Details MULTIJACK configurations (EXP, MIDI, UTIL) and JACK CHAN settings for MIDI channel selection.
Configures HOLD TIME for footswitch actions and USB MODE for computer or device control.
Covers CUSTOM DEVICE setup, DUMP function, and FACTORY RESET options including specific pedal presets.
Consult the online list at disasterareadesigns.com/supported-devices for compatible pedals.
Walkthrough of setting up a Meris Enzo and Strymon Timeline for MIDI control via DMC.micro.
Explains connecting pedals via MIDI cable or MultiJack and configuring the MultiJack for MIDI output.
Categorizes Strymon pedals into Big-Box with/without display and Small-Box types for setup.
Details MIDI channel, clock mode, and specific settings for Timeline, Mobius, BigSky, Volante, NightSky, and Small-Box pedals.
Enables DMC.micro to control one USB MIDI device on channel 1 using a gHOST Adapter.
Long-hold the right footswitch from any mode to return to Preset Mode.
Guides through selecting, editing, and saving presets by tapping and holding footswitches.
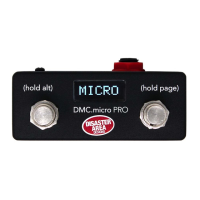
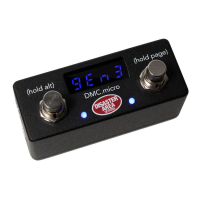
The DMC.micro PRO is an updated and improved version of a popular controller, offering full-sized performance in a much smaller package. This user manual covers the operation of both the DMC.micro PRO and the older DMC.micro, running firmware version 2.0 or higher. Throughout the manual, both devices are referred to as "DMC.micro." Special features exclusive to the PRO model are marked as "PRO FEATURE," while information specific to the older blue LED DMC.micro is marked in BLUE or referred to as LED4.
The DMC.micro user interface is designed for simplicity. Users can tap the left or right buttons to perform an action, hold the left button for a third "alternate" action, or hold the right button to advance to the next "page." The manual provides extensive examples and setup configurations, with additional resources available on the disasterareadesigns.com/support website.
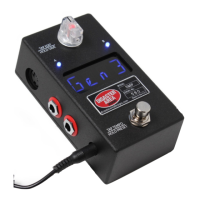
Despite its small size, the DMC.micro boasts a wide range of input and output capabilities. The rear panel includes a MIDI port, which typically functions as an output, connecting to MIDI-capable devices for control. With a DMC MIDI Y-cable, this port can also provide both MIDI input and output, allowing the DMC.micro to be controlled by another device. The versatile MultiJack connector supports various functions, including MIDI output, expression pedal input, dual remote footswitch input, or sending tap tempo to compatible devices. A USB port is available for firmware updates and USB MIDI connectivity to DAWs, iPads, or other mobile devices. It can also connect to certain USB MIDI devices via a gHOST adapter cable. Power is supplied through a DC power jack, requiring 9V DC, center negative, and at least 100mA of isolated power.
All configuration and customization options are accessed through the Setup Menu. Changes made here are saved for future use. To enter the Setup Menu, users press and hold both buttons after the DMC.micro boots, releasing them when "SETUP" appears on the display. Navigation involves tapping left or right to select an item, holding left to edit it, then tapping left or right to change its value. The PRO version highlights the menu item, while the LED4 version flashes the menu value. Holding left returns to the main menu. To save settings and exit, the right footswitch is held. If port configurations are changed, a power-cycle of the DMC.micro is required. It is crucial to save changes from the Setup Menu for them to take effect.
The Setup Menu offers various items for customization. "MAX PRESET / PRST" sets the number of available presets (OFF to 99, default 16). "PRST CHAN / P CH" configures MIDI channels for Preset Mode (A, B, C, D for channels 1, 2, 3, 4; 0 to disable). "DEVICES / DEV" determines the number of active device modes (OFF to DevD, default DevA), each controlling one MIDI device. "DEVICE A / DEV.A" through "DEVICE D / DEV.D" assign device types to each channel, automatically setting up MIDI commands. "UTIL MOD X / UTIL.X" and "UTIL MOD Y / UTIL.Y" enable/disable Utility Modes or Looper Mode, assigning looper controls to a specific device. "CLOCK MODE / CLK" enables/disables Clock Mode (OFF, Preset for per-preset tempo, or Global for one tempo). "UTIL MOD X / UTIL MOD Y" configures Utility Mode functions (details on page 20).
The "MULTIJACK / JACK" option configures the MultiJack hardware, with detailed options on page 22. These include:
Further Setup Menu options include: "HOLD TIME / HOLD" to configure the duration for triggering "hold" functions (LO for faster, HI for preventing unwanted holds). "USB MODE / USB" configures the USB port (MIDI for computer control, HOST for DMC.micro control of USB MIDI devices). "INPUT CHANNEL / INCH" sets the MIDI channel for incoming data (default 16, requires MIDI-Y cable). "MIDI THRU / THRU" enables/disables MIDI thru on DMC interfaces (OFF, 5 P, JACK, ALL, USB). "NAME DISP (PRO)" enables preset name display (OFF, NAME & NUM, BIG NAME). "UTIL NAME (PRO)" displays 5-character names for Utility Mode functions. "UTIL LOAD / UT.LD" loads Utility Mode values per preset (X, Y, or BOTH). "BRT" sets display brightness (0-9, LED4 only). "CUST 1, CUST 2 / C1, C2" configure two Custom MIDI devices (details on page 15, hidden if not selected). "DUMP" performs preset and configuration dump via MIDI SysEx. "FACT" offers factory reset options: ALL (clears config, fills presets), PROD (test mode), C4 (sets up Device A/USB for Source Audio C4), MERS (sets up Device A/MultiJack for Meris), CBA (sets up Device A/MultiJack for Chase Bliss).
The process of setting up the DMC.micro involves identifying MIDI devices, checking the supported devices list (disasterareadesigns.com/supported-devices), or using the Custom Devices section for unsupported devices. An example configuration for Meris Enzo and Strymon Timeline is provided. This involves setting "DEVICES" to "DEV B," then assigning "DEVICE A = MERIS" and "DEVICE B = TIMELINE." The MultiJack is configured as "MIDI TIP," with DIP switches set to ON-ON-ON. If controlling the Timeline looper, "UTIL MOD Y = LOOPER B" is set. After configuration, the right button is held to save and exit. Users then configure their Enzo and Timeline pedals (e.g., Enzo to MIDI channel 1, Timeline to channel 2). The manual encourages exploring Preset, Device, Looper, Clock, and Utility Modes for comprehensive control.
The manual details setup guides for common pedals:
USB Host Mode Setup (ZOOM, RED PANDA, SOURCE AUDIO): The DMC.micro controls one USB MIDI device on MIDI channel 1. This requires a USB cable matching the pedal's type and a Disaster Area gHOST Adapter Cable. Setup involves configuring "USB as HOST" and "Device A" as a supported type (ZOOM, C4, TENS, PRT2). The USB MIDI device must be set to MIDI channel 1. USB Host Mode Tips: only one USB MIDI device supported, only Device A can use USB MIDI, USB MIDI devices may be susceptible to noise (recommend 5-pin or 1/4" connections), Alexander Neo/Super Series pedals not supported via USB, use separate power outputs for DMC.micro and device if noise occurs.
Custom Device Setup: For unsupported devices, "GEN MIDI" or "GEN MIDI 2" drivers provide basic functionality (programs 0-127, CC4 for expression, CC64 for tap tempo). "GEN MIDI 2" does not send program change 0 for bypass. For more advanced control, users can create "Custom Devices" by configuring device slots as "CUSTOM 1" or "CUSTOM 2." This enables custom menu options for "CUST 1 MIN/C1LO" (lowest preset number), "CUST 1 MAX/C1HI" (highest preset number), "CUST 1 BYP/C1BP" (MIDI CC for bypass), "CUST 1 TAP/C1TT" (MIDI CC for tap tempo), "CUST 1 EXP/C1EP" (MIDI CC for expression pedal), and "CUST 1 DSP/C1DS" (display format for preset numbers: 0-127, 1-128, BANK2, BANK3, BANK3.1). Options can be set to ZERO if not supported by the device.
Preset Mode: This is the core of the DMC.micro, allowing access to any sound on any device in any combination with a single tap. To enter, long-hold the right button until "P" plus a number appears. Presets can be edited and saved by tapping left/right to select a preset, holding right to advance to device modes, tapping left/right to select sounds, holding left to bypass, and holding left again to save the preset. The PRO version allows naming presets (8 characters, upper/lower-case, numbers, punctuation, symbols) by configuring "NAME DISP = NAME & NUM" or "NAME LRG" in the Setup Menu. Editing involves selecting a preset, holding left until "NAME EDIT" appears, tapping left/right to select/change characters, and holding right to save.
Device Mode: Allows scrolling through connected devices, changing patches/sounds, and bypassing/engaging them. It's used for quick pedal adjustments and for editing preset mode settings. Enter by holding the right footswitch from preset mode. In device mode, the DMC.micro controls only the selected device. Users tap left/right to select sounds, hold left to bypass, and hold right to advance to the next device. For Chase Bliss Audio or Red Panda pedals, Device mode helps save presets by allowing users to adjust pedal knobs/DIP switches and then long-hold the left footswitch on the DMC.micro to save the new sound.
Clock Mode: Controls the DMC.micro's internal MIDI clock source. Enabled by setting "CLOCK MODE / CLK" to "PRESET" (per-preset tempo) or "GLOBAL" (one tempo for all presets). Users step through modes (CLOCK / T) by holding the right button. Functions include TAP (tap tempo), BPM (set tempo by BPM), and DIV (tap division for analog tap output only). MIDI clock can be stopped by setting BPM to minimum and tapping left. The DMC.micro sends MIDI clock messages, and devices must be configured to receive them. If "CLOCK = PRESET" is set, tempo and division settings are saved per preset. For non-MIDI devices, the MultiJack can be configured for normally-open or normally-closed relay operation (DIP switches OFF-OFF-OFF), and "TAP LENGTH / TLEN" can be adjusted for device response.
Utility Modes: The DMC.micro offers two Utility modes, each allowing up to three user-definable MIDI messages. To use, configure "UTIL MOD X (UTL.1)" or "UTIL MOD Y (UTL.2)" to ON in setup. Each button action (left, alt, right) can be configured for message type ("ONE" for single CC value, "TOGG" for alternating CC values, "NOTE" for MIDI Note on/off, "b UP/DN" for Strymon bank up/down, "TAP" for tap tempo, "EXP" for expression pedal), number (MIDI CC or note number), low/high values (for TOGG or ONE/NOTE), and channel (A, B, C). If UTIL actions are set to TOGG, the display highlights them at the HI value. "UTIL LOAD / UT.LD" allows saving and recalling TOGG states per preset.
Looper Mode: The DMC.micro can use "UTIL Y" mode to control the phrase looper on supported devices (Strymon Timeline, Line 6 HX Stomp/Effects, M9/M13, Eventide H9/Timefactor). Configuration involves setting "UTL MOD Y" to match the device slot of the looper-enabled pedal. The looper mode displays button functions on the PRO version or the looper's current state on the LED4 version.
MultiJack Configuration: The 1/4" MultiJack on the back of the DMC.micro is highly versatile, functioning as MIDI output, expression pedal input, or programmable footswitch input. Configuration is done via "MULTIJACK / JACK" in the Setup Menu, with options including EXP, FT.SW, N-O, MIDI TIP, MIDI RNG, MIDI T&R, MIDI I/O, UTIL, and N-C. "JACK CHAN / J CH" matches the MultiJack to desired device channels. When "MULTIJACK = UTIL" is selected, additional setup menu items are unlocked for "J TIP TYP / JTT" (MultiJack tip function: ONE, TOG, RTN, NOTE, B UP/DN, TAP, EXP), "J TIP NUM / JTN" (MIDI CC or note number), "J TIP LOW / JTL" (low value), "J TIP HI / JTH" (high value), and "J TIP CH / JTC" (device slots).
| Weight | 0.5 lbs |
|---|---|
| Type | MIDI Controller |
| Channels | 16 |
| Presets | 128 |
| Presets per Bank | 4 |
| Banks | 32 |
| Switches | 2 |
| Footswitches | 2 |
| Expression Pedal Inputs | 1 |
| Power Supply | 9V DC |
| MIDI Ports | 1 |