Connections and Setup
87
Connecting to the Nearby TV (TV1)
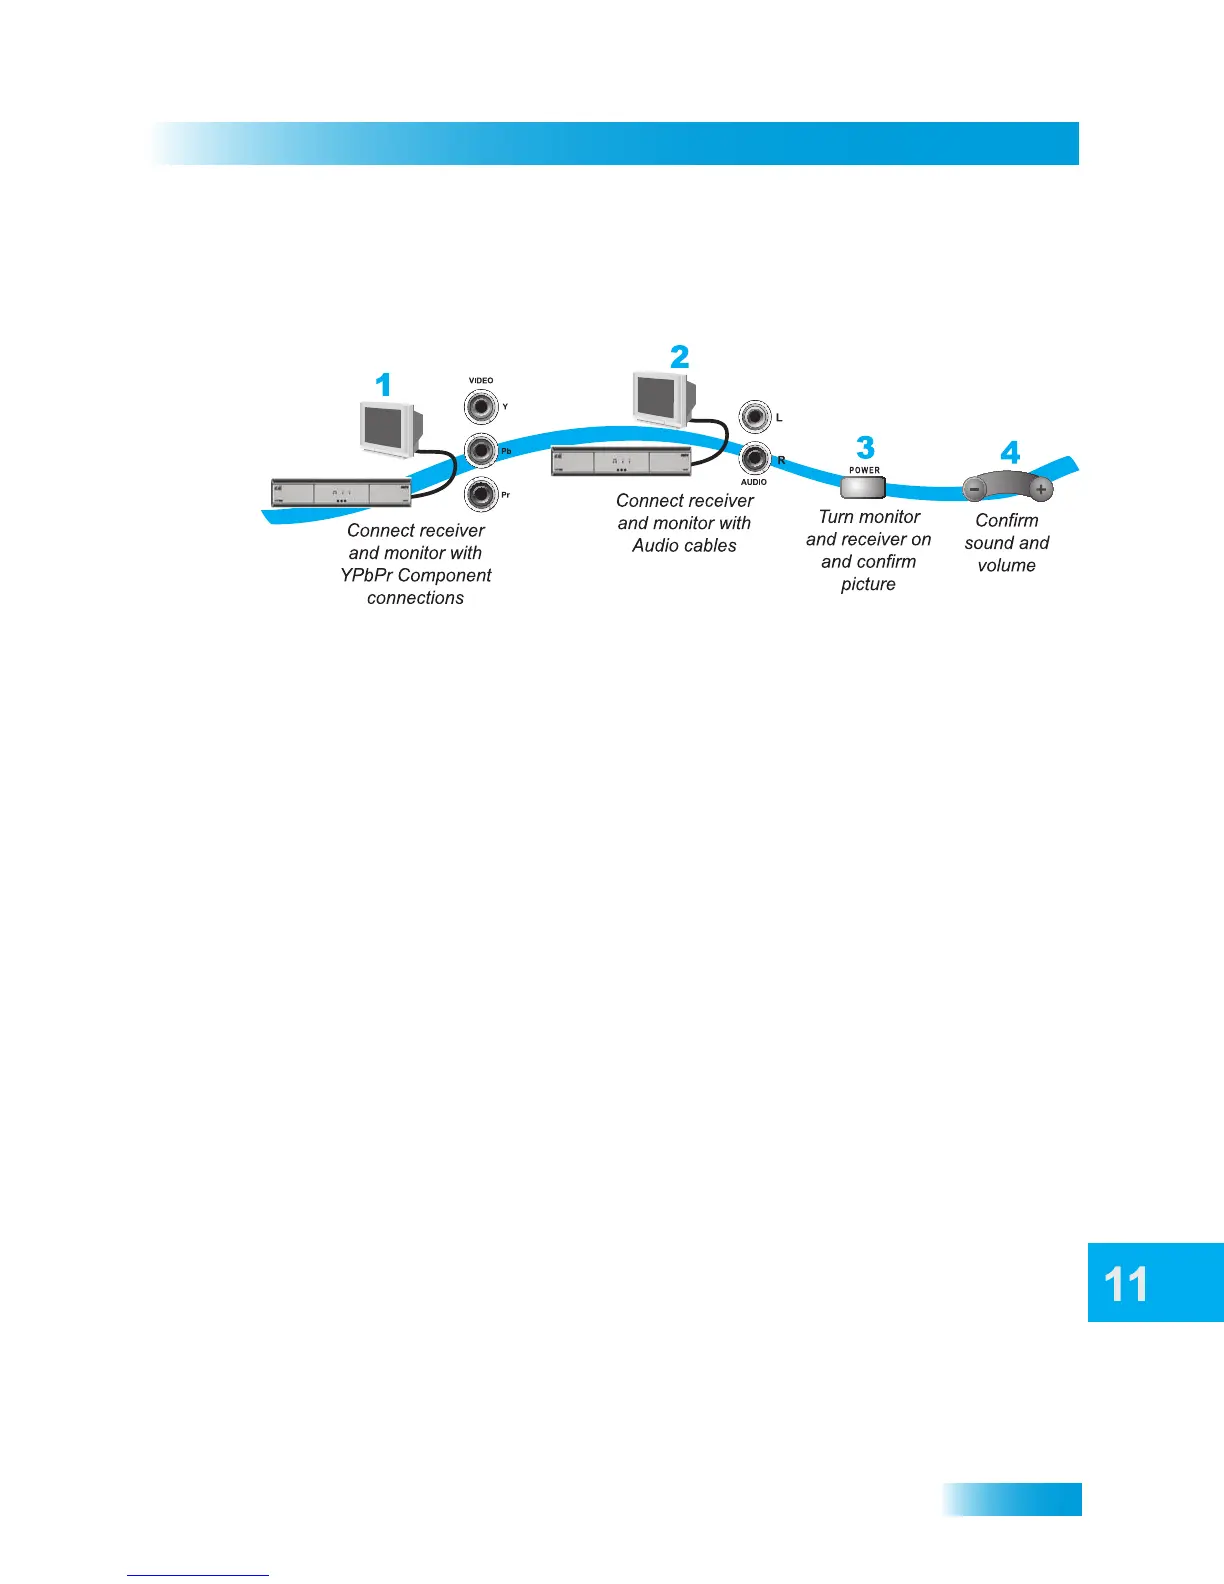
YPBPR Connections
The YPbPr connections provide high-quality video to your HDTV or HD monitor.
1 Connect between the YPbPr component output jacks on the receiver and the component
video inputs on the nearby TV using component video (usually red/green/blue) cables.
2 Connect audio (red and white) RCA-type cables between the receiver Audio Outputs and
audio input connections that go with the YPbPr connectors on your HDTV or monitor.
3 If you do not see a picture, then change the resolution setting on the receiver as described
on page 88.
4 Turn up the volume on your HDTV and confirm that you hear sound. If you don’t hear any
sound, then check the RCA-type audio connections.
No Picture on the Nearby TV
This section will help you make a picture on the nearby TV in the event that you could not
do so in the previous sections.
1 Connect RCA-type cable connections between the receiver TV1 Out and the nearby TV.
2 Make sure the receiver and nearby TV are on.
3 Make sure the nearby TV is set to use the RCA-type inputs. Examine the jack panel of
your HDTV (on the back or side, as applicable) and consult your HDTV user’s guide.
4 Change the HDTV settings as described on page 88.
5 Switch to the nearby TV to display from the HD inputs you selected in the preceding
sections. If you see a picture from TV1 output(s), then you are finished with setup.
6 Repeat steps 4 and 5 until the nearby TV displays video from the receiver.