XWEB5000 Operation Manual
A new windows will appear:
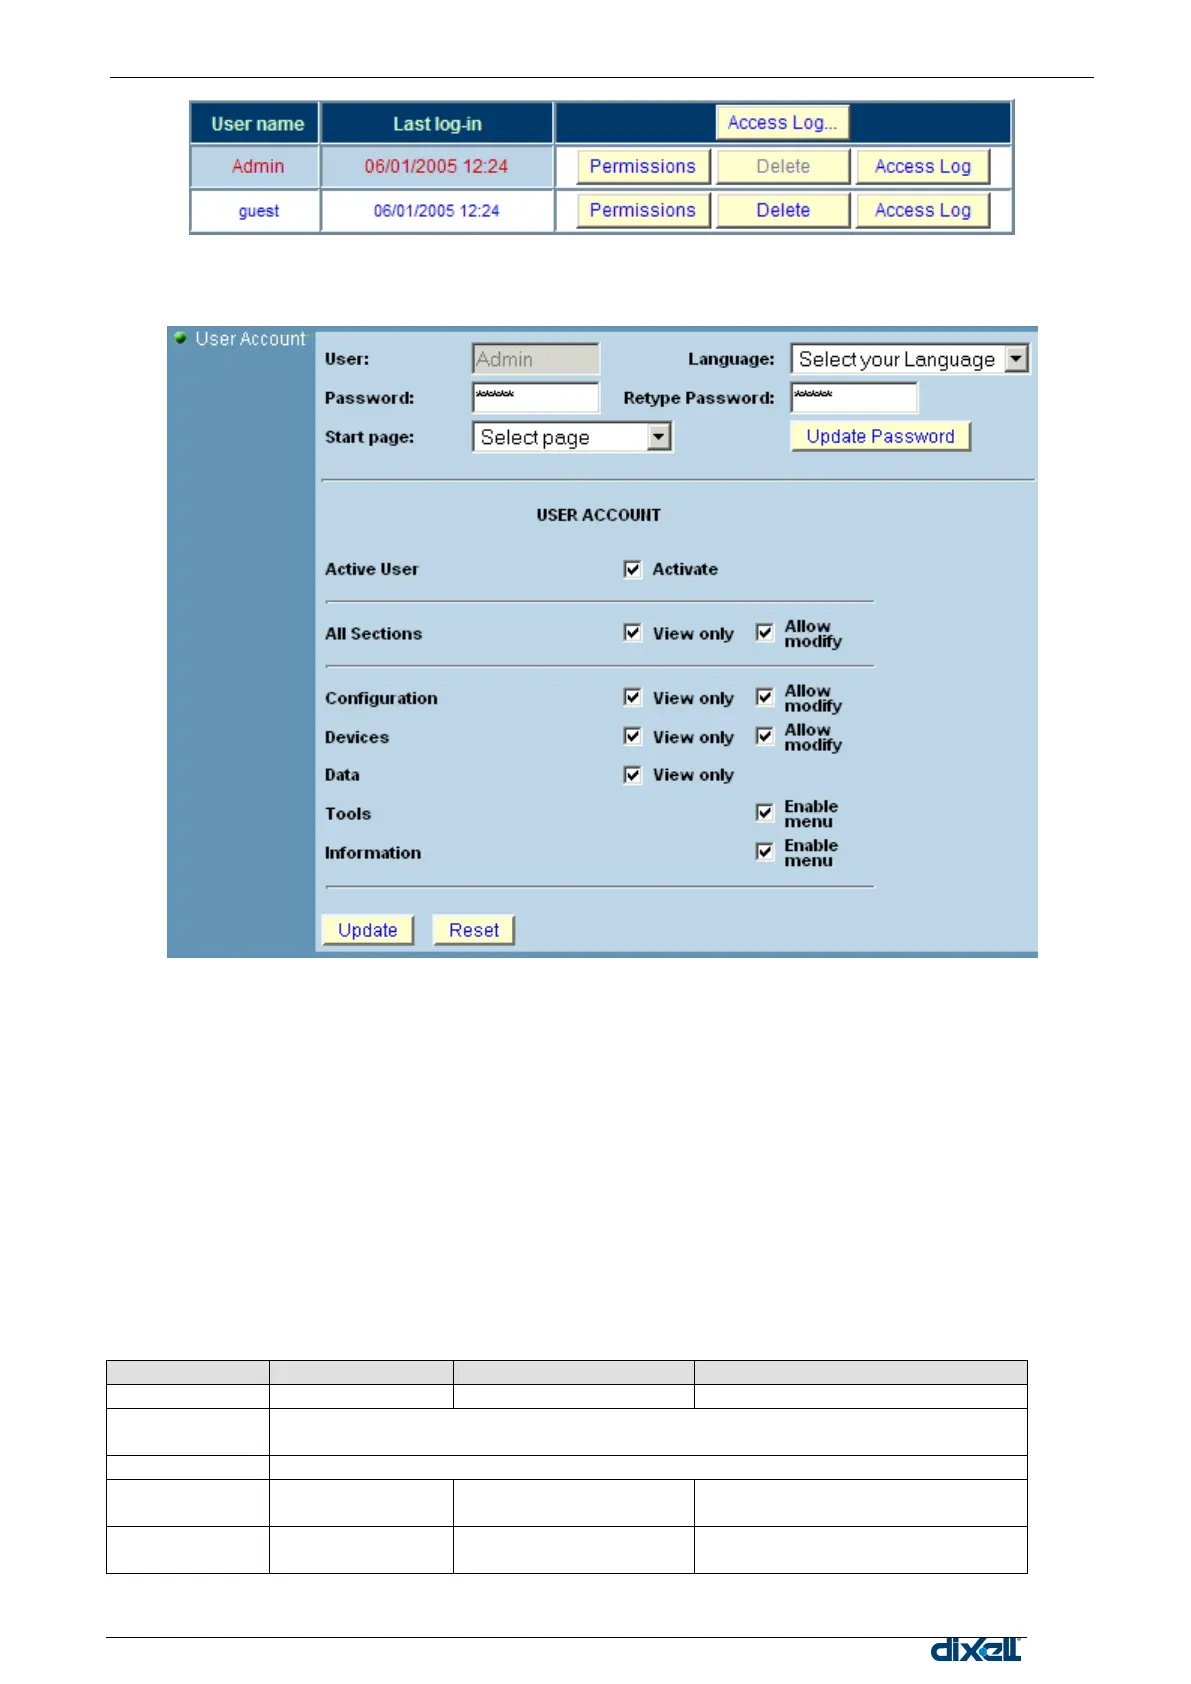
To activate a user check “Activate” box in “User Account” section. To create a read-only user, please check
“View” box in “All Sections” (later it is also possible to uncheck specific valuse). Automatically the system will
check all other boxes. Confirm the changes by pushing “Update” button.
3.3.5.1 MANAGING THE USERS
You can interact with a user in different ways:
Setting-up permission (Permission button)
Deleting the user (Delete button)
Logging the user/s (“Access log” or “Access log…” button)
First by clicking the labels on the left hand side (see green arrow) you can fold/unfold all the options available.
Then you can use the check box to properly setup user‟s permissions.
“View” box means that the user can only see the web-page, no other interactions are allowed.
“Edit” box means that the user can view and interact with the web-page.
There are others specific options available:
it is possible to link a specific language to an user. The system uses the master
language defined in §2.2.4.1Language
after the login either the RunTime page or the Layout can be loaded automatically
If checked, user can update his
own password.
If checked, user can modify other
users‟ permissions.