1834-065-B-10-14
10
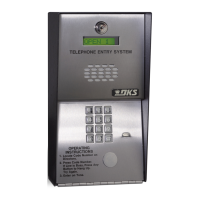
Bottom View
Side View
Front View
Recess Box
Threaded Stud
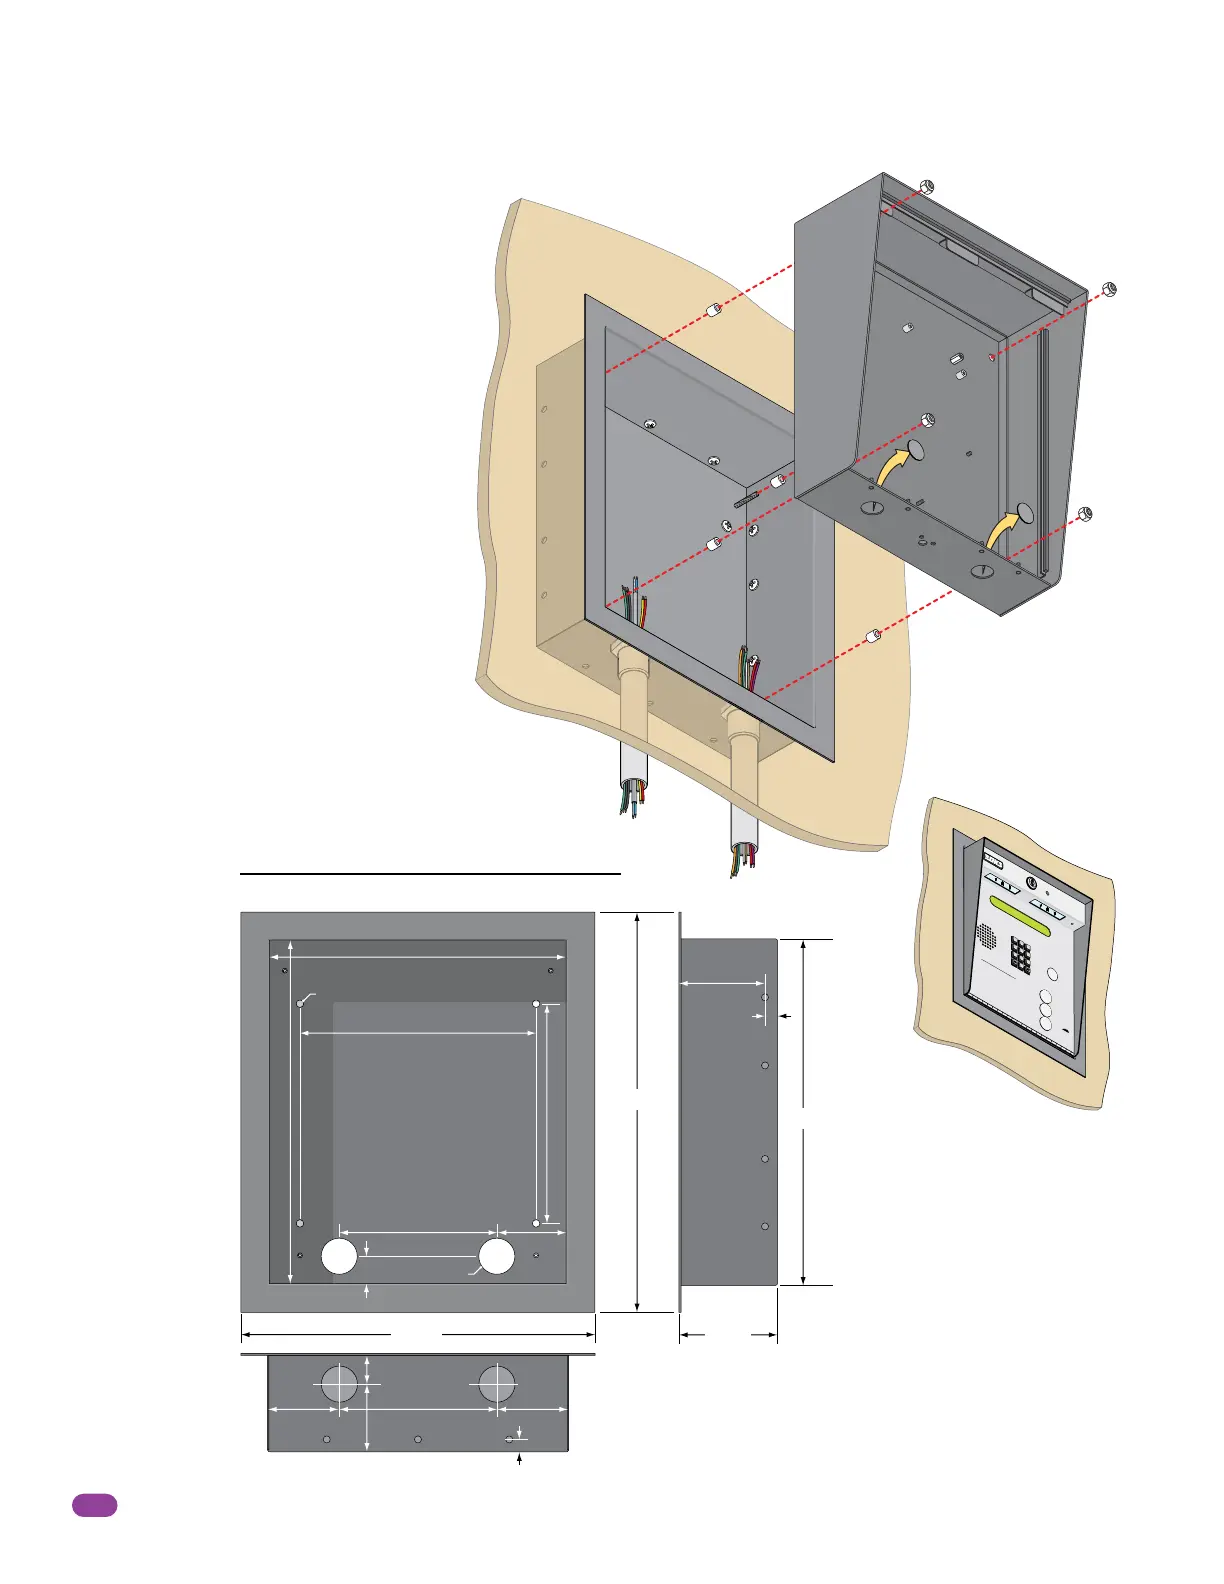
1.2.1 Surface Mount Recess Kit Dimensions and Installation
Surface mount unit can be recessed into a
wall or pilaster by using the optional surface
mount recess kit (P/N 1803-150). This allows
for a recessed telephone entry system to
have a lighted keypad which the flush mount
units DO NOT have. The recess box gets
installed in the wall. Use appropriate
hardware (not included) to secure the box in
the wall. Run all necessary conduit (not
included) to the recess box. Slide the
enclosure in the recess box and secure it with
the hardware included in the kit. Be sure the
unit is mounted securely and is not subject to
vibration from closing doors or gates.
9”
11.25”
6”
6”
2.625”
2.625”
.4”
.4”
3.2”
1”
8.5”
13.25”
2.625”
1.125”
2.5”
25” Dia. Mounting Hole
1.375” Dia.
15.25”
13.25”
13.375”
3.625”
Mounting
Holes
.25” Dia.
Knock-outs
Surface Mount
Enclosure
Plastic Spacer
Locknut
Recess
Box
Mounting Screws (Not supplied)
Mount In a Surface
Wall
A
Z
C
A
LL
7
8
9
4
5
6
1
2
3
0
O
PE
R
W
X
Y
Z
T
U
V
P
Q
RS
M
NO
J
K
L
GHI
D
E
F
A
B
C
SP
T
E
L
E
PHONE
E
NT
R
Y
S
Y
S
T
E
M
HOL
D
TO
SCA
N
OPE
RA
TI
NG
I
NS
T
RUCTI
ONS
Use “
A
t
o
Z
”
B
u
tto
ns
to L
oc
a
te
Nam
e
an
d
Co
d
e
Num
b
er
o
n
Di
s
p
la
y
.
N
a
m
e
s
a
r
e
I
n A
l
p
h
ab
e
t
i
c
a
l
O
r
de
r
.
T
o
Ca
l
l
,
E
n
t
e
r
Cod
e
N
um
b
er
on
K
ey
pa
d
or
P
r
e
s
s
“C
al
l
”
B
u
t
t
on
.
I
f
Li
n
e
i
s
B
us
y
,
P
r
es
s
“#”
or
“C
al
l
”
t
o
H
a
n
g
U
p
.
Tr
y
A
g
a
in
.
E
nter
o
n
O
pe
n
D
is
p
lay
a
n
d
T
o
n
e
.
1
.
2
.
3
.