15000 25 ℃ 12 min
Figure 8-3 Last running interface
⚫ Speed: 15000rpm. Running time: 12 minutes.
⚫ The door lock is released.
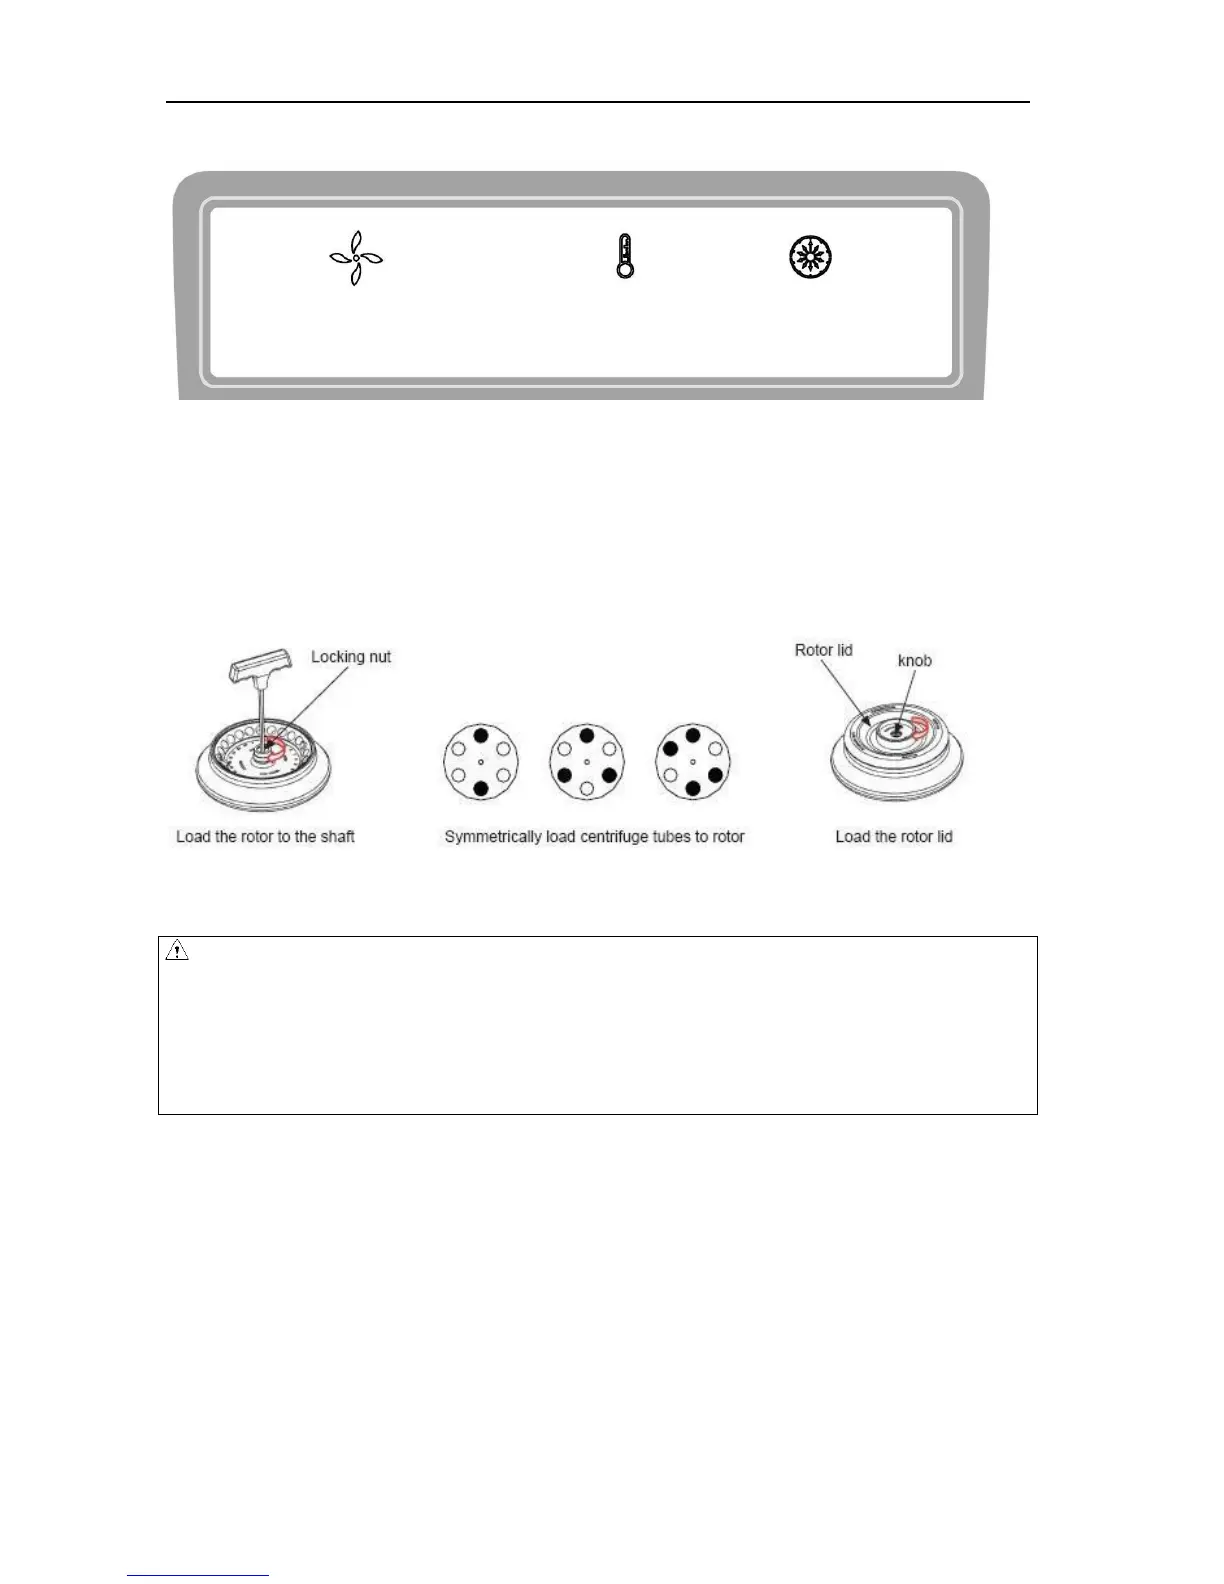
8.1.1 Load and replace the rotor
Figure 8-2 Load the rotor
CAUTION
⚫ Attach the rotor to the rotor shaft. Ensure the rotor is in position and connected with the shaft,
tightening the locking nut to secure the rotor with shaft, to prevent the rotor damaging the centrifuge.
⚫ Ensure the rotor lid is firmly tightened to the rotor.
⚫ Load the rotor to shaft to ensure rotor is in position until it connected with the shaft.
⚫ You should feel a
„
cli
ck‟
when the rotor is properly loaded to the shaft. If not, there may be something
stuck between the rotor and the shaft. Double check and clean it if necessary.
⚫ Rotate the rotor slightly with your fingers to check if the rotor vibrates. If so attach the rotor again.
⚫ Rotate the nut clockwise using the wrench to tighten the rotor to the shaft firmly.
⚫ Close the rotor lid, firmly tighten clockwise the lid to the rotor and ensure is in position. Close the door
and then start running.
⚫ The method of removing the rotor is as same as the above mentioned by turning the locking nut
counterclockwise.