System Setup XR150FC/ XR550FC User’s Guide 21
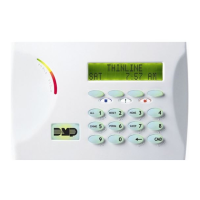
3. The keypad displays SELECT WEEK DAY and SUN MON TUE
WED. Press the COMMAND key to display THU FRI SAT HOL.
4. Enter the Begin and End timesfor each day of the schedule.
Refer to Adding a Schedule for more information.
5. The keypad goes back to the SUN MON TUE WED display.
Press the Back Arrow key to enter another schedule.
Press the Back Arrow key to exit the User Menu.
Set t in g Area, Ou t put , and Door Sched ules
The Schedules function allows you to assign up to 8 different
schedule numbers to each area, output, and door access relay
connected to your system. The schedule number allowsthe opening
and closing times for the area and on/ off times for outputs and
door access relays
1. Access the User Menu.
2. Press COMMAND until SCHEDULES?displays.
3. After you have accessed the SCHEDULES? menu and the
schedule options, TIMES AREAS DOOR, display, press the
COMMANDkey once more and the display changesto OUTPUT
HOLIDAYS. Select AREAS, DOOR, or OUTPUT.
4. The keypad displays ENTER THE AREA/ OUTPUT/ DOOR
NUMBER:- , enter the area, output, or door number you want
to assign a schedule. Press the COMMAND key.
5. The keypad displays SCHEDULE NO: -. Press any Select
key and enter the schedule number (01 to 99). Press the
COMMAND k ey.
6. The keypad returns to the TIMES AREAS DOOR display
allowing you to enter additional programming. To exit the
user menu press the Back Arrow key.
Set t in g Holiday ABC Schedu les
Three Holiday Schedules are available. This allow s an output,
area, or door to have three different schedules for holidays. For
example, Holiday Schedule A for those holidays when the building
stays closed, Holiday Schedule B for a day that only opens for a
morning, etc. Also, Holiday Schedules can be used to cross multiple
days. These schedules become active and supersede the current
day’s schedule when a Holiday Date occurs. See Setting Holiday
Dates (HOL).
1. After you have accessed the SCHEDULES? menu and the
schedule options, TIMES AREAS DOOR, display, press
the COMMAND key until the display changes to OUTPUT
HOLIDAYS. Press COMMAND once more and the display
changes to FAVORITES.
2. Select HOLIDAY to program holiday schedules.
3. The keypad disp lays HOL: A B C . Select A to set the Àrst of
three holiday schedules.
4. The keypad displaysA - : AM PM.
Note: After Selecting the schedule, the keypad displays any
current times previously set for that holiday. This feature
allows you to review the p rogrammed times.
5. If times display, the keypad then displays DELETE KEEP.
Select DELETE to enter new times.
6. The keypad then displaysBEGIN TIME?Thisis followed by the
display – : AM PM.
Enter a new time and select AM or PM.
The display changes to END TIME? This is followed by the
display – : AM PM.
Enter a new time.
 Loading...
