16 XT30/XT50 User Guide Arming and Disarming
Disarming During an Alarm
1. While the alarm bell or siren sounds, enter your user code
to silence the alarm. The keypad tone silences as soon as
the rst key is pressed.
For a burglary alarm, the keypad displays
IS THIS A FALSE ALARM? NO YES or CANCEL VERIFY.
This allows you to investigate the alarm prior to disarming
the system. This display remains on the keypad until a
selection is made, the Back Arrow is pressed, or the internal
system bell cutoff timer expires.
2. If a valid alarm has not occurred, select YES or CANCEL to
disarm the system and cancel the alarm.
The keypad next displays ALL SYSTEM OFF to conrm the
system is disarmed.
OR
If the alarm is valid, select NO or VERIFY to send a verify
message to the Central Station. The system will remain
armed.
All/Perimeter System Arming
Area Assignment: Your security system is divided into two separate
areas. Motion detectors, inside doors, and other interior protection
devices are assigned to the Interior area while windows and exterior
doors are assigned to the Perimeter area.
Perimeter or All: When arming an All/Perimeter system, the keypad
displays PERIM ALL. If you select ALL, you arm both the Perimeter
and the Interior of the system. You want to arm both of these areas
when leaving with nobody left inside. Selecting PERIM arms only
the Perimeter of the system. Perimeter arming is for when you are
staying inside but want the comfort of knowing the exterior doors
and windows are armed. Perimeter arming allows you to move freely
about inside without setting off any interior alarms.
Disarming an Area System
1. Press the CMD key until ARM DISARM displays. During entry
delay this process starts at step 3 below.
2. Select DISARM to disarm areas.
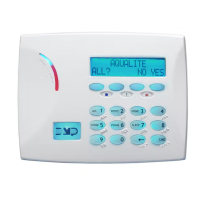
3. The keypad displays ENTER CODE: . Enter your user code
and press CMD. The keypad displays ALL? NO YES.
4. Select YES to disarm all areas authorized for your user code.
4a. Select NO to disarm only certain areas individually. The
keypad then displays the name of each area authorized for
your code followed by the NO YES display.
4b. Select YES to disarm the area displayed.
4c. Select NO to not disarm and to display the next area.
Note: You can also just press the area numbers you want to disarm
while at the ALL? NO YES display. This changes the display to
AREAS: . The area numbers you select appear in the display. For
example: AREAS: 2 4.
To remove an area number from the display, press its
corresponding number on the keypad. Press CMD when done.
5. After all areas have displayed, any alarms or communication
problems that occurred during the armed period are shown.
6. If all areas are disarmed, the keypad displays
ALL SYSTEM OFF.
 Loading...

