13
EN
RV So Start Accessory Preinstallation
7 Preinstallation
This section describes the bracket preparation required
before installing the device onto the AC unit.
7.1 Bracket configuration
This section describes the bracket configurations based
on the AC model.
7.1.1 Brisk II and FreshJet bracket
configuration
The mounting bracket and z-brackets should already be
assembled and attached to the device.
If the bracket is not assembled and/or not attached to
the device, go to “Bracket assembly” on page13.
qq
rr
ww
ee
18 Z-bracket direction of slant - Brisk II
q
Device
e
Supply side
w
LEDs
r
Direction of slant
1. With the supply side of the device facing you,
determine the z-bracket’s direction of slant.
I
The two LEDs visible on the outside cover of
the device are located on the supply side of the
device.
– Brisk II - If the z-bracket slants le, go to
“Installation” on page16, otherwise go to
step2.
– FreshJet - If the z-bracket slants right, go to
“Installation” on page16, otherwise go to
step2.
2. Complete steps 1–5 in “Preparing the device” on
page14.
qq
ww
ee
rr
tt
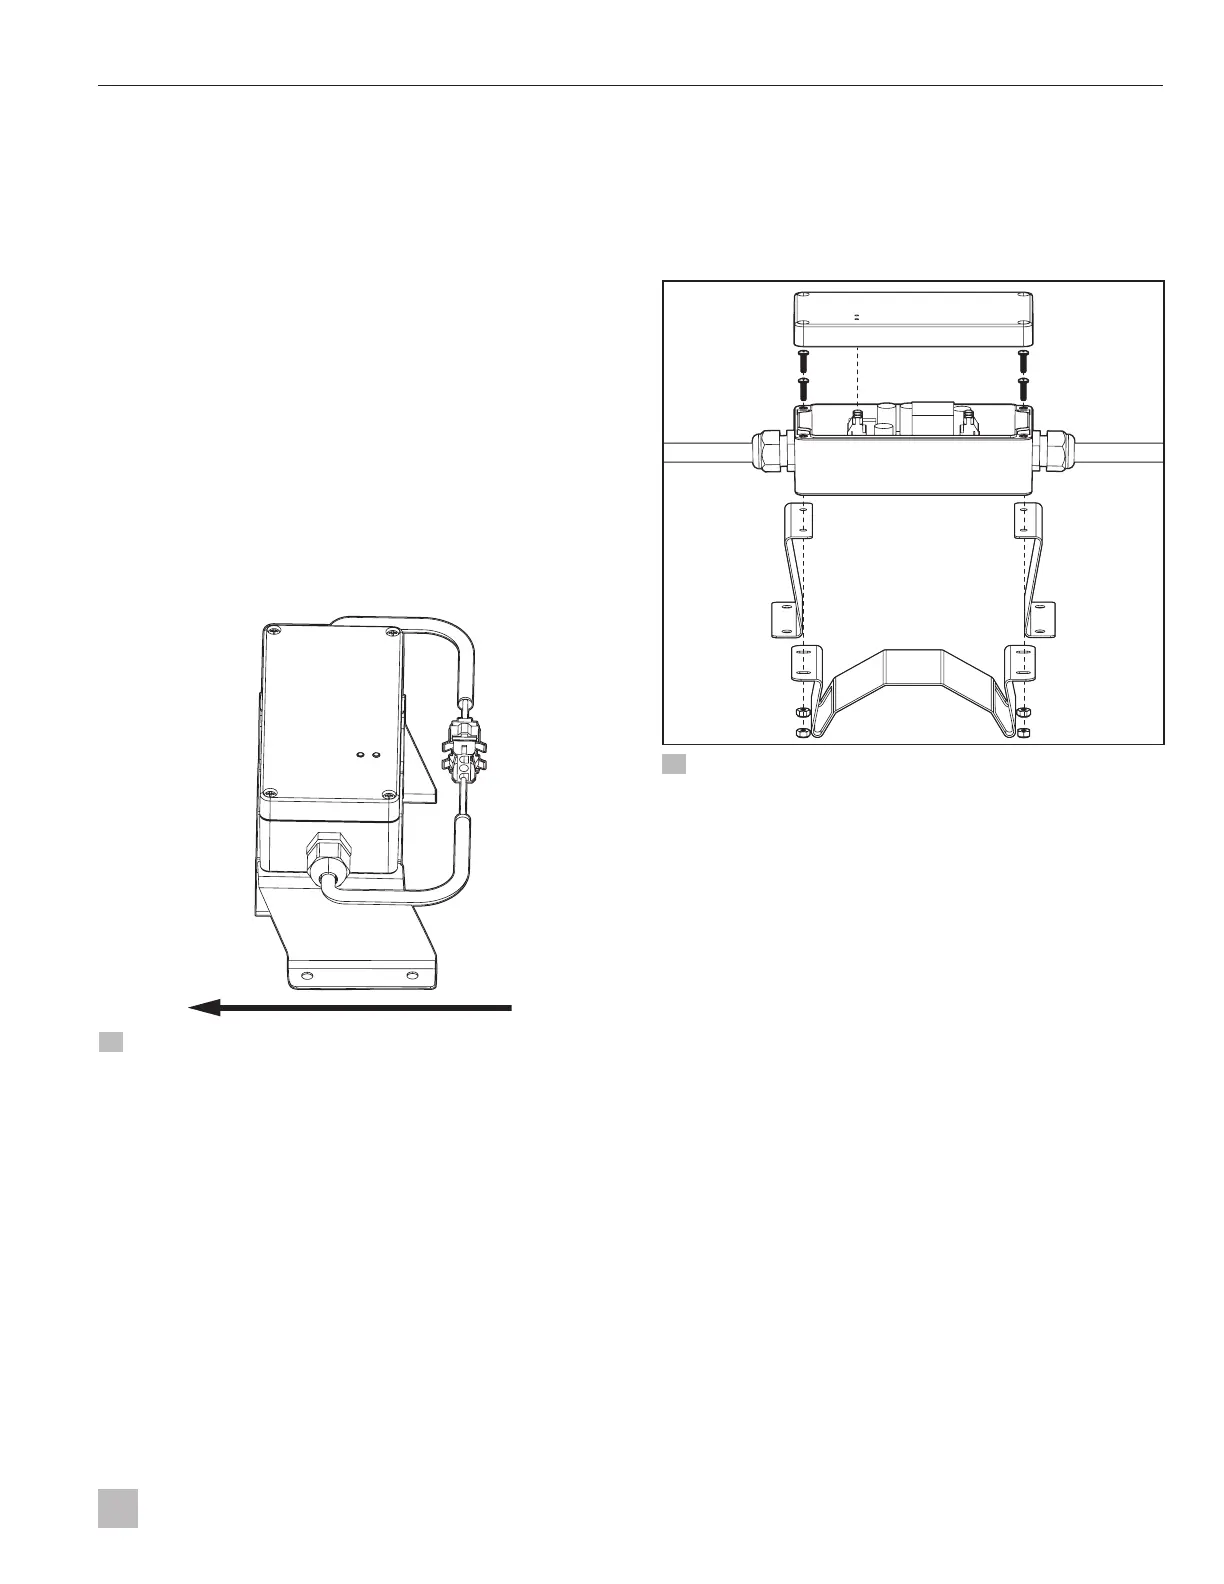
19 Removing the z-brackets and mounting bracket
q
Bracket screws
r
Mounting bracket
w
Device
t
Nuts
e
Z-Brackets
3. Using the torque wrench and the #2 Phillips
screwdriver, remove the nuts on the bracket screws.
4. Remove the bracket screws from the mounting
brackets and z-brackets.
5. Switch the brackets so that the slant is in the correct
direction.
6. Confirm that the z-bracket’s direction of slant is
correct for the AC unit model.
– Brisk - le slant
– FreshJet - right slant
7. Complete the steps in “Assembling the brackets -
Brisk II” on page14. to reassemble the brackets to
the device.

 Loading...


