26
EN
Installation RV So Start Accessory
8.2.6 Replacing the covers
1. Replace the reserved gasket putty to seal the holes
where the wire harness passes in and out of the
housing wall:
a. Split and roll the putty into two equal-size balls.
b. Press one gasket putty ball into the hole where the
wire harness passes through the housing wall.
c. Press the other gasket putty ball into the hole on
the other side of the housing wall where the wire
harness passes through.
d. Thoroughly spread and press the putty into the
opening to ensure a quality seal.
I
The gasket putty seal keeps outside air, dirt,
bugs, and other contaminants from entering
directly into the RV air ducts.
2. Replace the electrical box cover on the electrical box.
3. Using the 5/16 in. deep well nut driver, insert and
tighten the two electrical box cover screws until snug.
4. Replace the wire tie in the same approximate location
where it was removed and trim the wire tie end aer
tightening.
5. Replace the foam gasket into its original position
without compressing on itself.
6. Replace the AC shroud onto the base of the AC unit.
7. Using the #2 Phillips screwdriver, replace the four AC
shroud screws and tighten to secure the AC shroud
in place.
8.3 Installing the device -Blizzard
NXT
NOTICE: Do not force the AC shroud during removal.
Failure to follow this notice can damage or break the
screw holes and require an AC shroud replacement.
This section describes how to access the installation area,
disconnect the existing wiring, mount the device, install
and connect the new wiring, and close the unit aer
completing the installation in a Blizzard NXT AC unit.
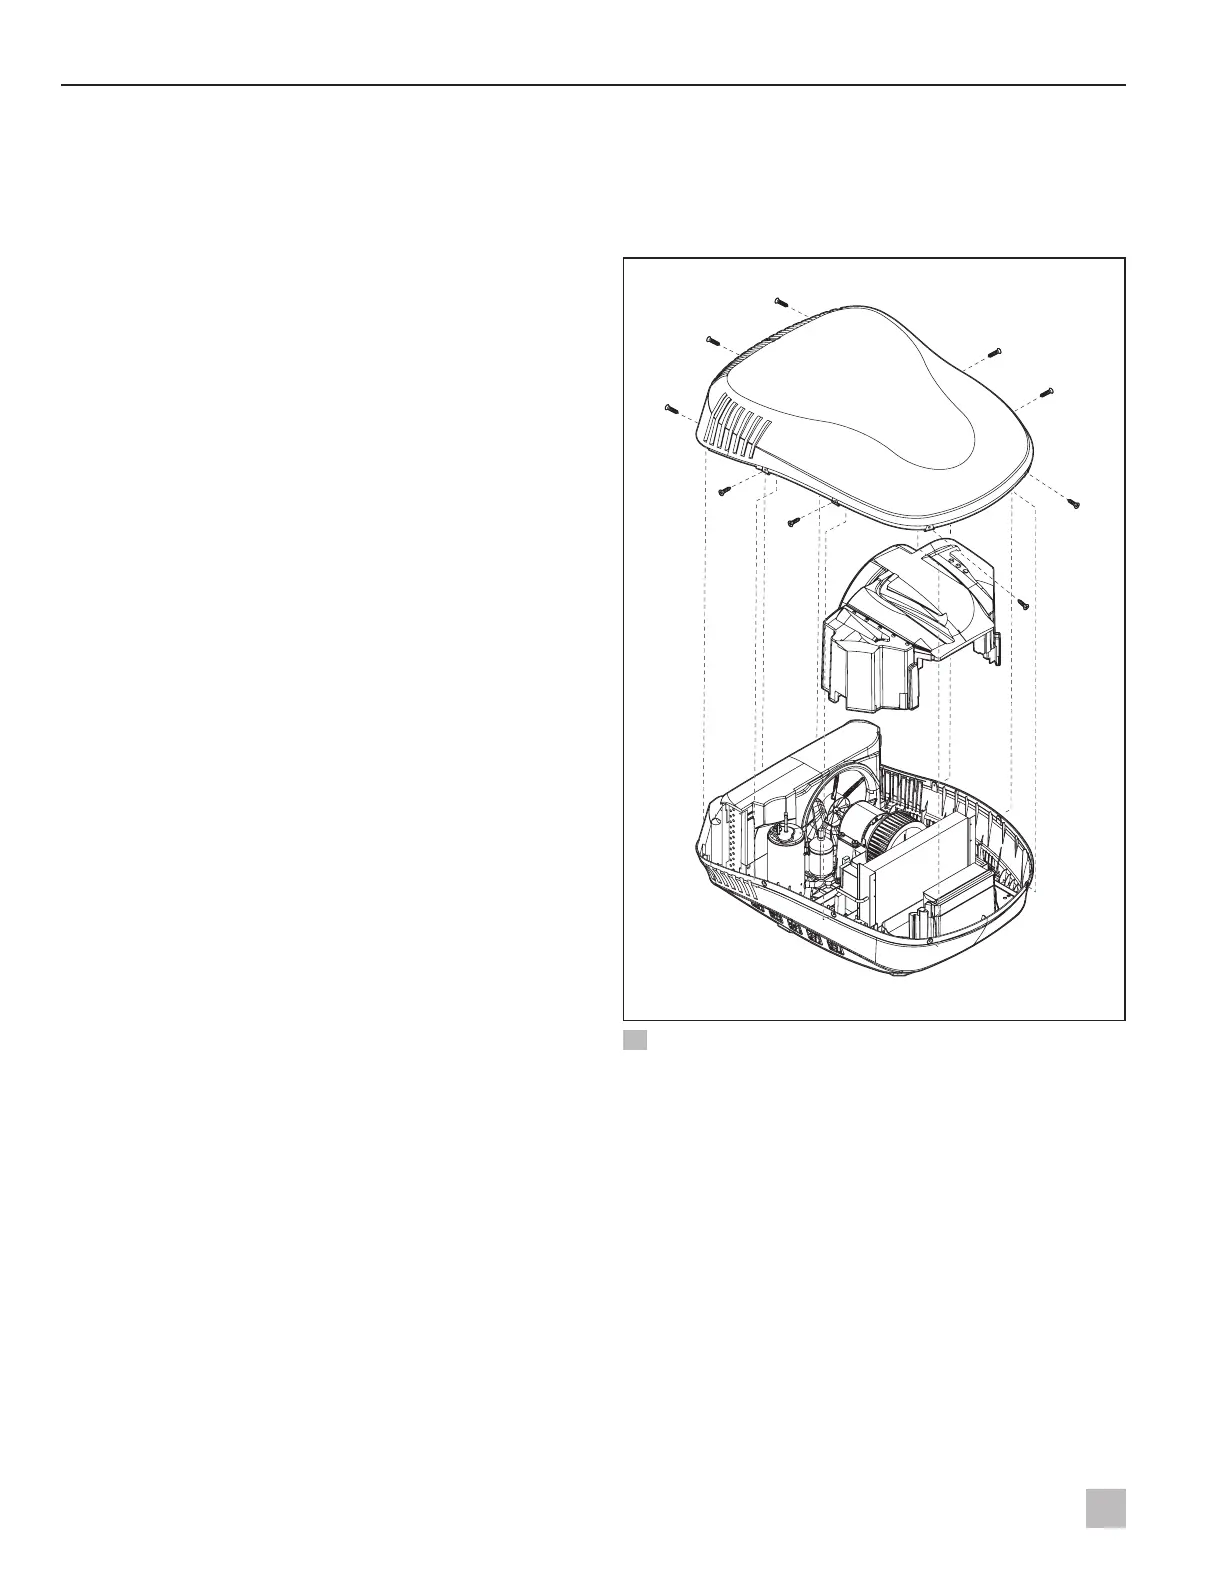
8.3.1 Removing the covers
I
Turn the AC shroud upside down to store the
screws and other small parts removed during the
installation process.
qq
ww
ee
rr
tt
yy
43 Removing the covers and foam
q
AC shroud
r
Electrical box foam
w
AC shroud
screws
t
Electrical box
cover
e
Foam shroud
y
Electrical box cover
screws
1. Using the #2 Phillips screwdriver, remove the nine AC
shroud screws and the AC shroud.
I
The AC shroud should li off easily. If it does
not, verify all the AC shroud screws have been
removed.

 Loading...


