17
EN
RV So Start Accessory Installation
This section describes how to install the device. The
installation procedures and components vary by the AC
unit model.
Brisk II
Go to “Installing the device - Brisk II” on
page17.
Penguin II
Go to “Installing the device - Penguin II” on
page22.
Blizzard
NXT
Go to “Installing the device -Blizzard NXT” on
page26.
FreshJet
Go to “Installing the device - FreshJet 3 Series
Mechanical” on page31.
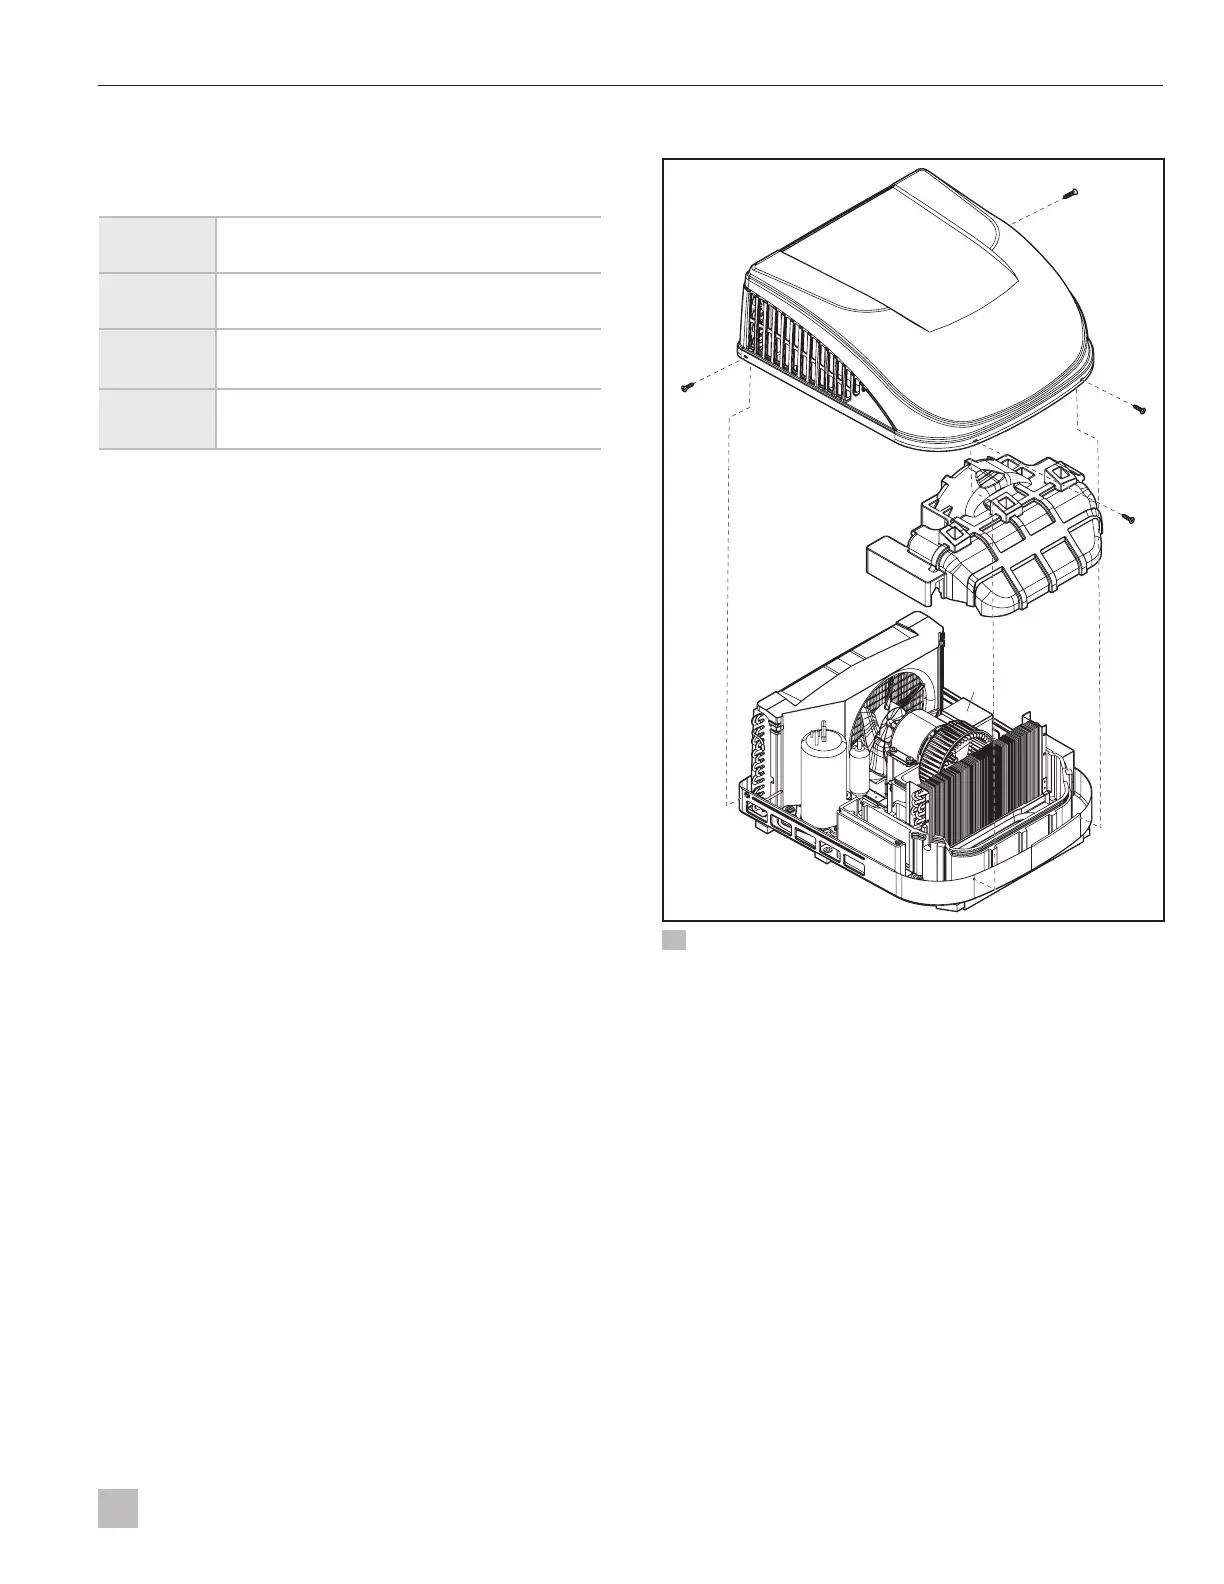
8.1 Installing the device - Brisk II
NOTICE: Do not force the AC shroud during removal.
Failure to follow this notice can damage or break the
screw holes and require an AC shroud replacement.
This section describes how to access the installation
area, disconnect the existing wiring, mount the device,
install and connect the new wiring, and close the unit
aer completing the installation in a Brisk II AC unit.
8.1.1 Removing the shrouds
qq
ww
ee
rr
24 Brisk II AC unit components and screw locations
q
AC shroud
e
Foam shroud
w
AC shroud screws
r
Electrical box
1. Using the #2 Phillips screwdriver, remove and set
aside the four AC shroud screws and the AC shroud.
I
The AC shroud should li off easily. If it does
not, verify all the AC shroud screws have been
removed.
I
Turn the AC shroud upside down to store the
screws and other small parts removed during
the installation process.
2. Remove the internal foam shroud by pulling up
vertically on the sides and set it aside.

 Loading...


