14
EN
Preinstallation RV So Start Accessory
7.1.2 Penguin II and Blizzard NXT
configuration
The mounting bracket should already be attached to
the device. To attach the necessary hose clamp, go to
“Attaching the hose clamp” on page15.
If the bracket is not assembled and/or not attached to
the device, go to “Bracket assembly” on page14.
7.2 Bracket assembly
This section describes how to assemble and attach
the bracket assembly to the device if delivered
unassembled. The steps vary based on the AC unit.
To determine the AC unit model, refer to “Model
identification” on page10.
7.2.1 Preparing the device
This section describes how to remove the device cover
and position the device.
I
Perform the following actions on a flat, clean surface.
1. Place the device on the flat surface with the device
cover facing up.
2. Loosen the four device cover screws and remove the cover.
qq
ww
20 Identifying the LEDs in the device
q
Fiber optic rods
w
LEDs
3. Inspect the underside of the device cover and note
the fiber optic rods that align with the LEDs in the
device.
4. Set the device cover aside.
5. Carefully turn the device on its side.
6. Continue with the assembly:
– For Brisk II AC units, go to “Assembling the
brackets - Brisk II” on page14.
– For Penguin II and Blizzard NXT AC units, go to
“Assembling the mounting bracket - Penguin II
and Blizzard NXT” on page15.
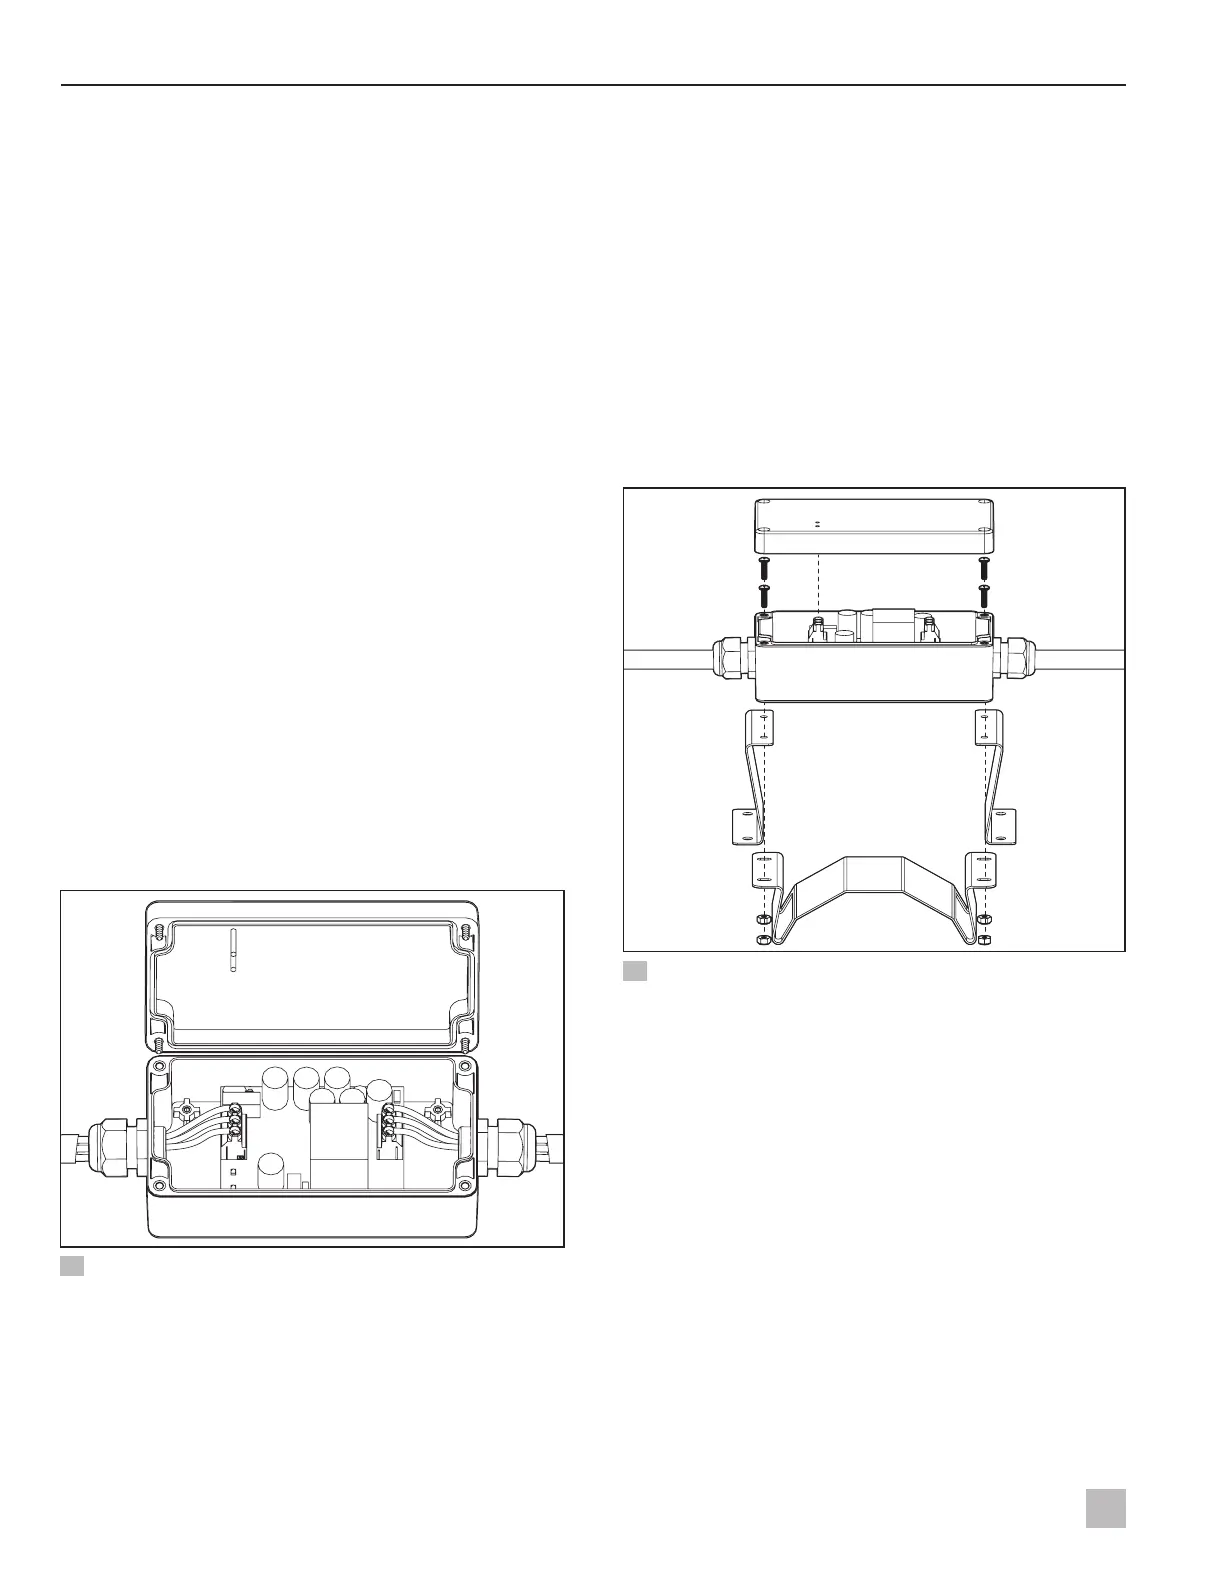
7.2.2 Assembling the brackets - Brisk II
This section describes the device’s z-bracket and
mounting bracket assembly for all Brisk II AC units.
qq
ww
ee
rr
tt
21 Securing the z-brackets and the mounting bracket
q
Bracket screws
r
Mounting bracket
w
Device
t
Nuts
e
Z-Brackets
1. Inspect the z-brackets to locate the flange end with
the smaller screw holes.
I
When both z-brackets are installed correctly,
they will mirror each other.
2. Align the smaller screw holes on the flange of one
z-bracket to the screw holes on the
bottom
of the
device.
3. Position the bend in the z-bracket flange against the
device so that the bend points away from the center
of the device.

 Loading...


