16
EN
Installation RV So Start Accessory
16
EN
oo
ww
ee
qq
rr
yy
tt
uu
ii
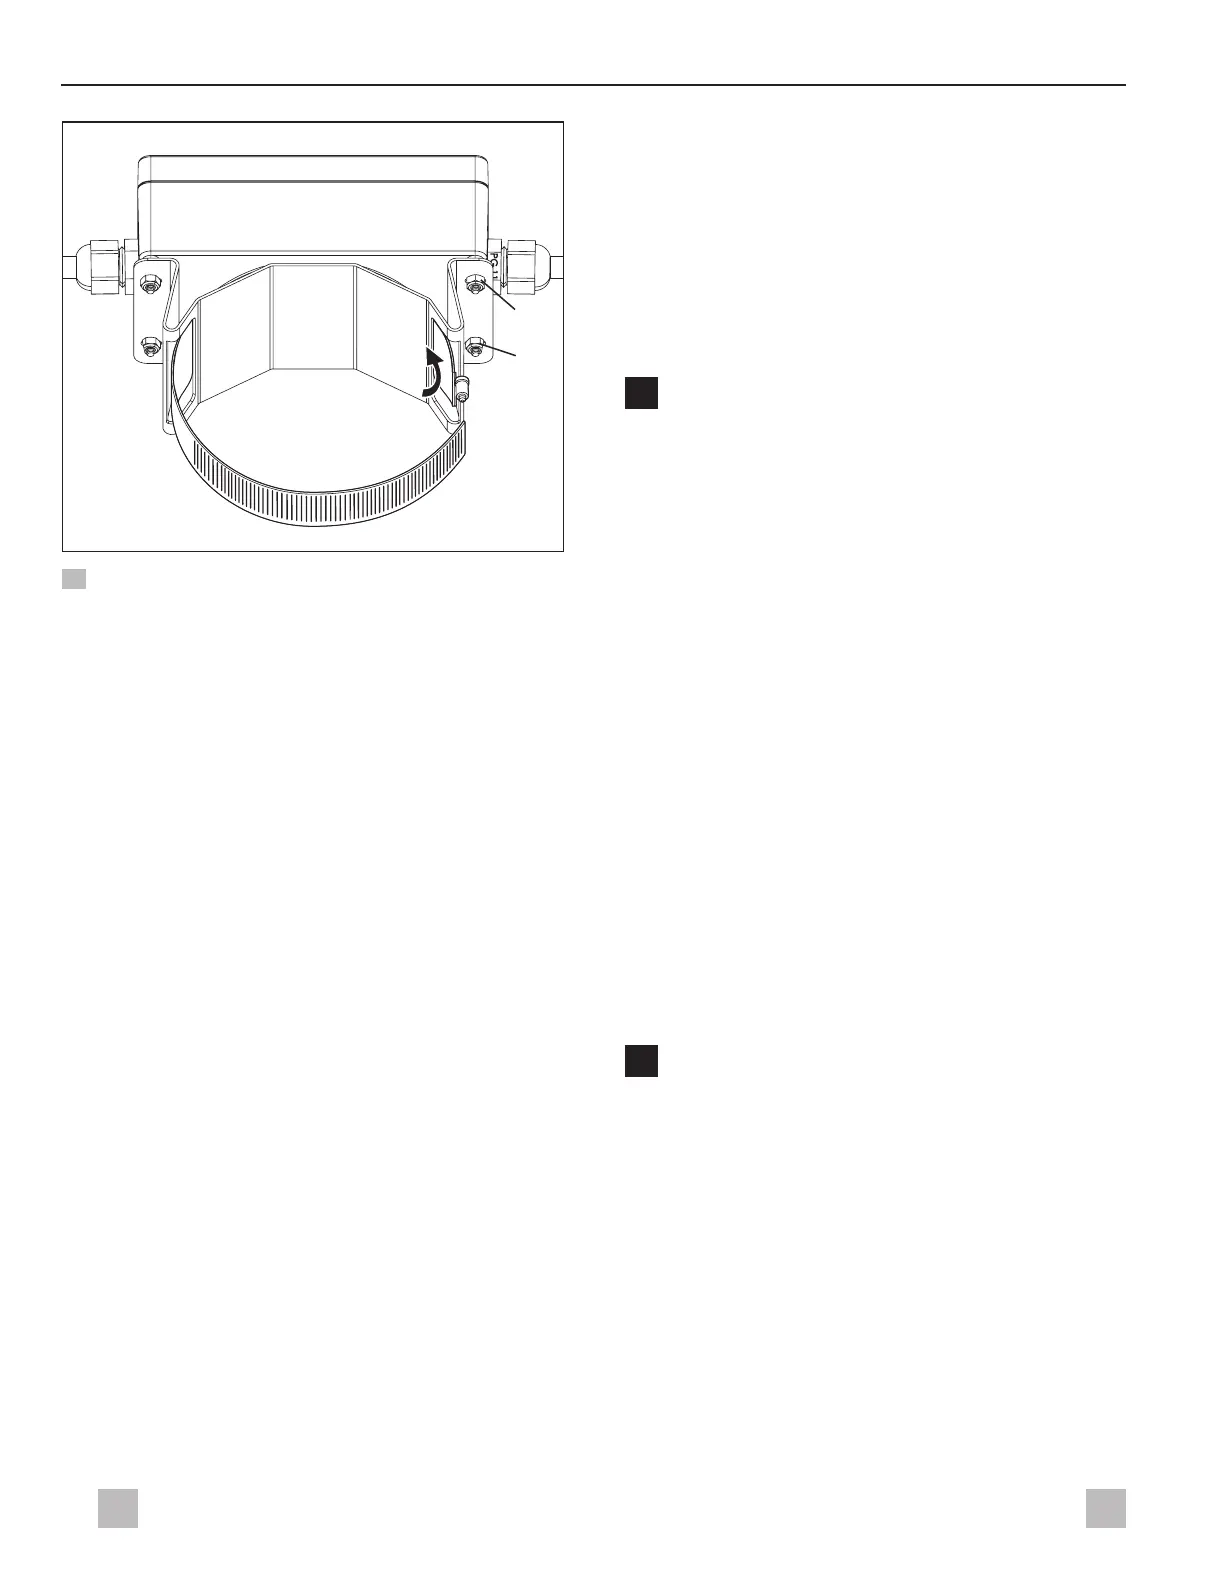
23 Attaching the hose clamp (supply side on the right)
q
LED location
on the device cover
t
Worm screw
y
Slot - supply side
w
Slot - compressor side
u
Bracket screws
e
Mounting bracket
i
Nuts
r
Hose clamp
o
Device - supply side
2. Insert the hose clamp end into the slot on the supply
side of the mounting bracket.
3. Push the hose clamp through to the other side of the
mounting bracket.
I
If it is difficult to push the hose clamp through
the mounting bracket, loosen the nuts on the
bracket screws several turns.
4. Push the hose clamp end through the slot on the
compressor side of the mounting bracket.
I
If the hose clamp does not easily align with the
compressor side slot, use the needle nose pliers
to guide it into place.
5. Continue pushing the hose clamp through the
mounting bracket until the worm screw is next to the
slot on the supply side of the device.
6. If the nuts on the bracket screws were loosened in
step 3, use the torque wrench and the #2 Phillips
screwdriver to tighten the nuts to 30 in. lbs (3.4 Nm).
7. Aligning the fiber optic rods on the underside of
device cover to the LEDs in the device, replace the
device cover.
8. Tighten the device cover screws to 8.8 in. lbs (1 Nm).
9. Go to “Installation” on page16.
8 Installation
WARNING: Fire or electric shock hazard.
Failure to obey the following warnings could
result in death or serious injury.
• Shut off the gas supply, turn off the AC circuit breaker,
disconnect the 120 VAC power from the RV, and
disconnect the positive (+) 12VDC terminal from the
supply battery before drilling or cutting into the RV
or before performing any preinstallation, installation, or
maintenance activities. Do not install the device unless
power to the AC unit is off.
• There is a risk of electrical shock from the energy
stored in the capacitors. Wait for five minutes aer
the shutdown of equipment before performing any
preinstallation, installation, or maintenance activities.
• Make sure there are no obstacles such as wires or
pipes inside the RV’s roof.
• Provide grounding in compliance with all applicable
electrical codes.
• Once installed, the device operates without need for
user input. See the specific AC unit’s and/or specific
controls Installation and Operation Manual for AC
operating instructions.
CAUTION: Liing hazard.
Use proper liing technique and control when
liing the AC unit. Failure to obey this caution could
result in minor or moderate injury.
NOTICE: Maintain the structural integrity of the RV roof.
The roof must be designed to support 130 lbs (59 kg)
when the RV is in motion. Normally, a 200 lb (91 kg)
static load design will meet this requirement. Failure to
follow this notice could result in
damage to the rooop
component, device, or the RV
.
I
Never create a low spot on the RV roof.

 Loading...


