15
EN
RV So Start Accessory Preinstallation
15
EN
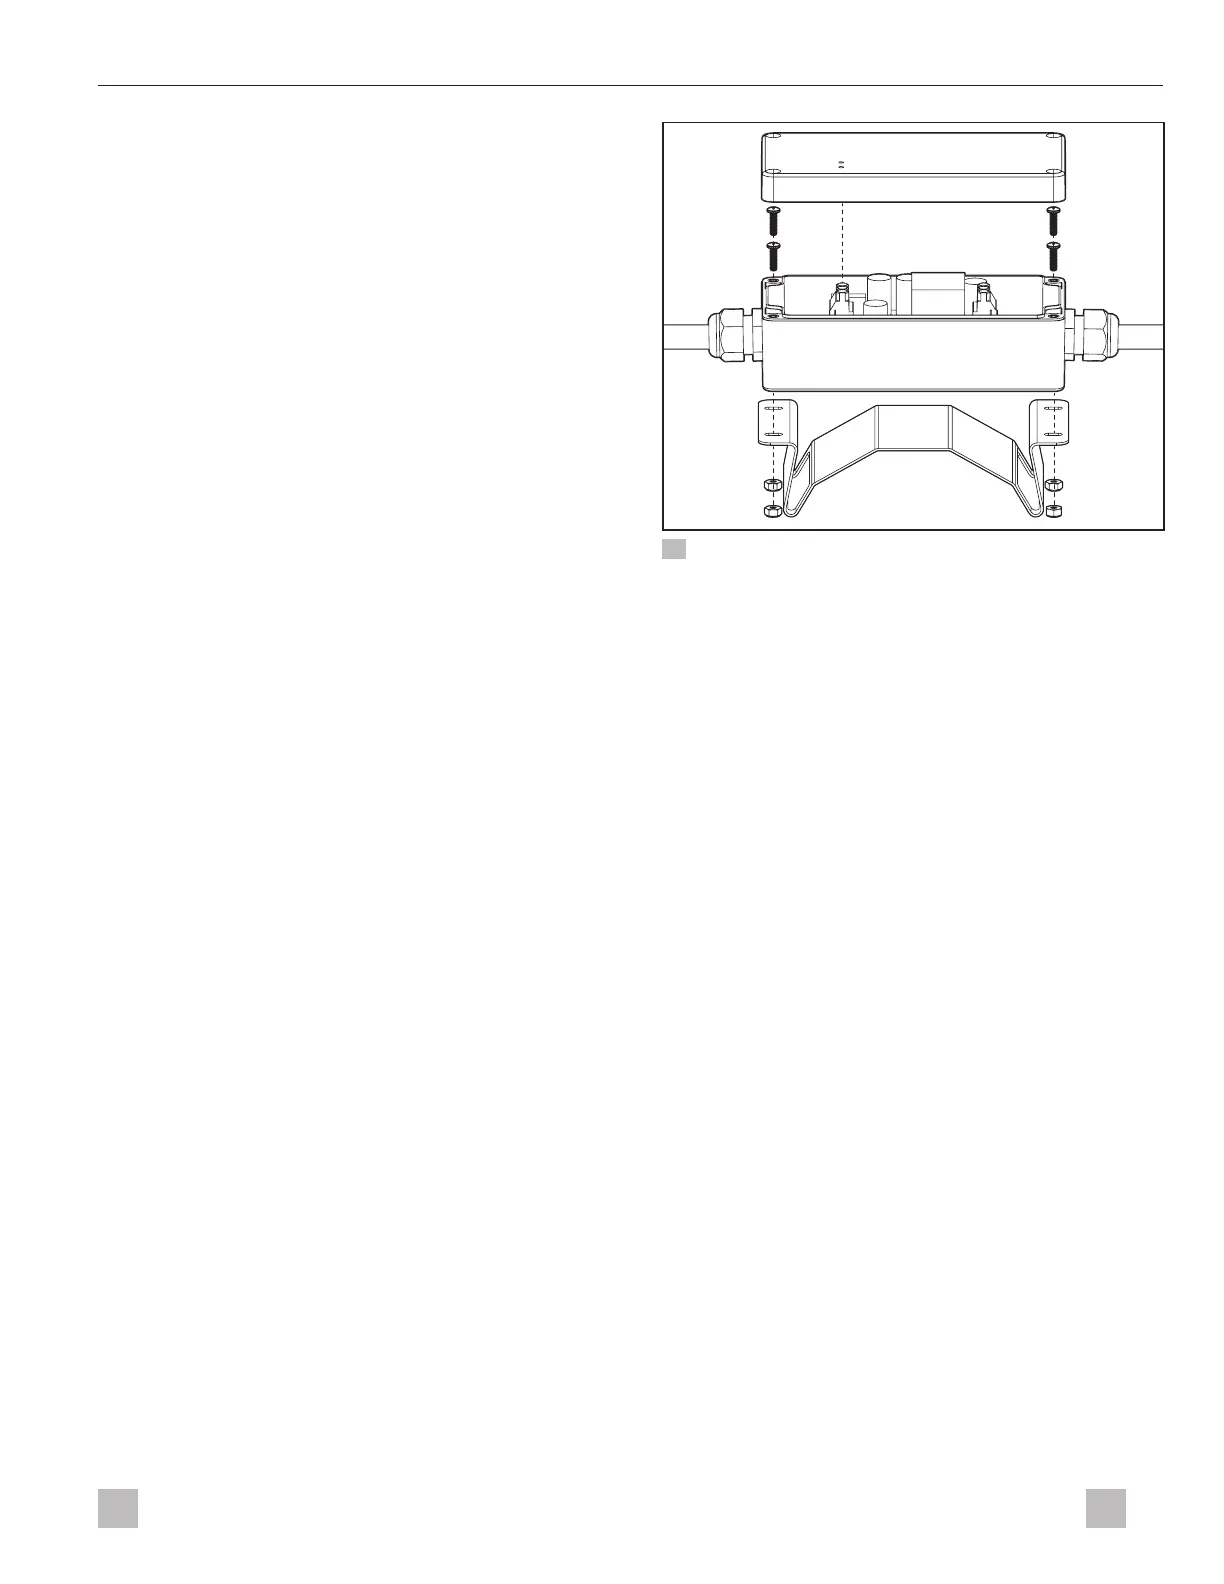
4. Using the #2 Phillips screwdriver, push two bracket
screws through the holes in the device and then
through the small holes in the z-bracket flange.
5. With the mounting bracket on its side, fit the mounting
bracket slots onto the exposed bracket screws.
6. Using the #2 Phillips screwdriver as a backer to hold
the screw in the mounting bracket slot, place a nut at
the end of each bracket screw.
7. Secure each nut at the end of each bracket screw by
two threads so the nuts do not fall off.
8. Repeat steps 2-7 for the remaining z-bracket, ensuring
the z-bracket is positioned directly against the device.
9. Using the torque wrench and the #2 Phillips
screwdriver, tighten the nuts on the bracket screws to
30 in. lbs (3.4 Nm).
10. While holding the device cover, align the fiber optic rods
on the device cover with the LEDs in the device.
11. Replace the device cover.
12. Tighten the device cover screws to 8.8 in. lbs (1Nm).
13. Aligning the fiber optic rods on the underside of
device cover to the LEDs in the device, replace the
device cover.
14. Tighten the device cover screws to 8.8 in. lbs (1 Nm).
15. Go to “Installation” on page16.
7.2.3 Assembling the mounting bracket
- Penguin II and Blizzard NXT
This section describes the device’s mounting bracket
assembly for all Penguin II and Blizzard NXT AC units.
qq
ww
ee
rr
22 Securing the mounting bracket
q
Bracket screws
e
Mounting bracket
w
Device - supply side
r
Nuts
1. Place one bracket screw into each of the mounting
hole locations.
2. Turn the mounting bracket on its side and align the
holes with the mounting bracket holes on the back
side of the device.
3. Using the #2 Phillips screwdriver, push the bracket
screws through the
mounting bracket holes
.
4. Place a nut at the end of each bracket screw.
5. Using the 5/16 in. deep well nut driver and the #2
Phillips screwdriver, tighten the nuts on the bracket
screws, then loosen by one-half turn.
I
Do not fully tighten the nuts yet.
6. Go to “Attaching the hose clamp” on page15.
7.3 Attaching the hose clamp
This section describes how to attach the hose clamp to
the mounting bracket for all AC units , if applicable.
1. Place the device on its side with the supply side to
the right and the mounting bracket towards you.
I
The two LEDs visible on the outside cover of
the device are located on the supply side of the
device.

 Loading...


