27
EN
RV So Start Accessory Installation
2. Remove the internal foam shroud by pulling up
vertically on the sides and set aside.
3. Expose the electrical box cover screws by pulling
forward on the electrical box foam.
4. Using the 5/16 in. deep well nut driver, locate and
remove the two screws from the sides of the electrical
box.
8.3.2 Disconnecting the compressor
wires
WARNING: Electric shock hazard.
There is a risk of electrical shock from the energy
stored in the capacitors. Wait for five minutes aer
the shutdown of equipment before performing
any installation activity. Failure to obey this warning
could result in death or serious injury.
qq
ww
ee
rr
tt
yy
44 Disconnecting the compressor wires from the capacitor
q
Compressor wire harness
r
Capacitor
w
Red compressor
wire
t
Wire tie
e
White compressor
wire
y
Blue compressor
wire
1. Using a multimeter, confirm that the capacitor is fully
discharged.
2. Using the needle nose pliers, remove the blue wire
from the relay block inside the electrical box.
3. Remove the compressor wires from the capacitor.
The wires can be traced from outside the electrical
box as part of the red, white, and blue wire harness.
4. Remove the white compressor wire from the piggy-
back connector.
5. Reconnect the piggy-back connector to its original
terminal location.
qq
ee
rr
tt
yy
yy
ww
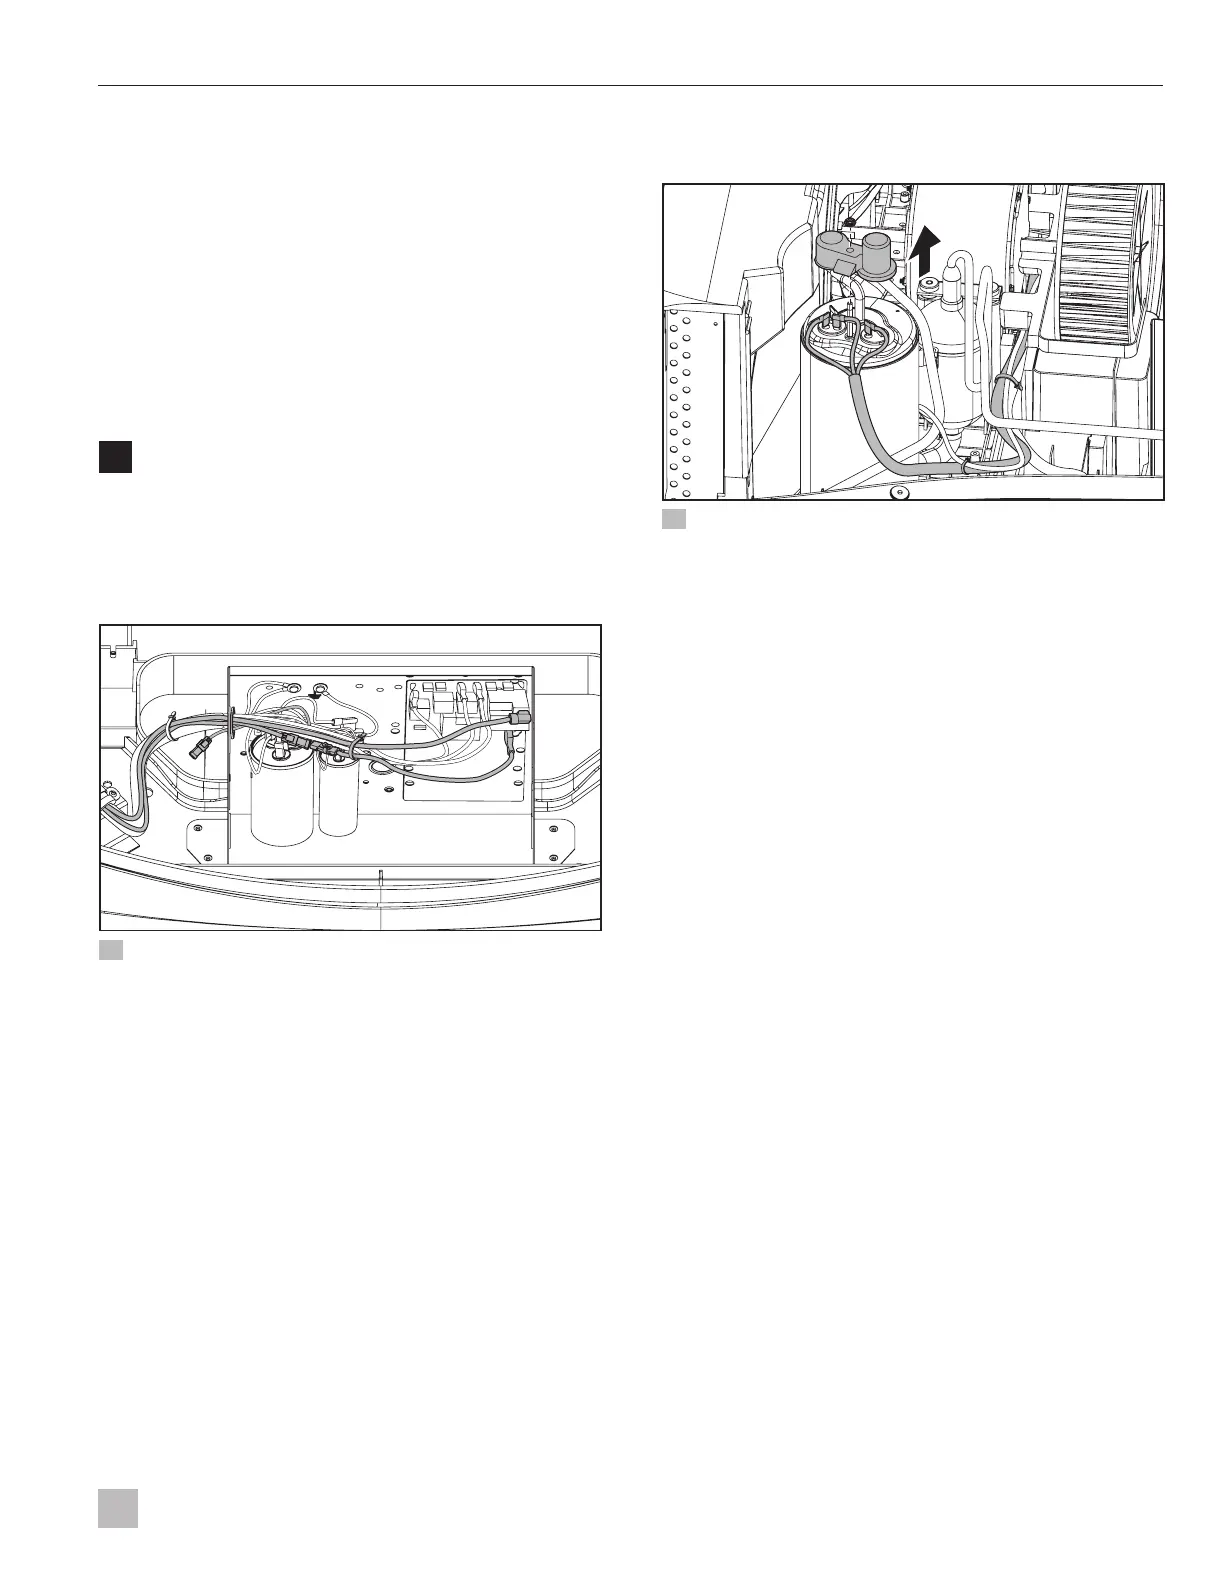
45 Disconnecting the compressor wires from the compressor
q
Compressor cap
nut and washer
r
Red compressor wire
w
Compressor
cap
t
Blue compressor
wire
e
White compressor
wire
y
Wire ties
6. Using the 5/16 in. deep well nut driver, locate and
remove the compressor cap nut and washer.
7. Remove the compressor cap from the top of the
compressor.
I
Turn the compressor cap upside down to store
the compressor cap nut and washer during the
installation process.
8. Using the needle nose pliers, disconnect the
white, red, and blue compressor wires from the
compressor.
9. Using a 6.0 in. (152 mm) length of electrical tape,
secure the compressor wires together and cover the
terminal ends. Use more electrical tape if needed to
cover the terminals completely to ensure no metal
wire ends are exposed.

 Loading...


