Installation and Operation of Flexible Batch Broiler – Electric
8
D. ADJUSTMENTS AT INSTALLATION
Eachbroilersectionandallitscomponentpartshave
beentestedthoroughlyandinspectedbeforeyourbroiler
wasshippedfromthefactory.However,itissometimes
necessarytofurthertestoradjustthebroileronceithas
beeninstalled.Suchadjustmentsaretheresponsibility
oftheDealerorInstaller.Thesetypesofadjustments
arenotconsidereddefects,ratheranormalandroutine
partoftheproperinstallationoftheequipment.
Theseadjustmentsincludebutarenotlimitedto:
•Broilerheightadjustment(ifrequired)
Noinstallationshouldbeconsideredcompletewithout
properinspectionand,ifnecessary,anyadjustments
byqualiedserviceorinstallationpersonnel.
It is also important not to obstruct the natural ow
ofventilationairifthebroiler is to operate properly.
Thisbroilershouldnotbeinstalledonacurbbaseor
sealedtothewall.Eitherconditioncanpreventproper
ventilation of the unit.
Beforemakinganyconnectionstothebroiler,checkthe
ratingsplatetobesurethebroilerspecicationsconcur
withthevoltagetobesuppliedtothebroiler.
Theratingplateislocatedonthebackofthelowercontrol
compartment cover panel on the right end of the unit.
Theplatebearingthebroiler’smodelnumberandserial
numberisattachedtothebacksideoftheunit.
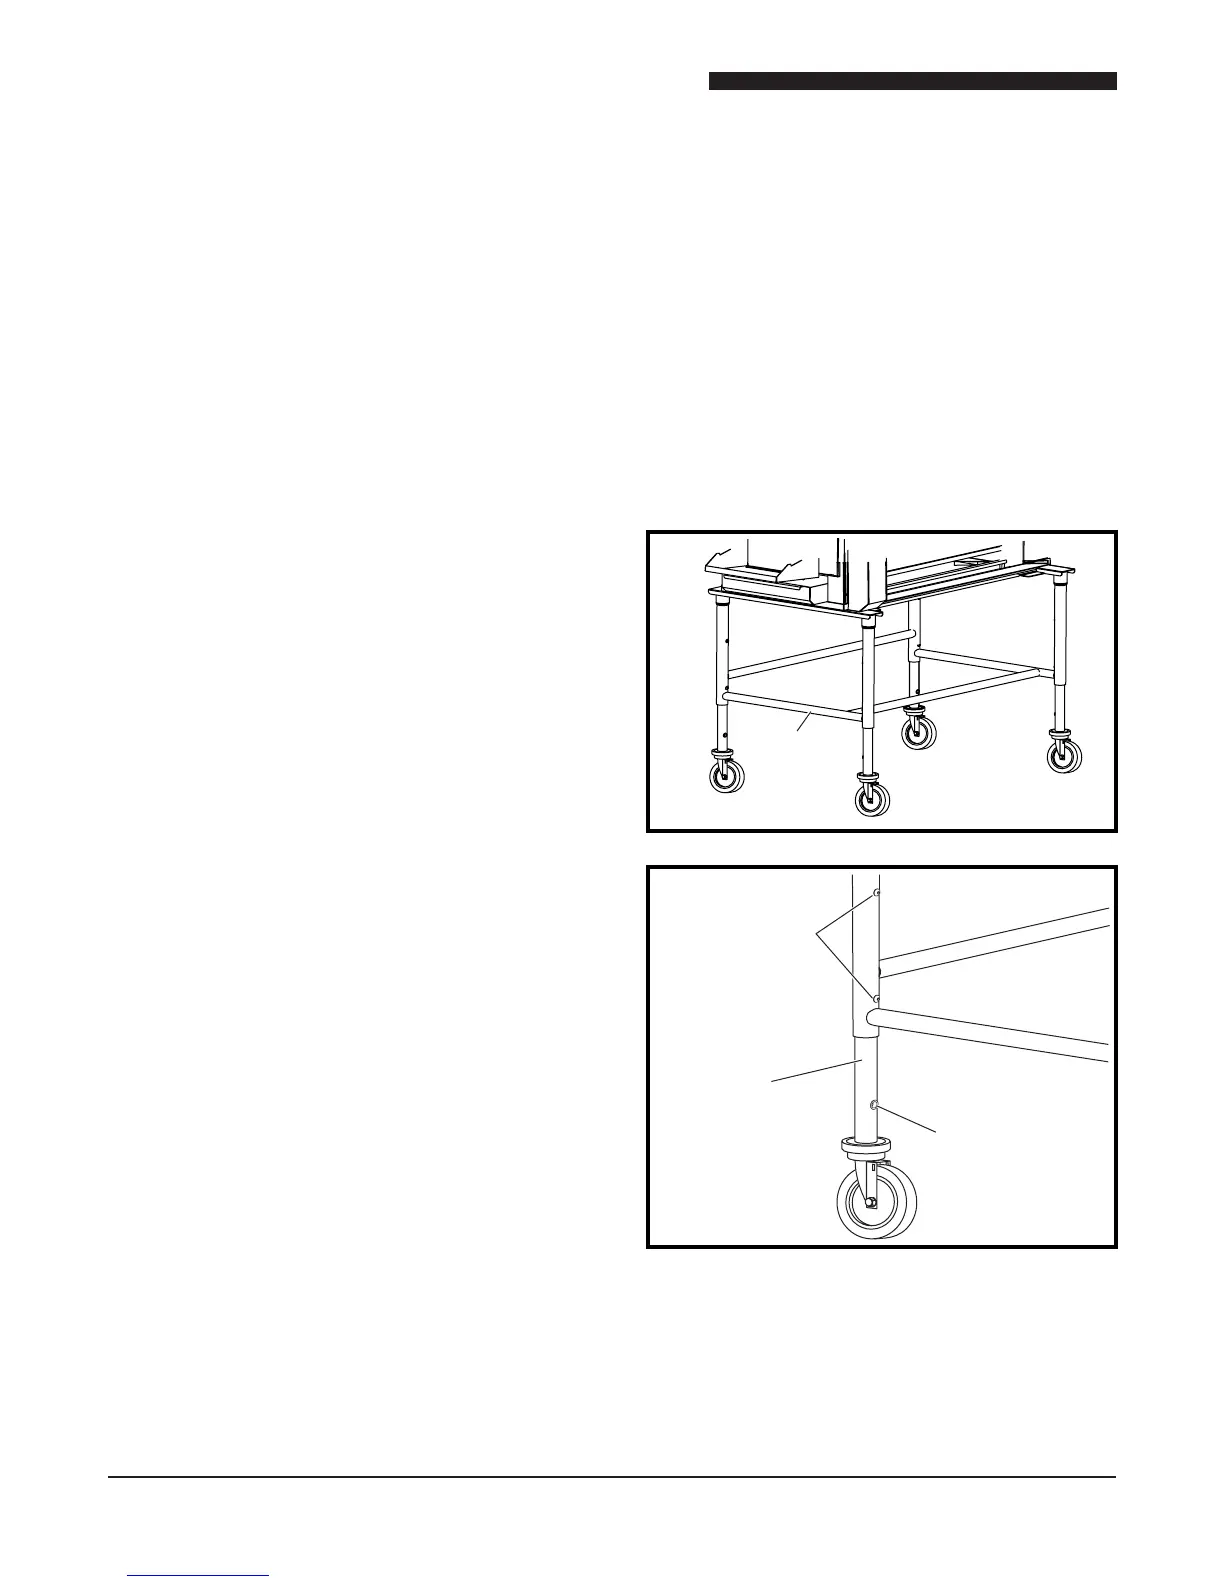
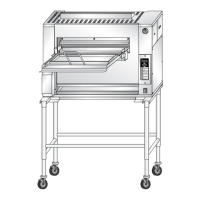
Raise or Lower Broiler
Thebroilerheightcanbeadjustedviatwoscrewson
each leg.
Caution: The Broiler is very heavy! Use adequate
help for lifting.
1. Liftoneendofthebroilerontoawide,sturdystand
(notsupplied).
2. Remove (2) screws per leg and raise/lower to
threadedholes.Reinstallscrews.
3. Removestandandsafelyraise/lowerbroiler.
4. Placeplasticholeplugs(suppliedattachtostand)
inanyunusedholes.
Support
broiler here
Screw
Slide Leg.
Reinstall screws.
Plastic Hole Plug