Accessing the EN-204 via a Web Browser
75
If you do not have an installed certificate, click one of the following buttons:
Create Self-signed Certificate – Download the form from a CA to create a digital
identity signature which confirms that the private key used by the unit matches
the public key used by the CA. Skip to Step 5.
Create Certificate Request – Send a message to apply to a CA for a digital identity
certificate. Skip to Step 6.
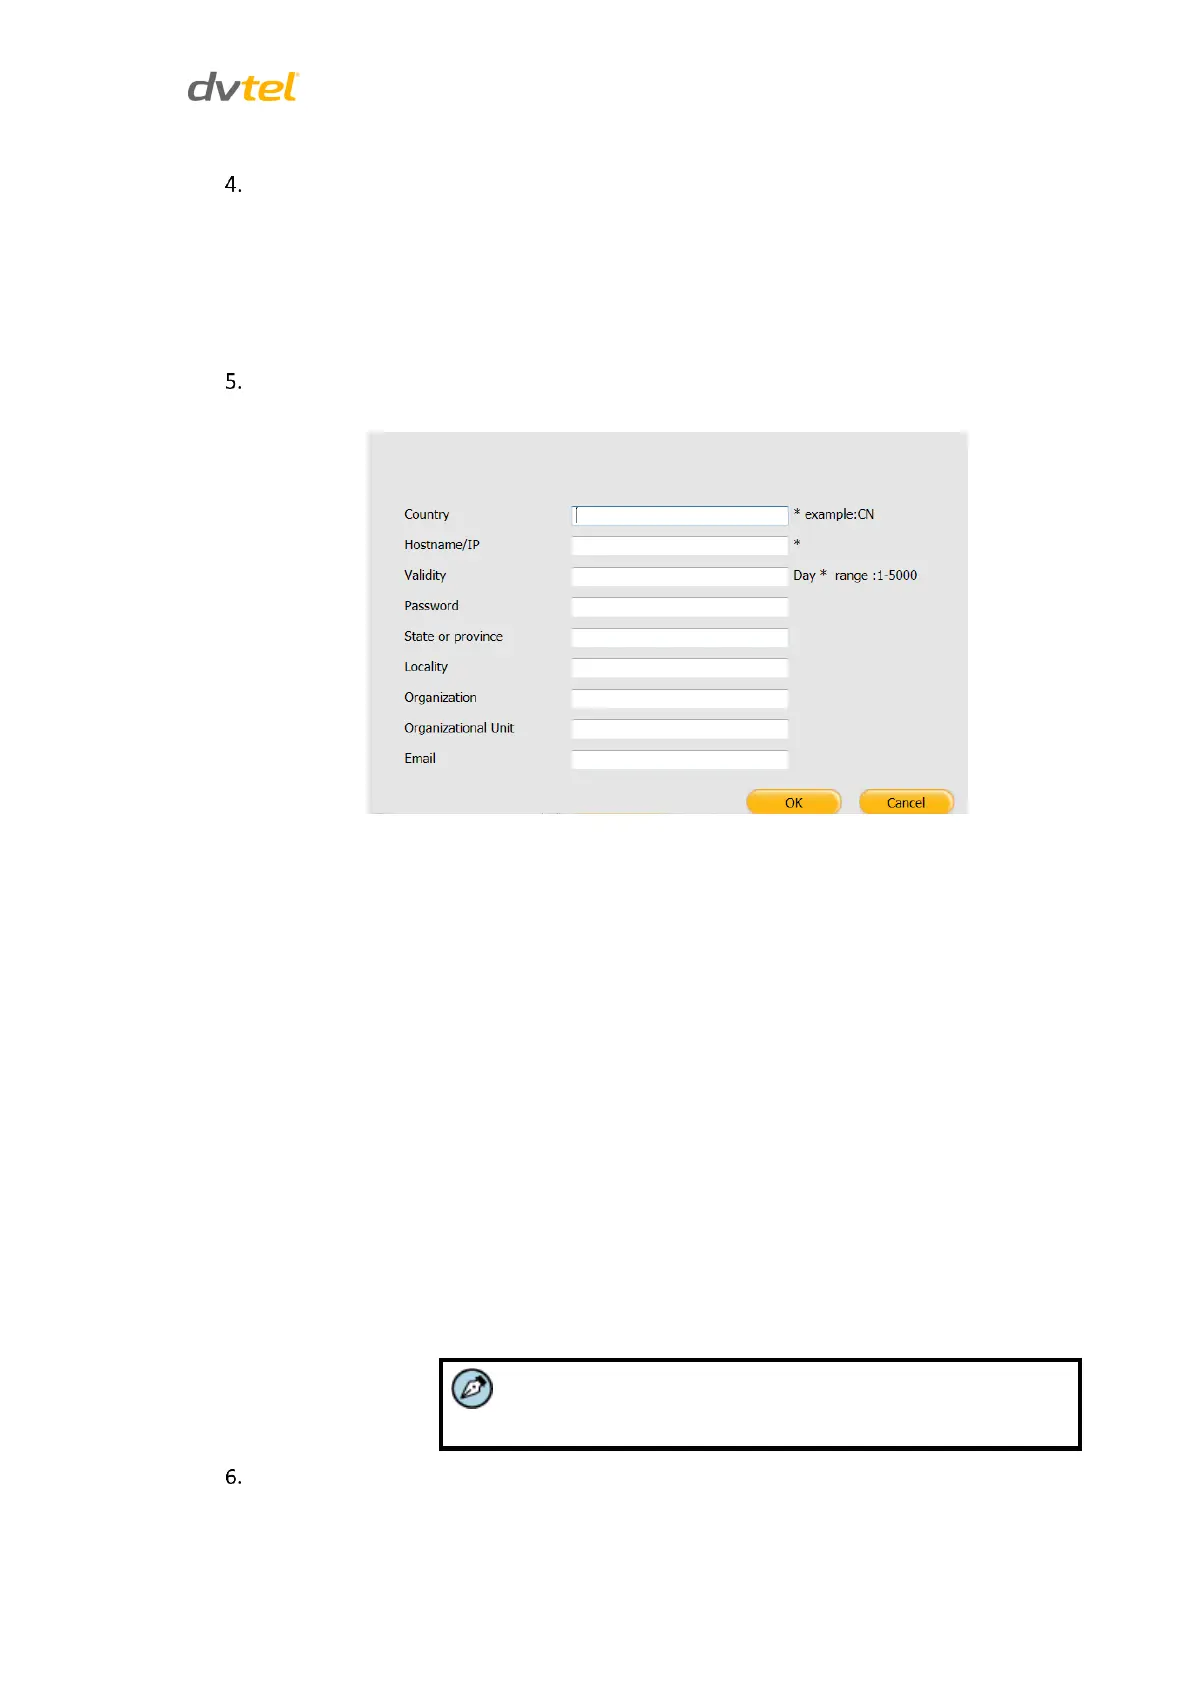
If you are creating a self-signed certificate, click Create Self-signed Certificate. The
following screen is displayed:
Figure 73: Create Self-Signed Certificate Form
Enter the required information:
a. Country – Two-letter abbreviation for your country (e.g. US, CN, etc.)
b. Hostname/IP – Domain name of the server to be protected by SSL
(e.g., public.yourcompanyname.com)
c. Validity – Number of days for which the certificate is valid
d. Password – The password to use for accessing the server
e. State or province – Jurisdiction in which your city is located
f. Locality – City
g. Organization – The name of your organization or company
h. Organizational Unit – The name of the group within your organization
to which you belong (e.g., IT)
i. Email – The Email address of the contact person responsible for
maintaining the SSL certificate
j. Click OK. The screen closes.
Country and Hostname/IP are required fields.
In the Certificate Path text box, click Browse to select the path for the certificate.
Click Upload to load the certificate to the device.