Dymax BlueWave® 200 Version 3.0 User Guide
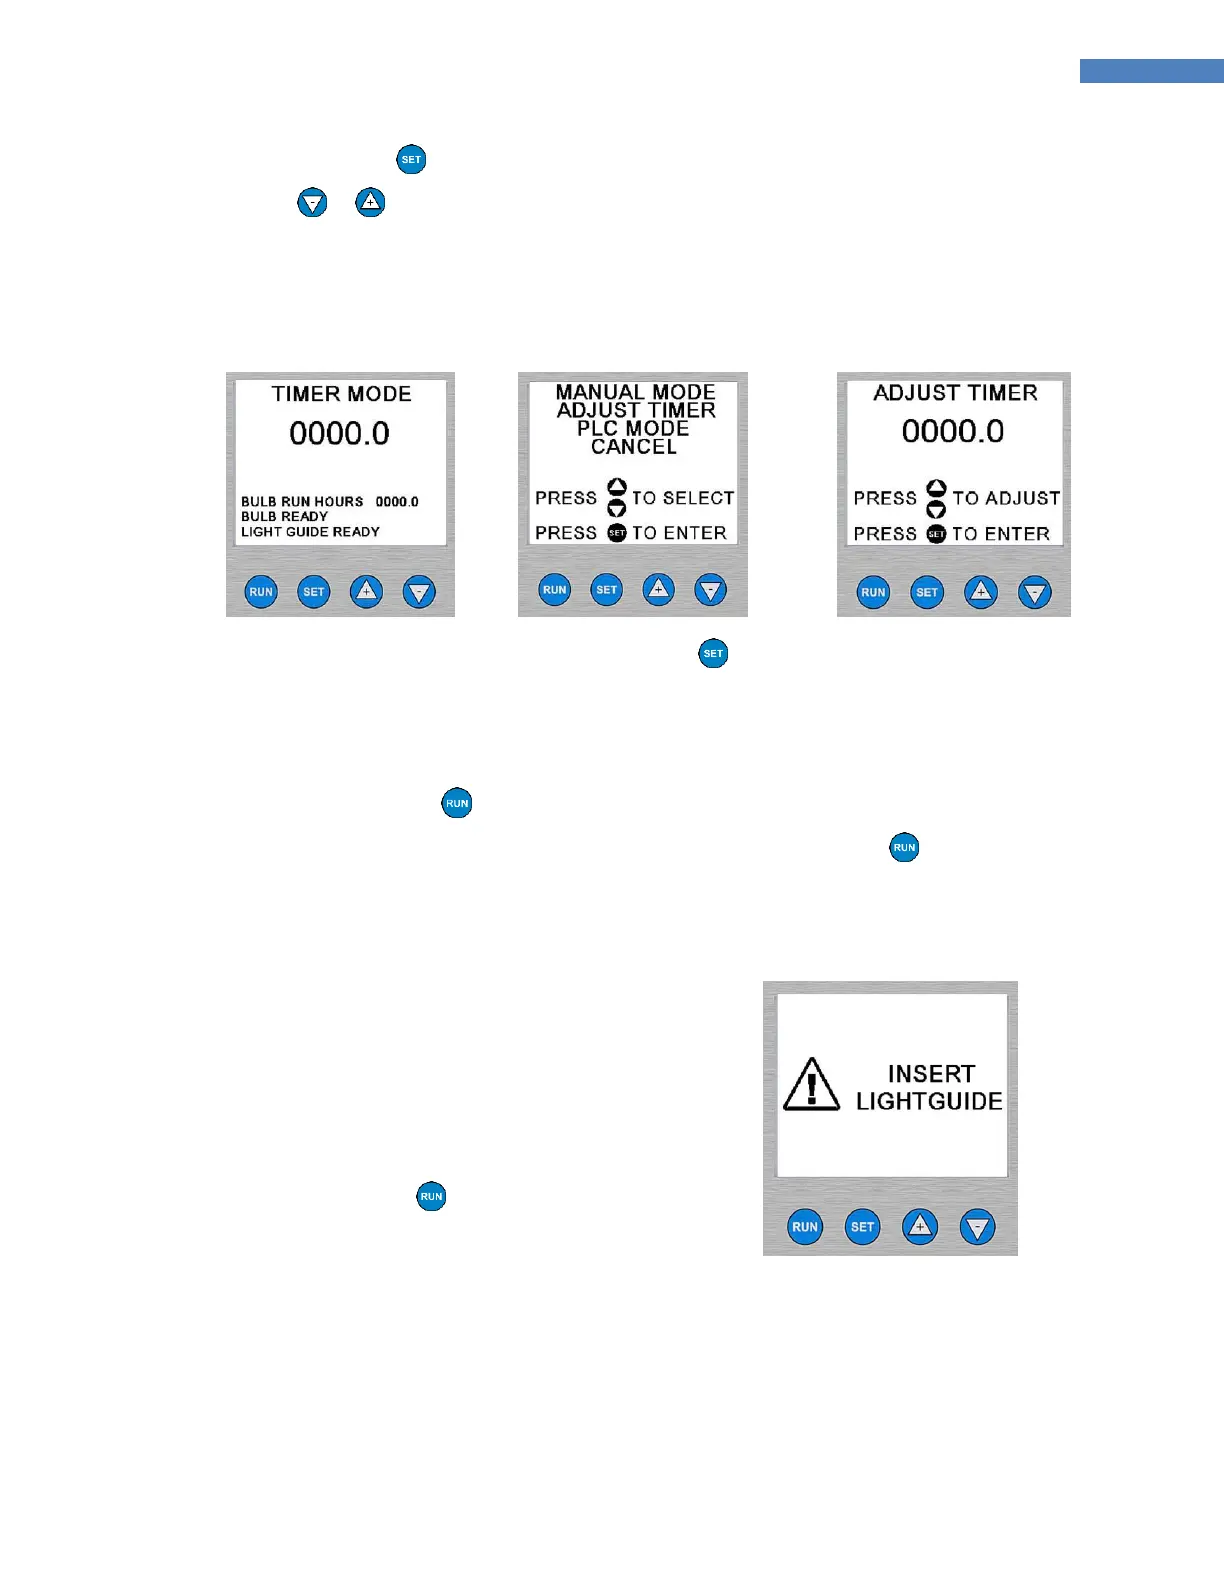
5. Press and release the Button.
6. Press the or Arrows to adjust the Timer value to the correct value. (Figure 28)
NOTE: Holding either key down changes the value quickly. Single presses of either key adjust the timer in
0.1 second steps.
Figure 26. Timer Mode
Screen
Figure 27. Adjust Timer
Menu Selection
Figure 28. Adjusting the
Time
7. After the correct value is showing on the screen, press the Button.
8. Position the Lightguide End no closer than 0.25" [0.64 cm] from the material being cured. Positioning the
Lightguide End too close can cause the Lightguide End to become cloudy from vapors coming off the
curing material. This cloudiness can reduce UV output by as much as 50%.
9. Press the Foot Pedal or the Button on the front panel to start the Timer.
NOTE: An exposure cycle can be cancelled at anytime by momentarily pressing the Button or Foot
Pedal.
If the Lightguide is not inserted, the Shutter will
not open. The LCD Screen will display a temporary
message to insert the Lightguide as shown below.
10. The Shutter opens and the Timer starts counting
down to zero.
NOTE: When the Timer reaches 0, the Shutter
closes automatically, and the Timer is reloaded
with the value that was last used. The BlueWave
200 is immediately ready to accept another press
of the Foot Pedal or the Button.
Figure 29. Lightguide Error
Screen