Dymax BlueWave® 200 Version 3.0 User Guide
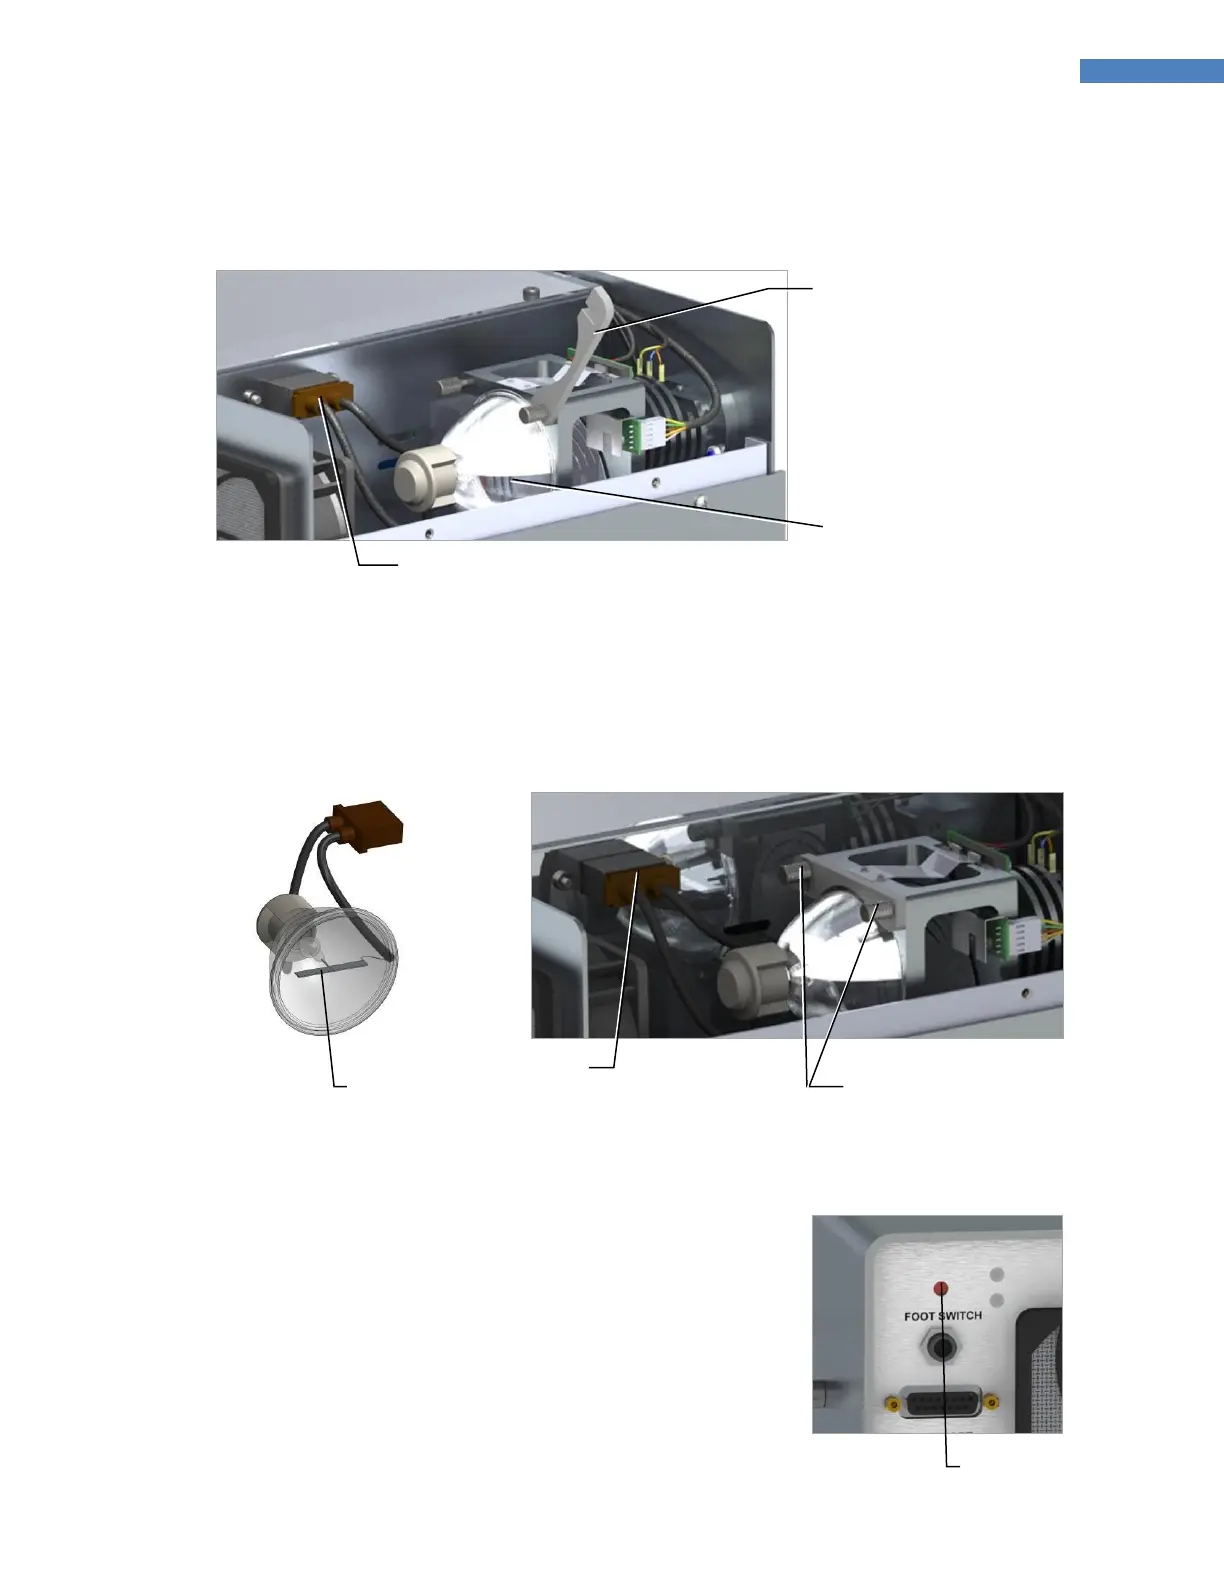
4. Unplug the Bulb and Lift the Bulb Mounting Bracket (Figure 39) from it. Remove the Bulb from the Bulb
Mount.
Figure 39. Lift Bulb Mounting Bracket and Remove Bulb
5. Unpack the new Bulb. Take care not to bend the flat Electrode in the center of the Bulb.
6. Install the new Bulb, plug the Bulb in and tighten the two Mounting Bracket Thumbscrews (Figure 41). Re-
install the BlueWave 200's cover. Make sure that the center Electrode connecting the Bulb to the wire
from the Reflector is parallel to the bottom of the system.
Figure 41. Installed Bulb
7. Plug in and turn on the BlueWave 200. Press and release the red
Reset Button on the back of the BlueWave 200 (Figure 42). This
completes Bulb installation. When the BlueWave 200 is turned
on, the Bulb will now ignite and is now reset to operate for 2,000
hours.
NOTE: If the Bulb does not light, repeat instruction 5-7 to
verify all steps were done correctly.
Figure 42. Reset Button,
Rear Panel
Mounting Bracket Thumbscrews