10
DYMO LabelWriter Wireless
User Guide
Getting Started
Follow the instructions in this section to set up your label printer to print from your
computer. To get started you will:
1 Connect the power.
2 Load a label roll.
3 Connect the printer to your wireless network.
4 Install the software you will use to print labels.
5 Add the printer to the software on either your computer or mobile device.
Refer to LabelWriter Wireless Printer Configuration on page 15 for more
advanced printer configuration information.
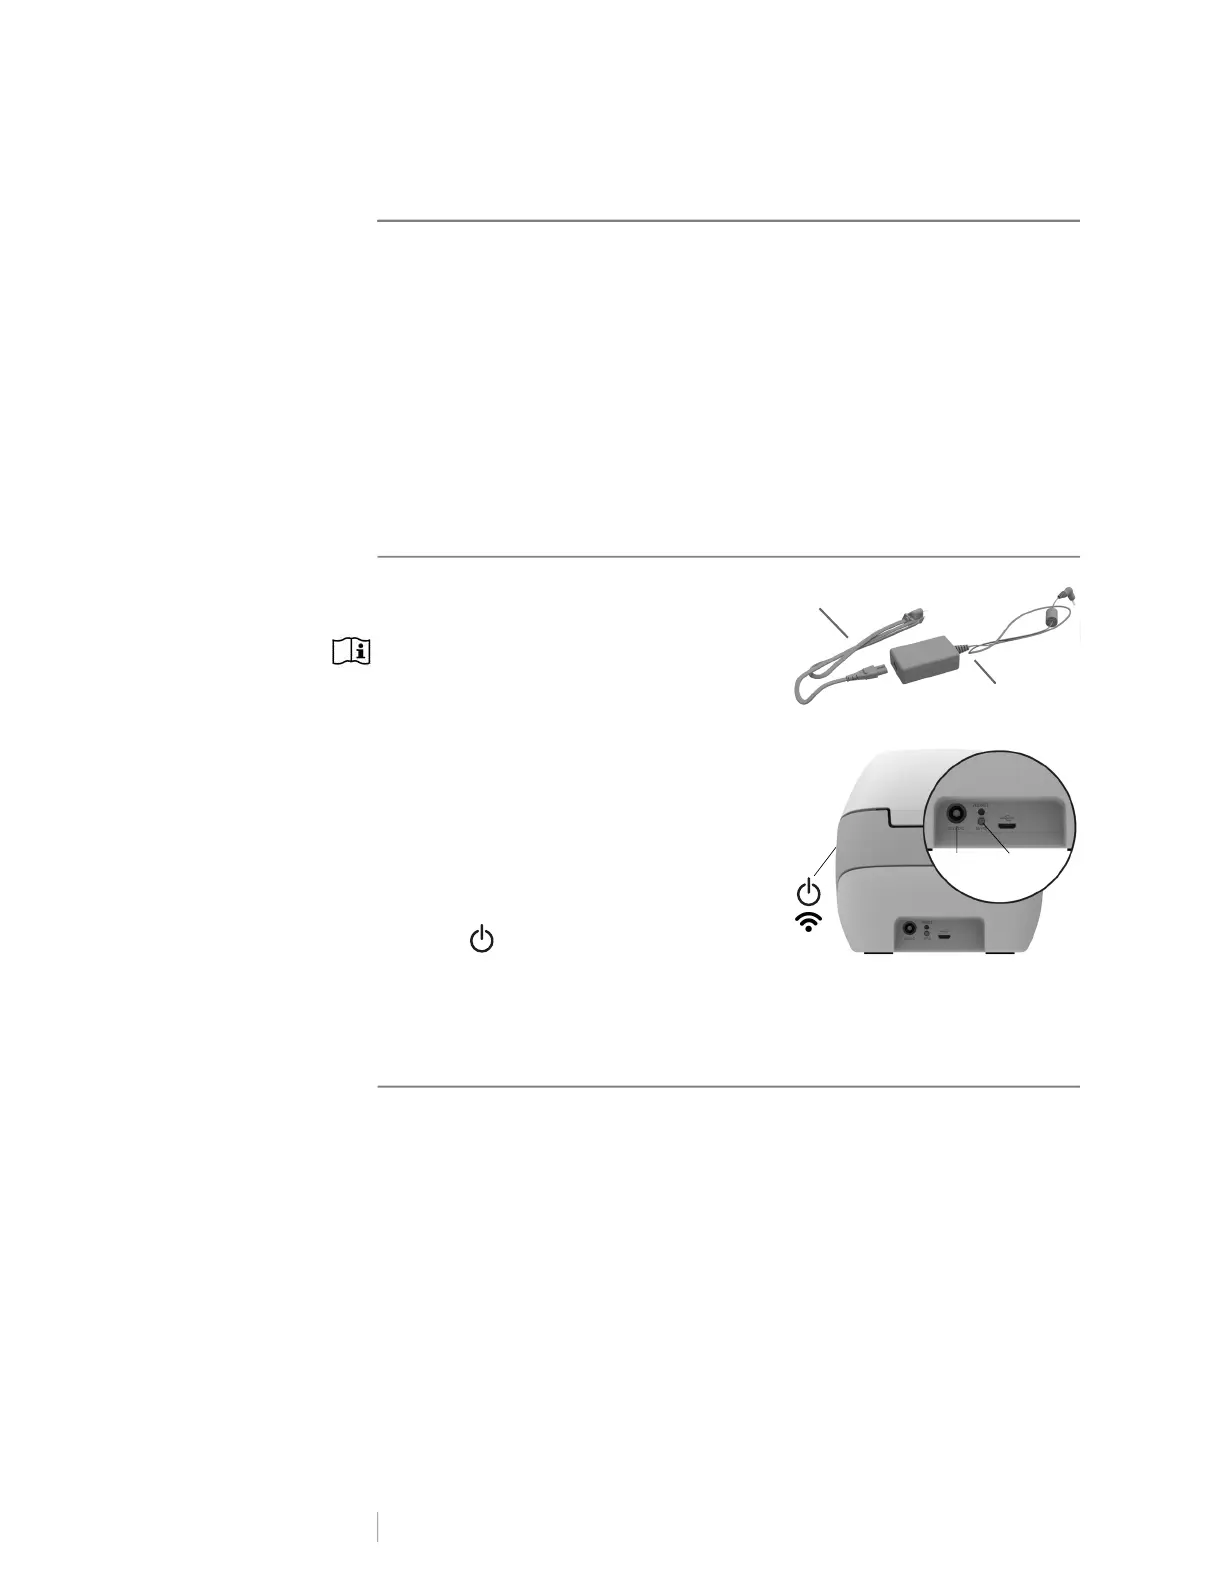
Connecting the Power
The different LabelWriter printer models may
have different power requirements.
Make sure to only use the power adapter that
was included with your label printer. See
Technical Specifications on page 29 for
details.
To connect the power
1 Plug the power cord into the power
adapter and plug the power adapter into
the power connector on the back of the
printer.
2 Plug the other end of the power cord into a
power outlet.
3 Press on the side of the printer to turn
on the power.
The power status light will flash for a few seconds and the wireless status light will
blink.
Loading Labels
Each label roll comes in a black plastic bag. Make sure to store the label roll in this
bag when the labels are not being used.
Important!
In order for the labels to feed properly during printing, pay attention to the
following when loading labels on the spool and into the printer:
Make sure the power is turned on.
The label spool guide must be pushed flush against the label roll, with no gap.
The labels must be loaded with the left edge of the label inserted against the
left edge of the label exit slot.
Power cord
Power adapter
Power WPS