Set Leads by Hand
Sometimes, the positions to lead in or lead out is not as you wish or the leads interfere with the contours. In
these cases, you can move the leads by specifying the lead positions by hand.
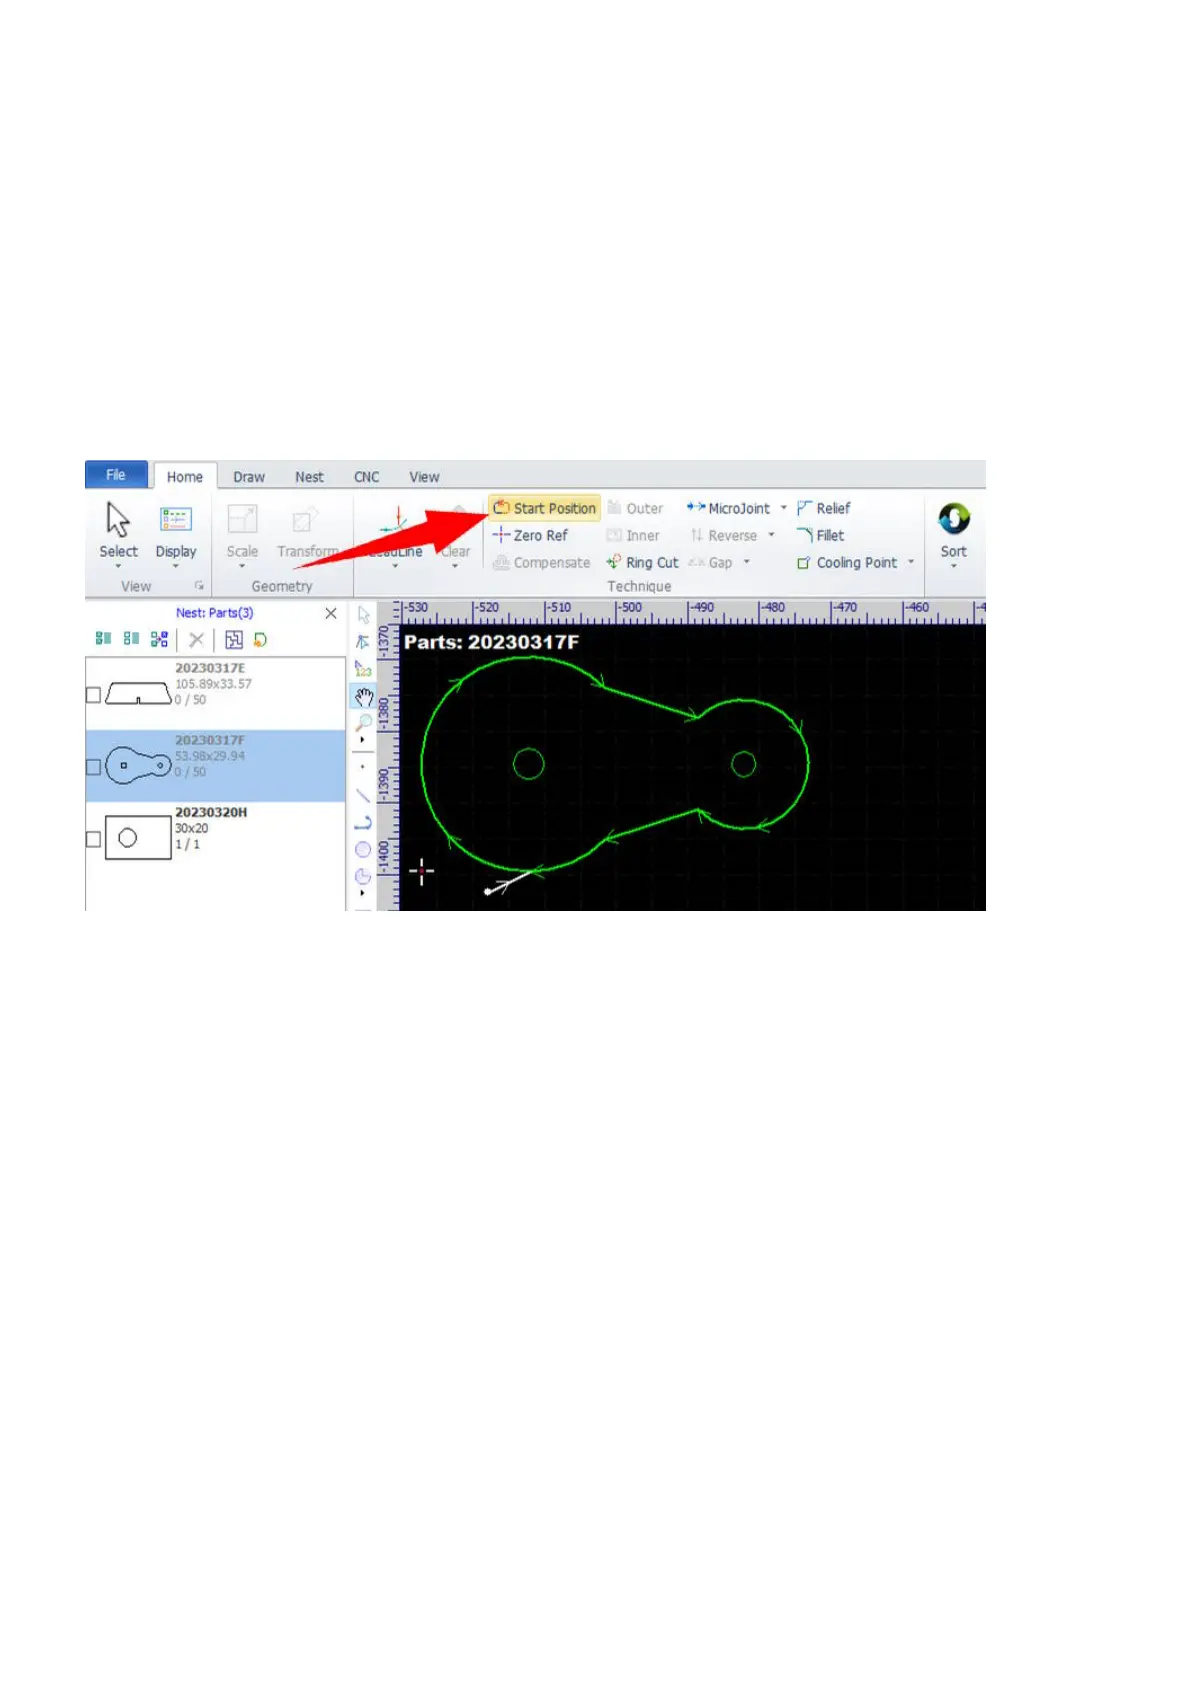
Select the command Start Position in Home and then click on the contour to specify the new start position.
In this way, the lead will keep its geometry except the lead position.
And, you can fully specify a new lead-in by this function. Select the command and click on a position out of
the contour, then click on the contour to set a lead-in line there. You can only set lead-ins with type Line in
this way.
Here, we would like to mention a group of functions which are closely related to the start position of a
contour.
By default, the start and end points of a closed contour are at the same position, we call it "seal". Sometimes,
it is good to add some small microjoints to prevent parts from falling out or hanging on while machining,
refer to Microjoints for more information.
If there is only a single microjoint to add, you can just set a gap at the start position instead of using the more
complex microjoint function.