EasyManua.ls Logo

EDAN INSTRUMENTS CADENCE II User Manual

EDAN INSTRUMENTS CADENCE II
60 pages
To Next Page IconTo Next Page
To Previous Page IconTo Previous Page
Page #11 background image
Cadence II Fetal Monitor Service Manual
11
transducer is in the proper place. Magnify and filter f0±fd Doppler frequency shift
ultrasound echo received by hardware system, then demodulate it, the (f0±fd)- f0=±fd
signal is obtained. After the signal is filtered by Doppler frequency shift filter, it is rectified
in full wave, and low-pass filtered. The envelope signal of Doppler frequency shift is
extracted, and sent to multi-channel strobe. It will become digital signal via A/D
transform. FHR is obtained by DSP auto-correlation operation. The Doppler audio is not
real sound, but an imitative sound caused by Doppler frequency shift change brought by
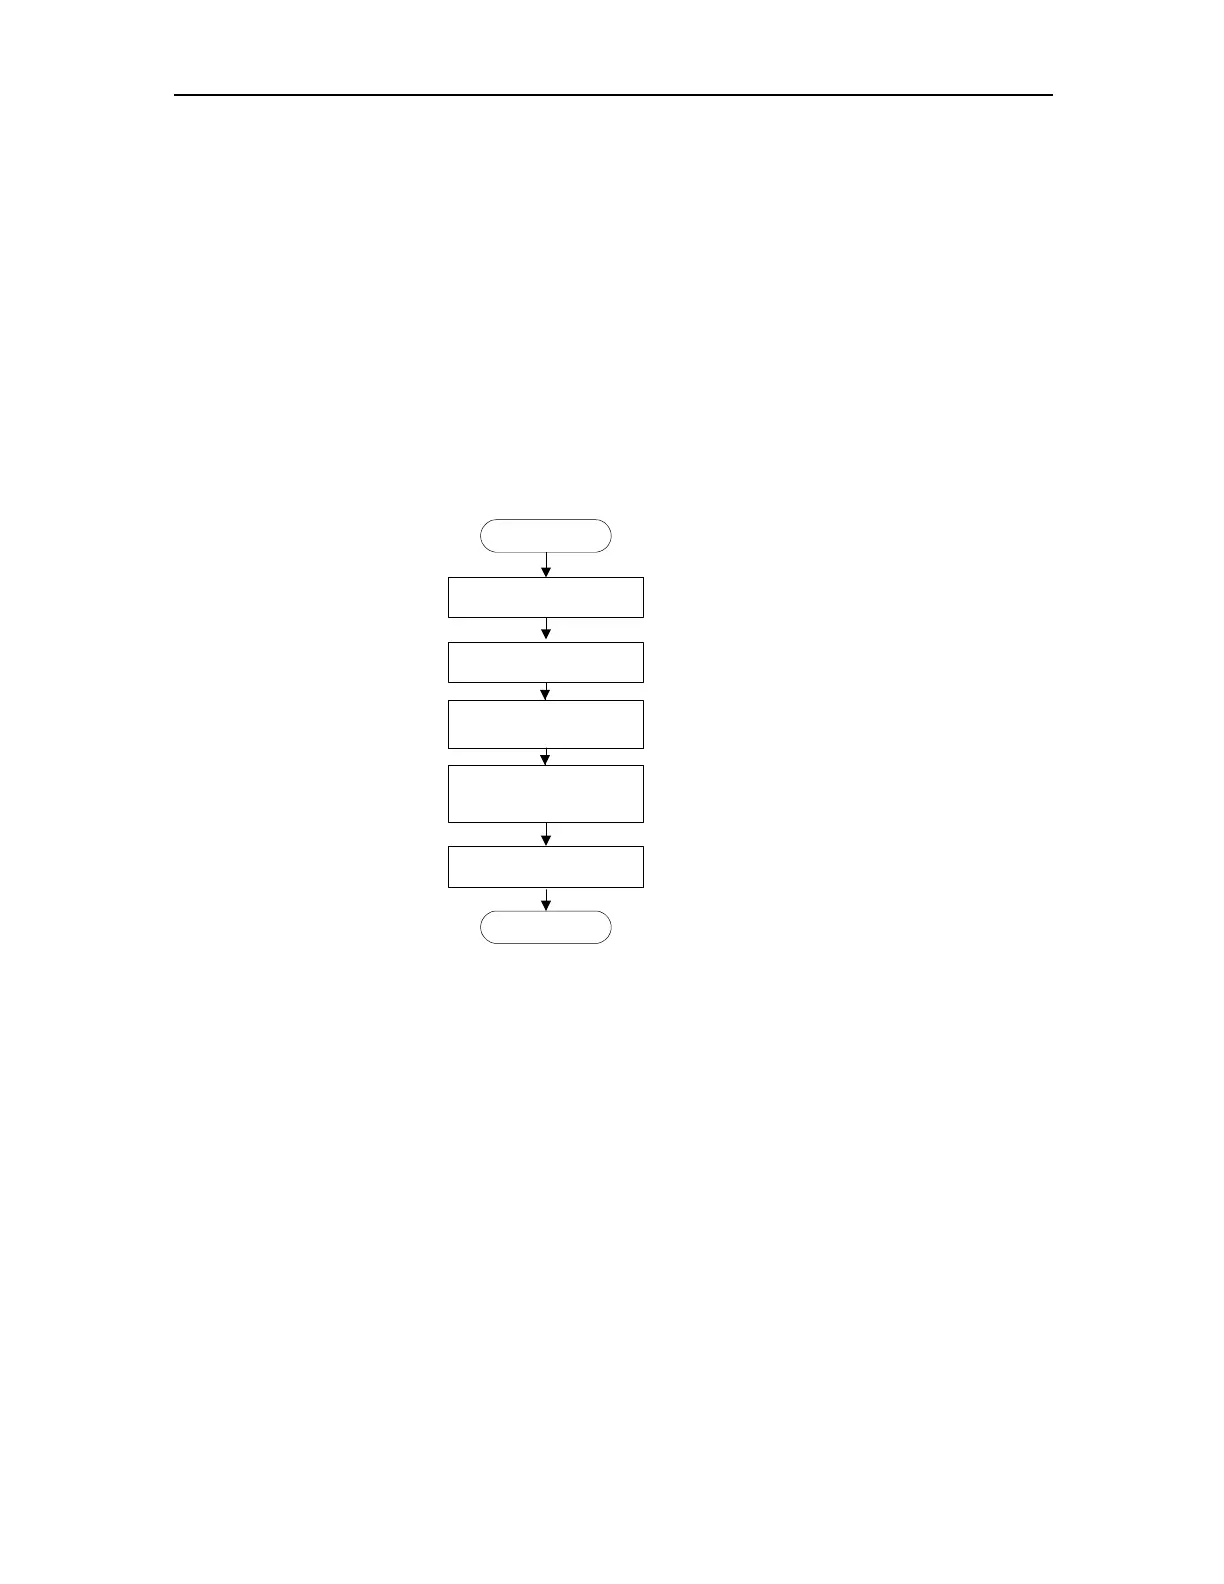
movement object. The FHR signal range is 50-210BPM.
FHR signal processing flow is as follows.
TOCO Measurement Operation Principle
External TOCO measurement sub system uses the strain gauge bridge. When strain
gauge suffers pressure, the bridge connection will lose balance, and produces an output
signal. The pressure changes very slowly, so a low-pass filter is set to filter noise signal.
It will change into digital signal via A/D, and its relevant value is computed by DSP. We
take 100 gram forces as 100 units, pressure measured by TOCO is contact force sensor
processing.
1.4 Function Modules
CADENCE II Monitor obtains accurate and reliable parameters, e.g. FHR and maternal
uterine activity, etc. by using pulsed Doppler ultrasound, external TOCO, etc. invasive
detection technology and device. The structure of CADENCE Series may be different
Examine Signals
Begin
End
Auto-correlation
Arithmetic
Connect Auto-correlation
Results
Analyze Auto-correlation
Results
Calculate Periods

Table of Contents

Questions and Answers:

EDAN INSTRUMENTS CADENCE II Specifications

General IconGeneral
BrandEDAN INSTRUMENTS
ModelCADENCE II
CategoryMeasuring Instruments
LanguageEnglish

Summary

Chapter 1: Overview of the CADENCE II Fetal Monitor

1.1 Product Information

Provides an overview of the CADENCE II Fetal Monitor and its connectivity features.

1.2 Technical Specifications

Details safety, size, weight, environment, and power supply specifications for the fetal monitor.

1.3 Fetal Monitor Operation Principle

Explains how the fetal monitor works, including ultrasound and TOCO measurement principles.

1.4 Function Modules

Describes the basic components and structure of the CADENCE II monitor.

1.3.1 Power Supply Board

Details the power module specifications and pin definitions for power input and output jacks.

1.3.2 Mainboard

Explains the mainboard's functions, interface definitions, and pin assignments for various connectors.

1.3.3 Fetal Monitor Board

Describes the fetal monitor board's functions and pin definitions for its connectors.

1.3.4 Print Control Board

Details the specifications and pin definitions for the print control board's interface.

1.3.5 Interface Board

Explains the interface board's role in communication and its pin definitions for connected components.

Chapter 2: Inspection of the Monitor

2.1 System Inspection

Covers initial checks for appearance, packing, power-on status, and component connections.

2.1.1 Appearance and Packing Inspection

Guides on checking the monitor's surface and accessories for damage or completeness.

2.1.2 Power On Inspection

Details the procedure for connecting power and performing initial checks after turning the monitor on.

2.1.3 Control Panel

Explains the functions of various buttons and indicators on the monitor's front panel.

2.1.4 Indicator

Describes the meaning of different indicator lights and their status during operation.

2.1.5 Recorder

Explains how to use the recorder, print patterns, and troubleshoot printing issues.

2.1.6 Networking Function

Details how to connect the monitor to a network for data transmission.

2.1.7 Connecting with Personal Computer (PC)

Guides on connecting the monitor to a PC for data analysis using specialized software.

Chapter 3: Installing the Monitor

3.1 Installing Power Supply Board

Provides instructions and diagrams for installing the power supply board.

3.2 Installing Main Board

Details the steps and connections required for installing the main board.

3.3 Installing Fetal Monitor Board

Guides on installing the fetal monitor board and its connections to other components.

3.4 Installing Battery

Explains the procedure for installing or replacing the monitor's battery.

3.5 Installing the Print Board

Provides instructions for installing the print control board.

3.6 Installing the Interface Board

Details the process of installing the interface board and its connections.

3.7 Troubleshooting

Lists common issues with the monitor, recorder, or networking, and their solutions.

Chapter 4: Packing of the Monitor

4.1 Checking Before Packing

Describes steps for inspecting the monitor and accessories before packing.

4.2 Preparation Before Power On

Outlines essential checks and environmental considerations before powering on the device.

4.3 Power On Procedure

Details the procedure for powering on the fetal monitor safely.

4.4 Important Notes

Provides important reminders regarding labels, user familiarity, and potential misuse.

Chapter 5: Monitoring Procedures

5.1 Ultrasound Monitoring of FHR

Explains the procedure for obtaining Fetal Heart Rate (FHR) using ultrasound.

5.2 Fetal ECG Electrode Monitoring of FHR

Details the process of monitoring FHR using a fetal ECG electrode, including contraindications.

5.3 Dual Heart Rate Monitoring

Describes simultaneous monitoring of twins using different channels.

5.4 Monitoring Uterine Activity

Explains methods for monitoring uterine contractions, both external (TOCO) and internal (IUPC).

5.5 Remote Patient Marker Recording of Fetal Movement

Guides on using the remote marker to record fetal movement events.

5.6 After Monitoring

Outlines the steps to follow after completing patient monitoring.

Chapter 6: Maintenance, Care, and Cleaning

6.1 Preventive Maintenance

Details visual, routine, and mechanical inspections to ensure proper functioning and safety.

6.2 Care and Cleaning of Monitor

Provides instructions for cleaning the monitor casing and display screen.

6.3 Care and Cleaning of Transducer

Explains how to clean TOCO and Ultrasound transducers, and Fetal ECG cables.

6.4 Cleaning of Recorder

Guides on cleaning the recorder platen, thermal print head, and paper sensing mechanism.

6.5 Cleaning of Belt

Provides instructions for washing soiled belts.

6.6 Sterilization

Details recommended sterilant choices for various monitor components.

6.7 Disinfection

Lists recommended disinfection agents and procedures for the monitor and accessories.

6.8 Care of Record Paper

Provides guidelines for storing recorder paper to maintain its quality and readability.