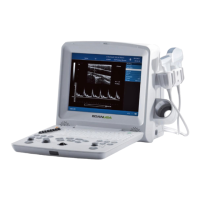
DUS 60 Digital Ultrasonic Diagnostic Imaging System Service Manual
- 61 -
8 Screen format
Press these keys to change the display mode from B/M, or M display
mode.
9 Dynamic Range
Dynamic Range controls how echo intensities are converted to
shades of gray, thereby increasing the adjustable range of contrast.
10 Edge Enhance
Due to this function a finer, sharper impression of the image is
produced.
11 Rejection
It determines the amplitude-level below which echoes are
suppressed (rejected).
12 Gray Map Selects a level.
Table 4-2 M mode checks
4.4.3. Calculations and Worksheet Pages
The DUS 60 supports calculation packages and applications-oriented patient reports for following
applications: abdominal, obstetrical, small parts, gynecological, orthopedic, cardiac, and
urological calculations.
NOTE:
Confirm that the patient information is correct and the probe and application are selected
properly.
For further details refer to the DUS 60 user manual, Chapter 7 to Chapter 12.
4.4.4. Probe/Connectors Usage
Activating the probe
While multiple transducers can be connected to the ultrasound system, only one can be
activated at a time.
Press Probe repeatedly to cycle through the transducers currently connected to the system.
The type of the activated transducer is displayed in the top corner of the screen.
Deactivating the probe
When deactivating the probe, the probe is automatically placed in standby mode.
1. Press Freeze.
2. Gently wipe the excess gel from the face of the probe. (Refer to the DUS 60 user
manual,13.3.2 for complete cleaning instructions.)
3. Carefully slide the probe around the right side of the keyboard, toward the probe holder.
Ensure that the probe is placed gently in the probe holder.
Disconnecting the probe
Prior to disconnect a probe switch the unit off.
CAUTION
If a probe is disconnected while running, a software error may occur. In this case switch
the unit off (perform a restart).

 Loading...