For example:
These screens will rotate at three seconds each.
When in this state, the UI buttons perform the following functions:
14 Servicing
Note: In the event of a meter failure follow the approved diagnostics and triage process or contact
EDMI.
When the main battery reaches 10% of its total capacity, the Low Battery warning indicator
becomes active when the meter is woken up and the LCD is activated. The meter also sends an
alert to the supplier to indicate that the battery will need changing.
Battery Replacement Procedure
Equipment required:
▪ Flat blade screwdriver
▪ 2 Philips head screwdriver
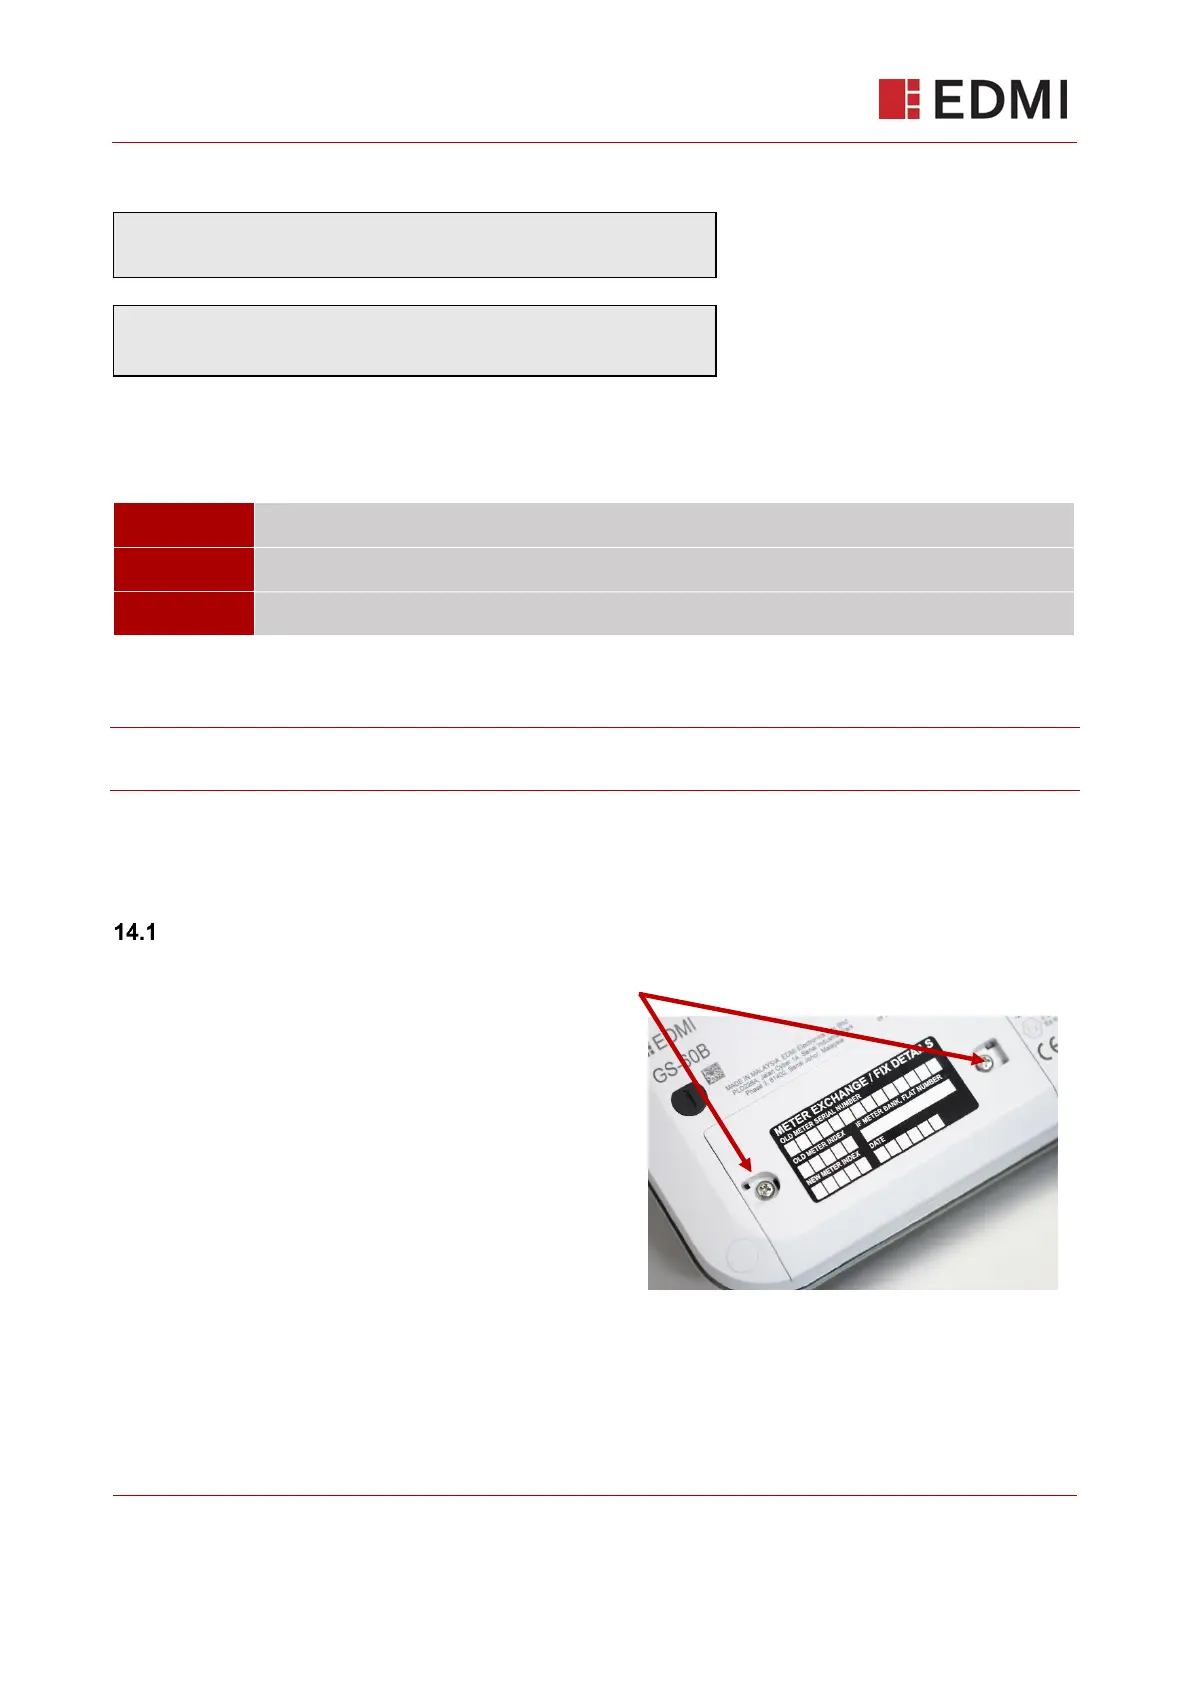
1. Locate the black plastic battery compartment
security seals on the lower left of the meter.
Using a flat blade screwdriver, apply direct force
downwards onto the middle of the plastic seal
until it breaks. Remove and discard the plastic
parts.
2. Unscrew the lid to the compartment with a Philips head screwdriver. Keep the screws safe.
Locate the battery connector.
3. Removing the battery cover, if there is some charge remaining a tamper alert will be generated
which will notify the supplier