18
2 SCREEN ADJUSTMENT
2-2 Imaging adjustment
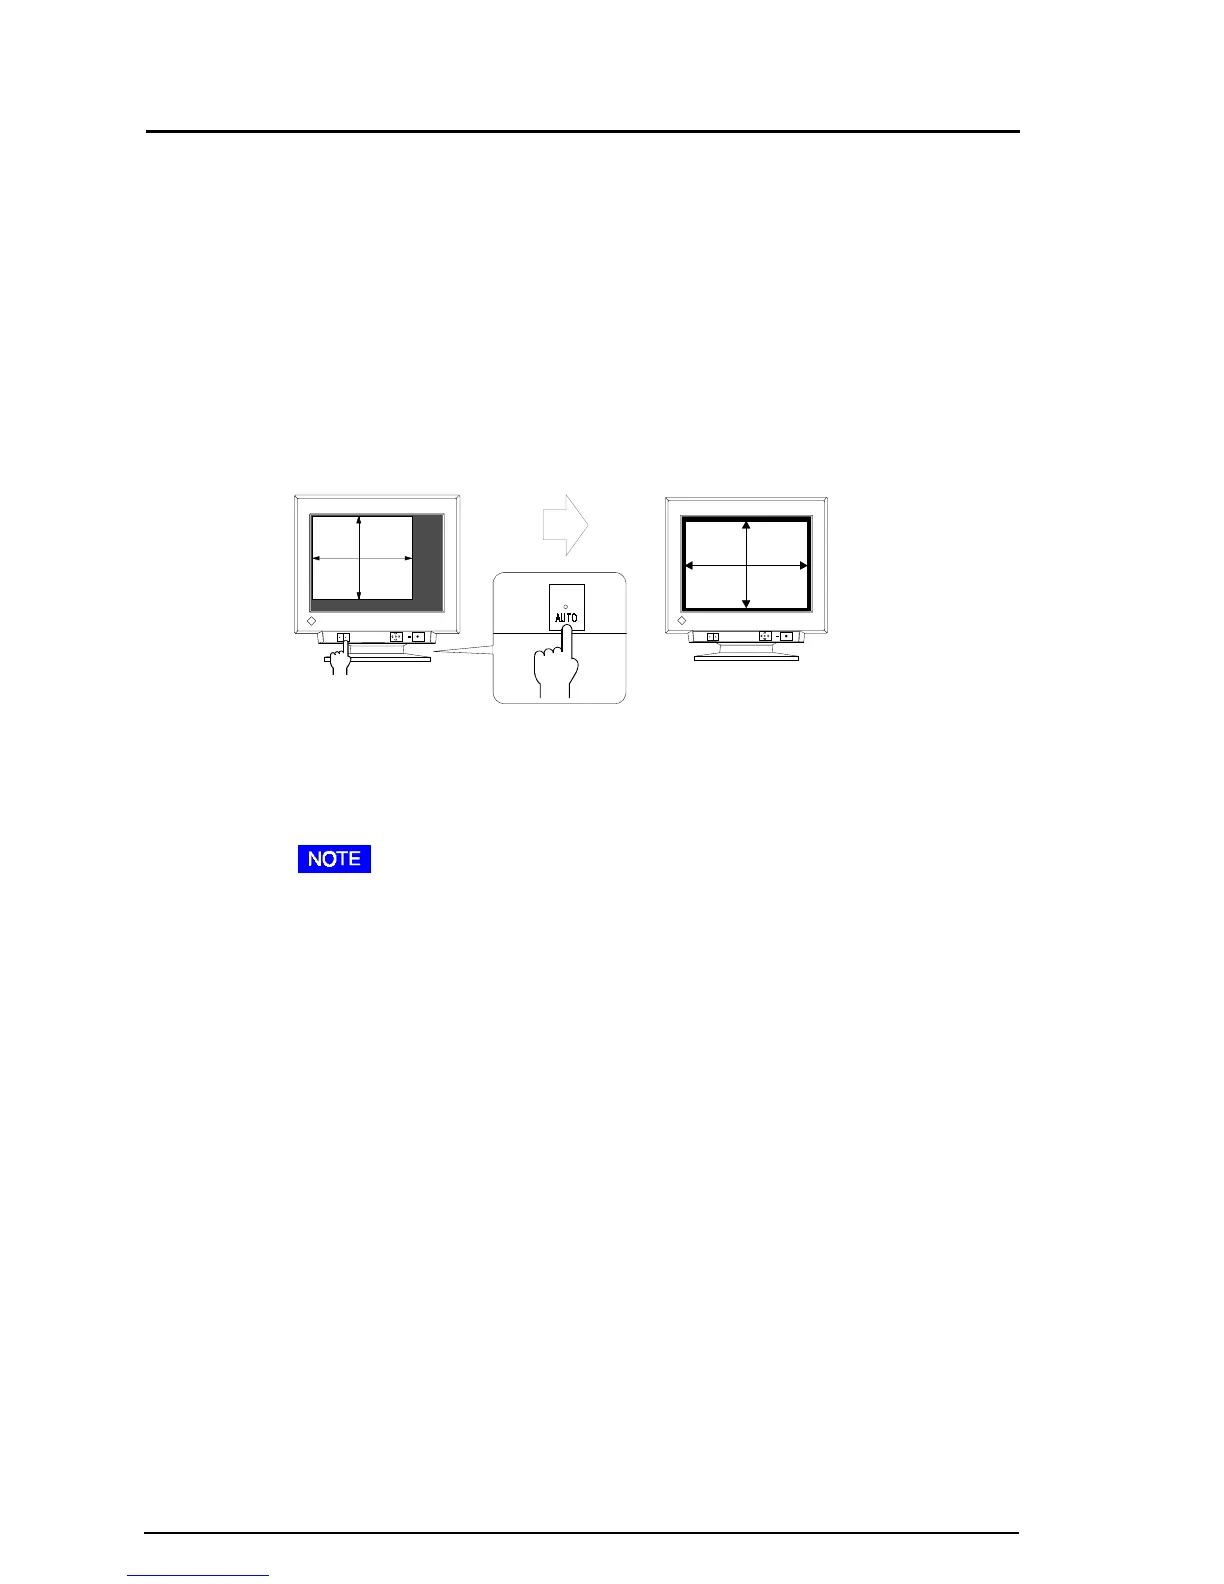
Using the AUTO-SIZING button
After connecting the monitor to the PC, first press the AUTO-SIZING
button on the front panel. The AUTO-SIZING function centers the
displayed image, aligning the image’s borders with respect to the monitor
frame.
In general, press the AUTO-SIZING button whenever changing the
graphics board or the resolution or when image size and/or position is
incorrect.
If further adjustment is required, adjust the picture size/position as desired
using the Size/Position function in the ScreenManager “Screen” menu.
Refer to the next page.
• The AUTO-SIZING function is intended for use on Macintosh, and IBM
compatibles running Windows. It may not work properly if either of the
following applies:
- An AT-compatible PC running MS-DOS (not Windows).
- The background color for the “wallpaper” or “desktop” pattern is set
to black.
• Some signals from the graphics board may not function properly.
• A solid-color screen (i.e. red, green, blue) may appear for an instant
while performing the AUTO-SIZING function, this phenomenon is not a
failure.