34
SERVICE & DISASSEMBLY
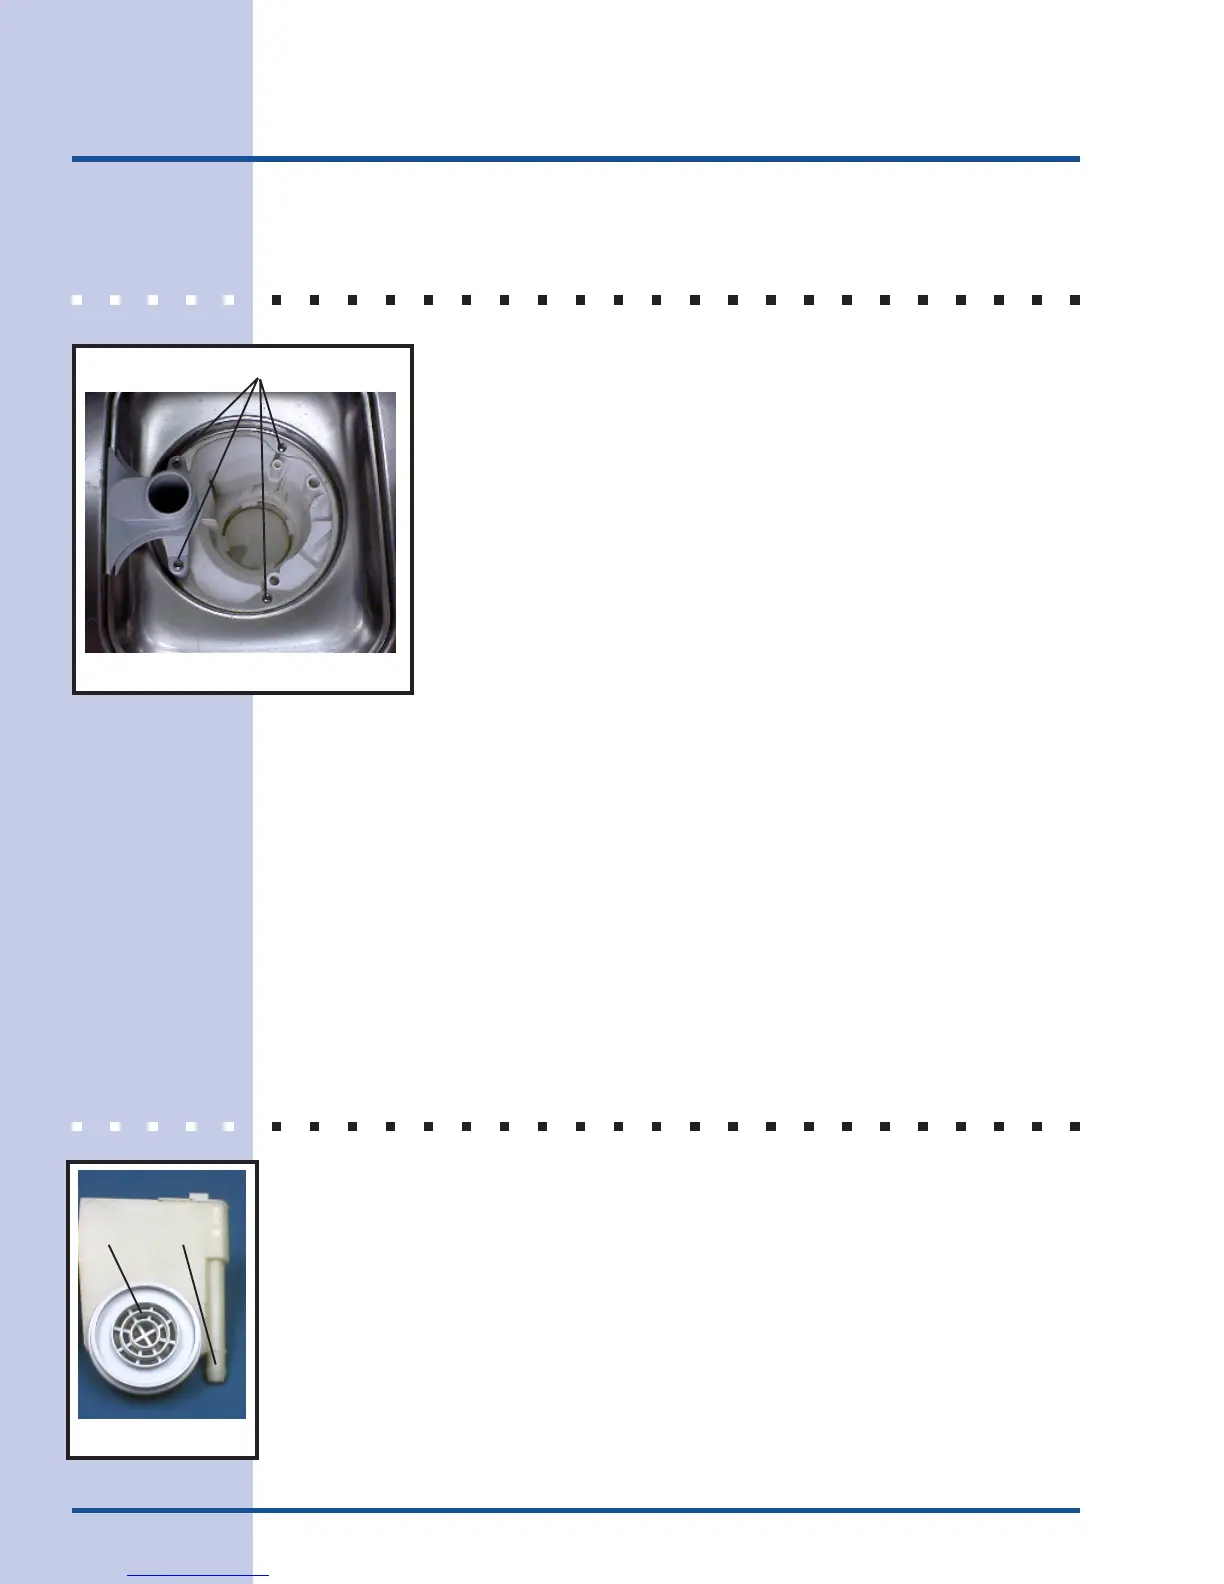
SUMP
1. Remove lower spray arm, filters, and volute cover from
inside of tub. Remove four screws mounting sump to tub.
2. Disconnect dishwasher from power and water supplies.
Remove drain line.
3. Remove dishwasher from underneath countertop.
4. Lay dishwasher on its back on a protective pad.
5. Remove wires to sensor.
6. Remove hoses from sump. (pressure switches, wash motor
intake, lower spray arm.)
7. The drain pump may be removed with the sump for
convenience.
8. Remove sump from tub. Then remove drain pump, sensor,
and sump gasket from sump. (If replacing the sump, these parts may be
installed on the new sump.)
9. Reassemble by mounting sump to tub and securing screws into sump from
inside tub. (This will hold the sump in place.)
10. Reinstall hoses and reposition hose clamps.
11. Reinstall wire plug to sensor.
12. Finish reassembly by installing cabinet and remaining parts inside tub.
13. Recheck sump mounting screws by filling dishwasher with water and
assessing for leaks.
SIDE VENT AND FILL HOSE
1. Remove dishwasher cabinet. See CABINET REMOVAL for detailed
instructions.
2. With cabinet removed, set unit upright.
3. Remove fill hose from side vent by removing hose clamp.
4. Unscrew (counterclockwise) vent grate from left side wall inside tub.
5. Remove side vent.
6. Reverse procedure to reinstall.
Sump mounting screws
Figure 53
Vent
grate
Figure 55
Fill hose
location