70
2
3
1
1
2
3
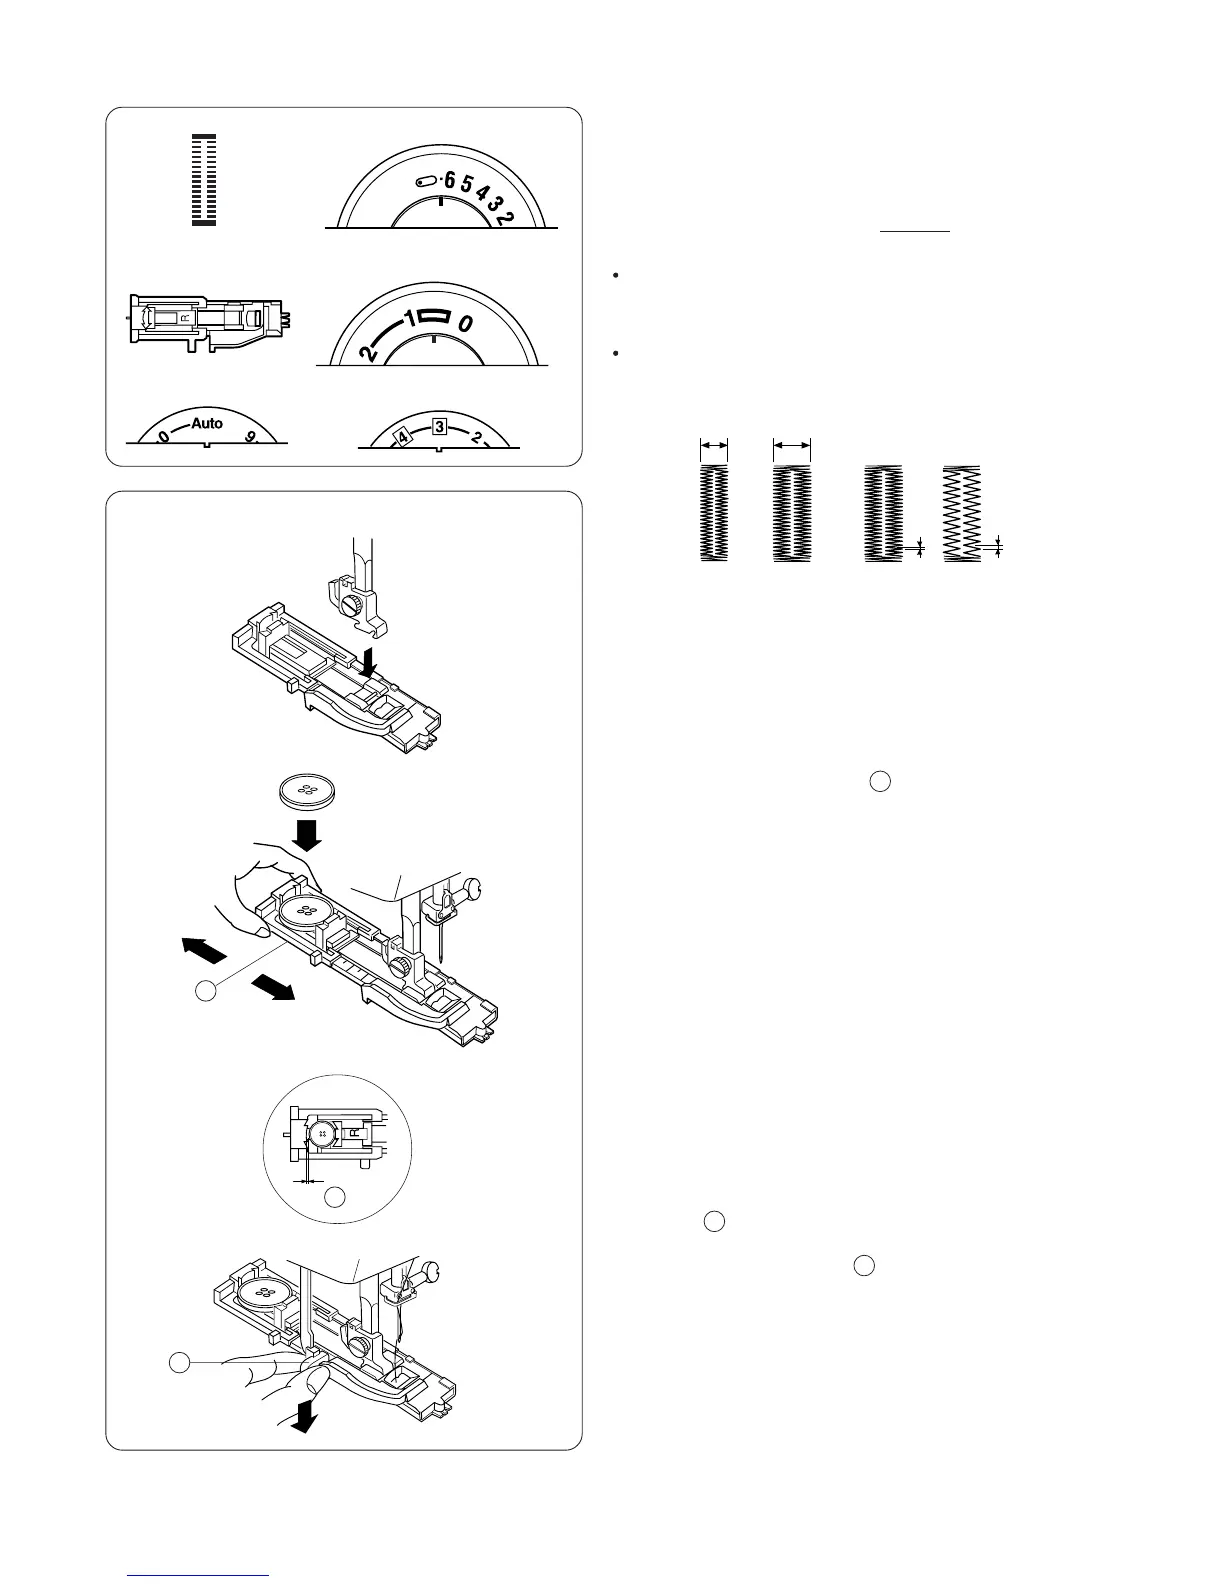
Automatic Buttonhole
All buttonholes should use interfacing that is the same
weight as the fabric. Interfacing is especially important
when sewing on stretch fabrics. Always make a test
buttonhole on extra fabric before sewing on your fabric.
Use a narrower stitch width (4) for a finer
buttonhole, a wider stitch width(6.5) for a more
substantial buttonhole.
Use a shorter stitch length (0.5) for finer fabrics, a
longer stitch length (1) for heavier fabrics. Remain
within the range of the buttonhole illustration.
4 6.5
0.5 1
1. Attach the automatic buttonhole foot. Make sure the
button opening is at the back of the foot when it is
attached.
2 - 4
0.5 - 1
2. Pull open the buttonholder to the back and place
the button in it. Push the buttonholder together tightly
around the button.
NOTE: Placing the button in the automatic buttonhole
foot automatically sets the size of the buttonhole. The
button holder on the foot adjusts for a button up to 2.5 cm
(1”) in diameter. If you are using a novelty button or
extremely thick button that does not fit through the test
buttonhole, pull the buttonholder open to lengthen the
buttonhole .
3. Pull the buttonhole lever down as far as it will go.
4 - 6.5