Procedure
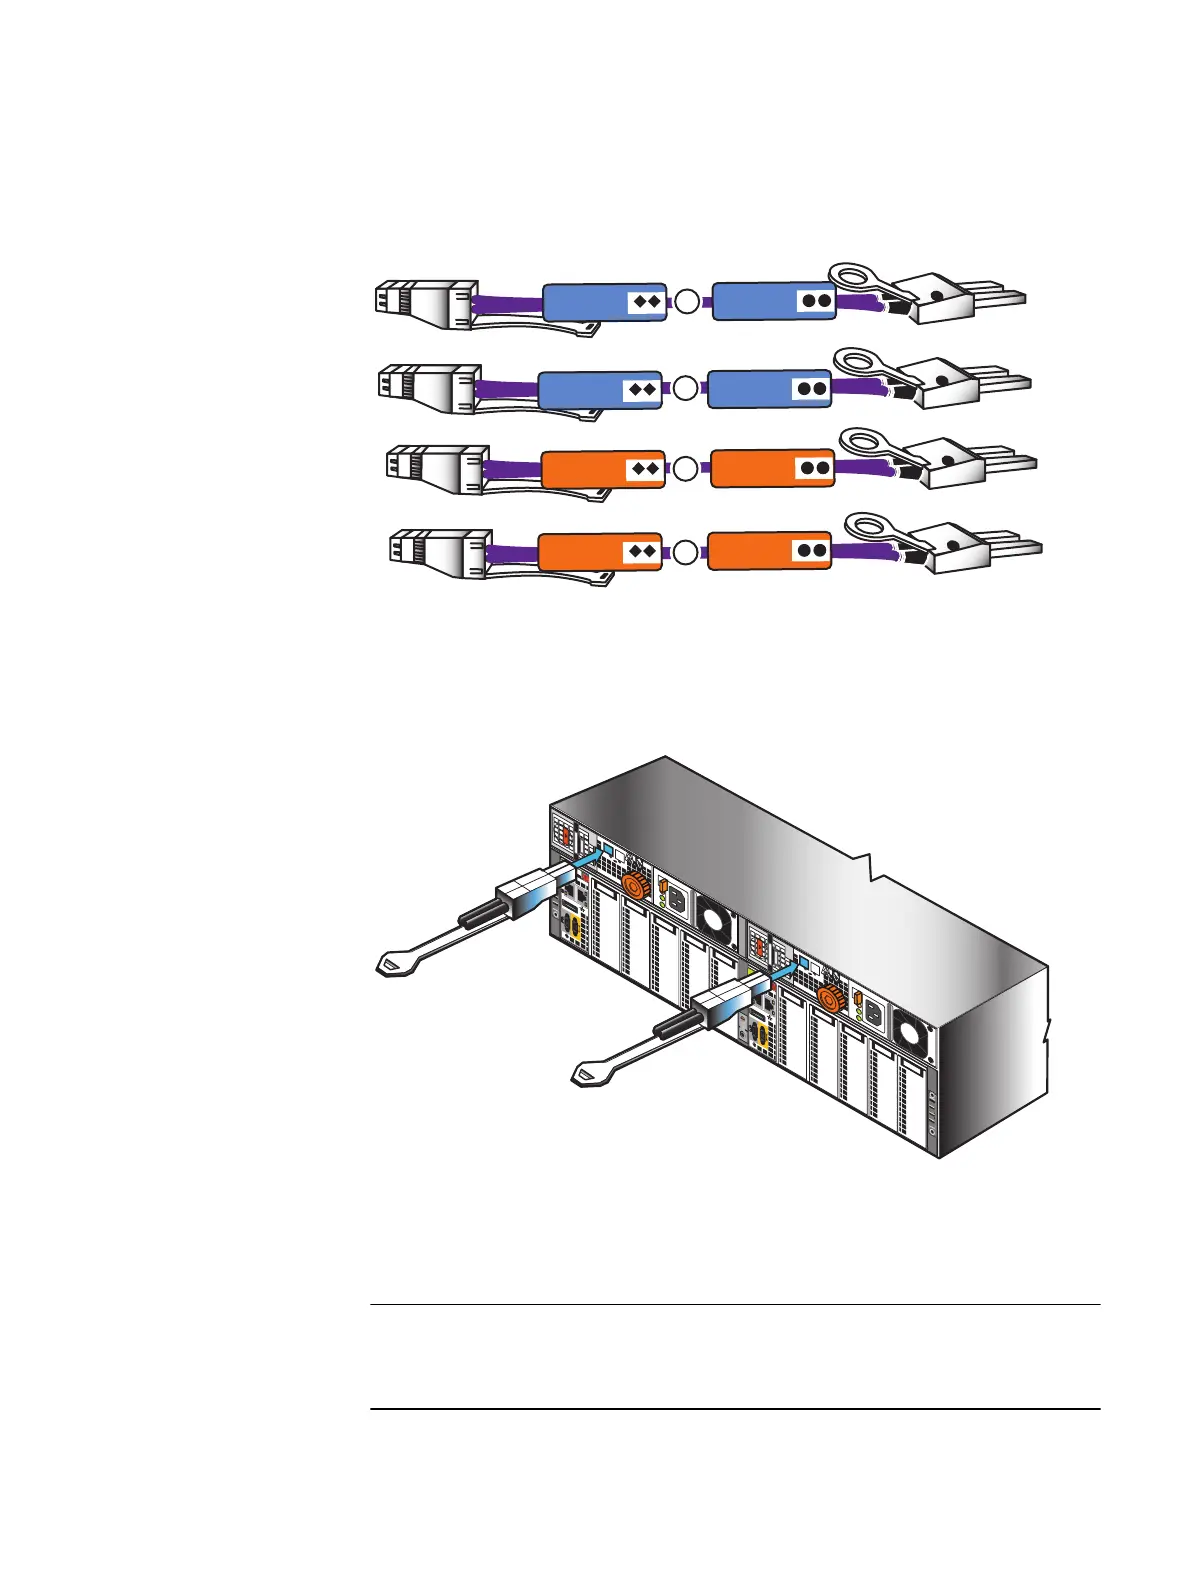
1. Locate one pair of cables for each DAE as shown in Figure 17 on page 41. These are
mini-SAS to mini-SAS HD cables.
Figure 17 SAS cables for the first two DAEs
LCC B
LCC
A
LCC A
LCC B
S
P B SAS 0
S
P
A SAS 0
SP A SAS 1
SP B SAS 1
1
2
3
4
The SAS ports on the DPE are labeled 0 and 1. Port 0 is connected internally to the
SAS expander that connects all the internal DPE disks. Since Port 0 is already
connected internally to the DPE disks, the first DAE is connected to Port 1 to balance
the load on the SAS ports. The second DAE is connected to Port 0.
Figure 18 Connecting the mini-SAS HD cable ends to the SAS ports
1
0
1
0
X4
AC
DC
!
X4
X4
X4
VNX-000619
The release tabs are down for the mini-HD connections to both ports 0 and 1, both
sides.
Additional DAEs can be added to each loop. Each BE loop can support up to 10 DAEs
or 250 disks, subject to the maximum number of disks for the system.
Your VNX hardware information guide provides examples of how to cable DAEs in your
VNX for interleaved or stacked environments.
Figure 19 on page 42 shows two different kinds of DAEs, one 2U DAE and one 3U
DAE. Your system may differ. The steps to follow are the same, no matter what kinds
of DAEs you have in your system.
Add additional storage
Connecting additional DAEs to your VNX system 41
 Loading...