5. Use a 1 1/4” (32 mm) wrench on the hex of the transducer holder and slowly
unscrew in a counterclockwise direction from the meter. If you hear gas leaking
from the threads, immediately stop and reinstall the holder as the meter has not
been fully drained and/ or pressure has not been relieved from the meter. Correct
the issue before attempting to remove the holder.
6. The transducer holder has now been removed from the meter with the transducer
still installed inside the transducer holder.
7. Make a note of the removed transducer holder length which is used to update the
meter configuration during the Transducer Swap-out procedure in Daniel MeterLink,
after all of the transducer holders are replaced.
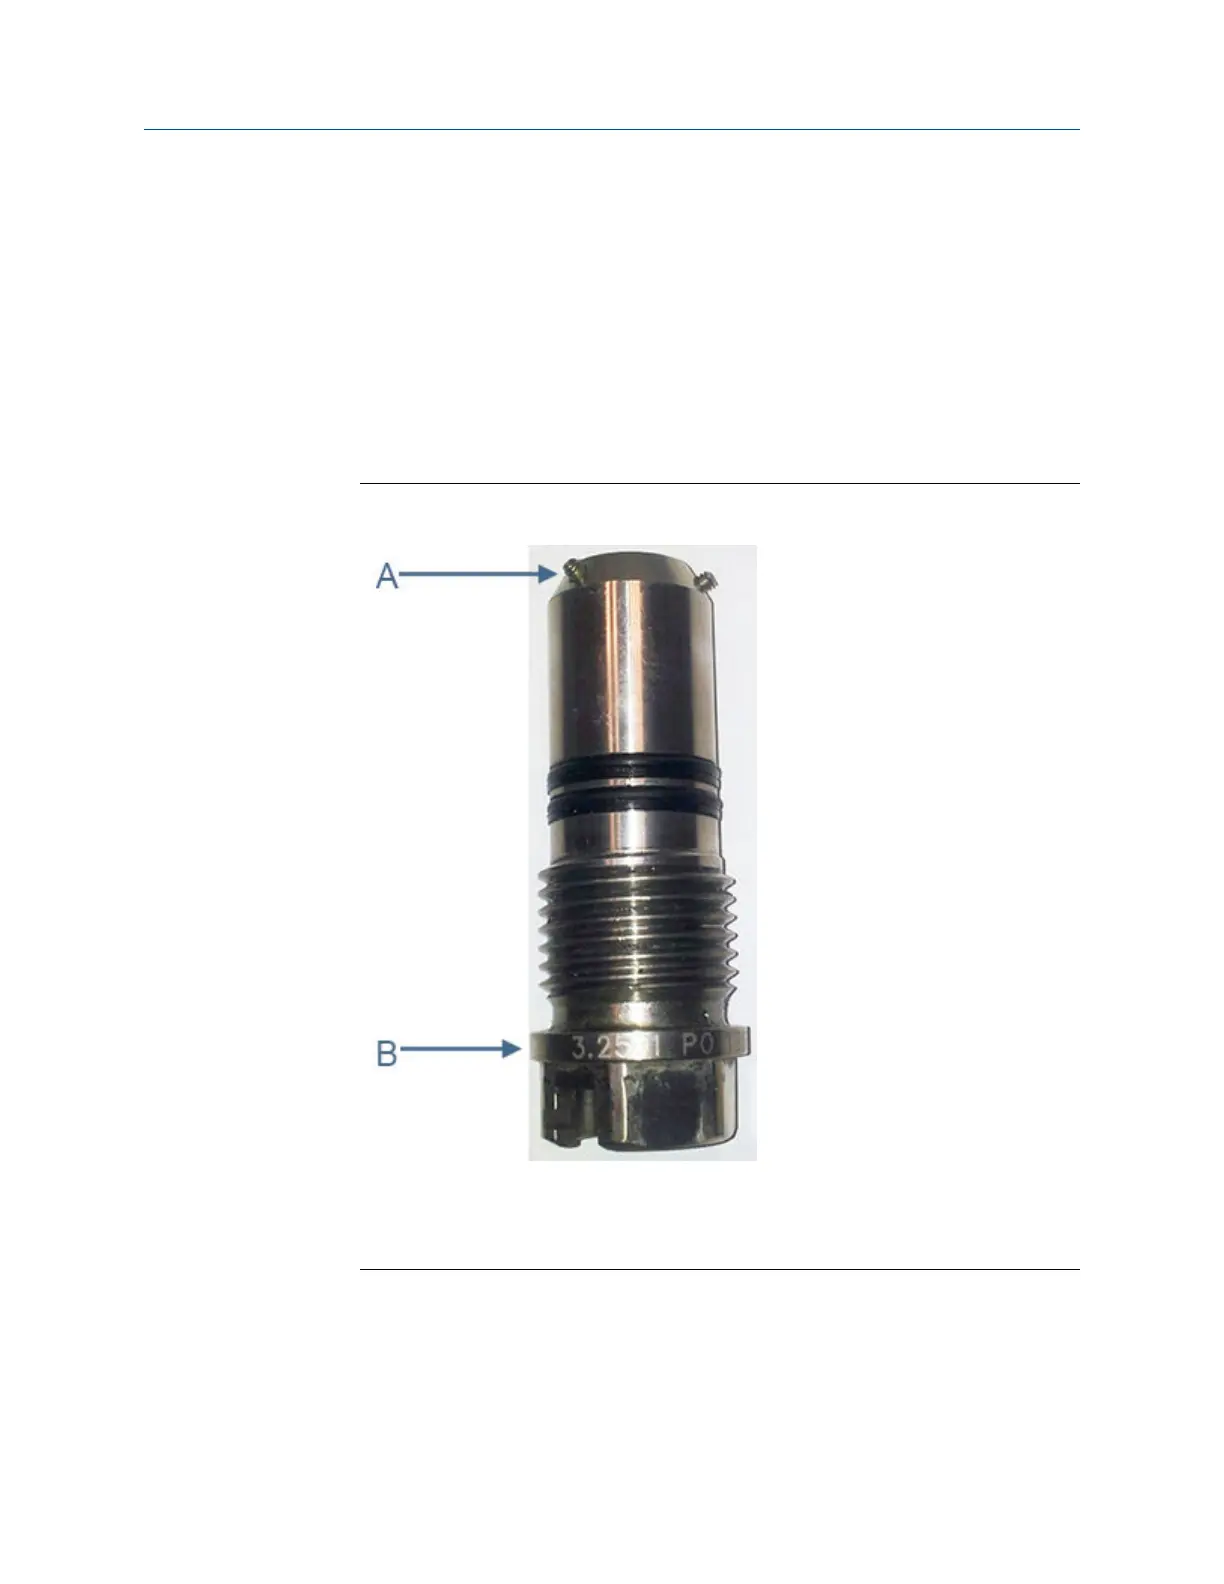
Transducer holder length and set screw identificationFigure 3-8:
A. Transducer holder set screws
B. Transducer holder length identification
8. Loosen the three Allen setscrews with a 1/16” hex driver securing the transducer
assembly and stalk, if installed. Carefully remove the transducer by pulling it from
the T-Slot transducer holder (or stalk if installed) without rotating.
9. Clean the holder with a dry cloth.
Meter repairs
58 Gas Ultrasonic Flow Meters
 Loading...