7. Prepare a new membrane.
a) Hold the membrane assembly with the cup formed by the membrane and
membrane holder pointing up.
b) Fill the cup with electrolyte solution allowing the wood ring to soak up the
electrolyte solution.
8. Hold the sensor at about a 45 degree angle with the cathode end pointing up.
9. Add electrolyte solution through the fill hole until the liquid overflows.
10. Tap the sensor near the threads to release trapped air bubbles.
11. Add more electrolyte solution if necessary.
12. Place the fill plug in the electrolyte port and begin screwing it in.
13. After several threads have engaged, rotate the sensor so that the cathode is
pointing up and continue tightening the fill plug.
Do not overtighten.
14. Place a new O-ring in the groove around the cathode post.
15. Insert a small blunt probe, like a toothpick with the end cut off, through the
pressure equalizing port. See .
CAUTION
Equipment damage
A sharp probe may puncture the bladder and destroy the sensor.
Do not use a sharp probe.
16. ; then place the membrane assembly over the cathode.
17. Screw the membrane retainer in place.
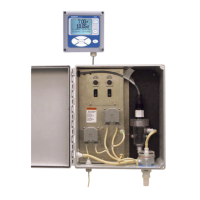
12.3
Sample conditioning system
12.3.1 Reagent
The sample conditioning reagent lasts about two months.
Before putting fresh reagent in the carboy, discard any small amount of remaining
reagent. To prepare the reagent refer to the procedure in Prepare the reagent.
Maintenance Reference Manual
January2023 00809-0200-3415
54 Emerson.com/Rosemount
 Loading...