Leading Edge Installation
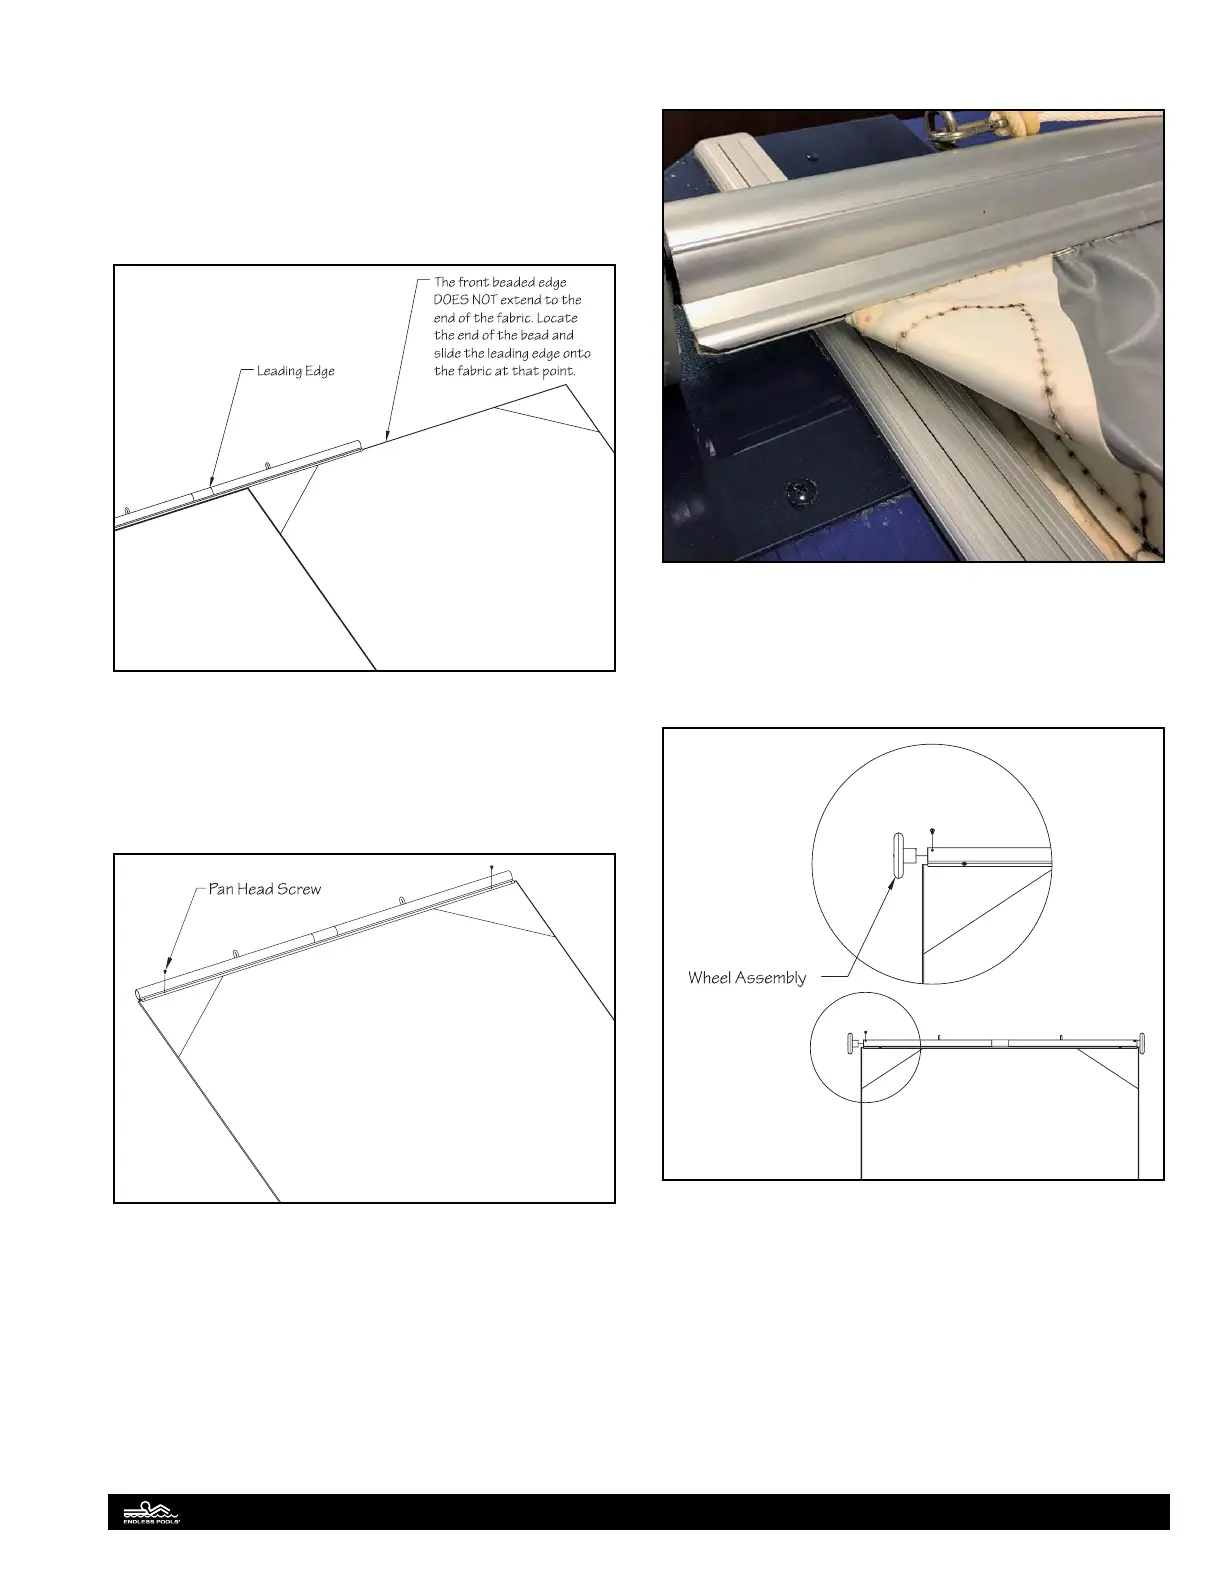
Slide the leading edge on to the bead at the front of the cover.
Fig. 83. Despite the way the fabric is stitched, the front bead
does not extend all the way to the sides of the fabric. e front
bead ends approximately 1" (25mm) from the sides of the fabric.
is allows a portion of the front edge of the fabric to be
pulled down and out of the receiving slot of the leading edge.
is leaves a few inches of the receiving slot on each end of
the leading edge empty.
Fig. 83
Attach the leading edge to the cover fabric using the ½” (13mm)
pan head screws. e holes closest to the ends of the leading edge
will not be used. Only install screws in the second set of holes
approximately 4” (10cm) in from each end of the leading edge.
Fig. 84.1.
Fig. 84.1
Pull out a few inches of fabric on each end of the leading edge.
Fig. 84.2.
Fig. 84.2
Insert the wheels into each end of the leading edge. Drill a
11/64" (4mm) hole into the leading edge and wheel assembly.
Secure the wheels to the leading edge with the ½” (13mm)
screws. Fig. 85.
Fig. 85
Clip the rope assembly to the eyehooks on the leading edge. e
rope is used to close the cover.
32