Installation Cerabar PMC11, PMC21, PMP11, PMP21, PMP23
16 Endress+Hauser
5 Installation
5.1 Mounting dimensions
For dimensions, see the "Mechanical construction" section in the Technical Information.
5.2 Installation conditions
• No moisture may enter the housing when installing or operating the device, or when
establishing the electrical connection.
• For metal M12 plugs: Do not remove the protection cap (only for IP69 and Ex ec version)
of the M12 plug terminal until shortly before the electrical connection.
• Do not clean or touch process isolating diaphragms with hard and/or pointed objects.
• Do not remove the protector on the process isolating diaphragm until just before
installation.
• Always firmly tighten the cable entry.
• Point the cable and connector downwards where possible to prevent moisture from
entering (e.g. rain or condensation water).
• Protect the housing from impact
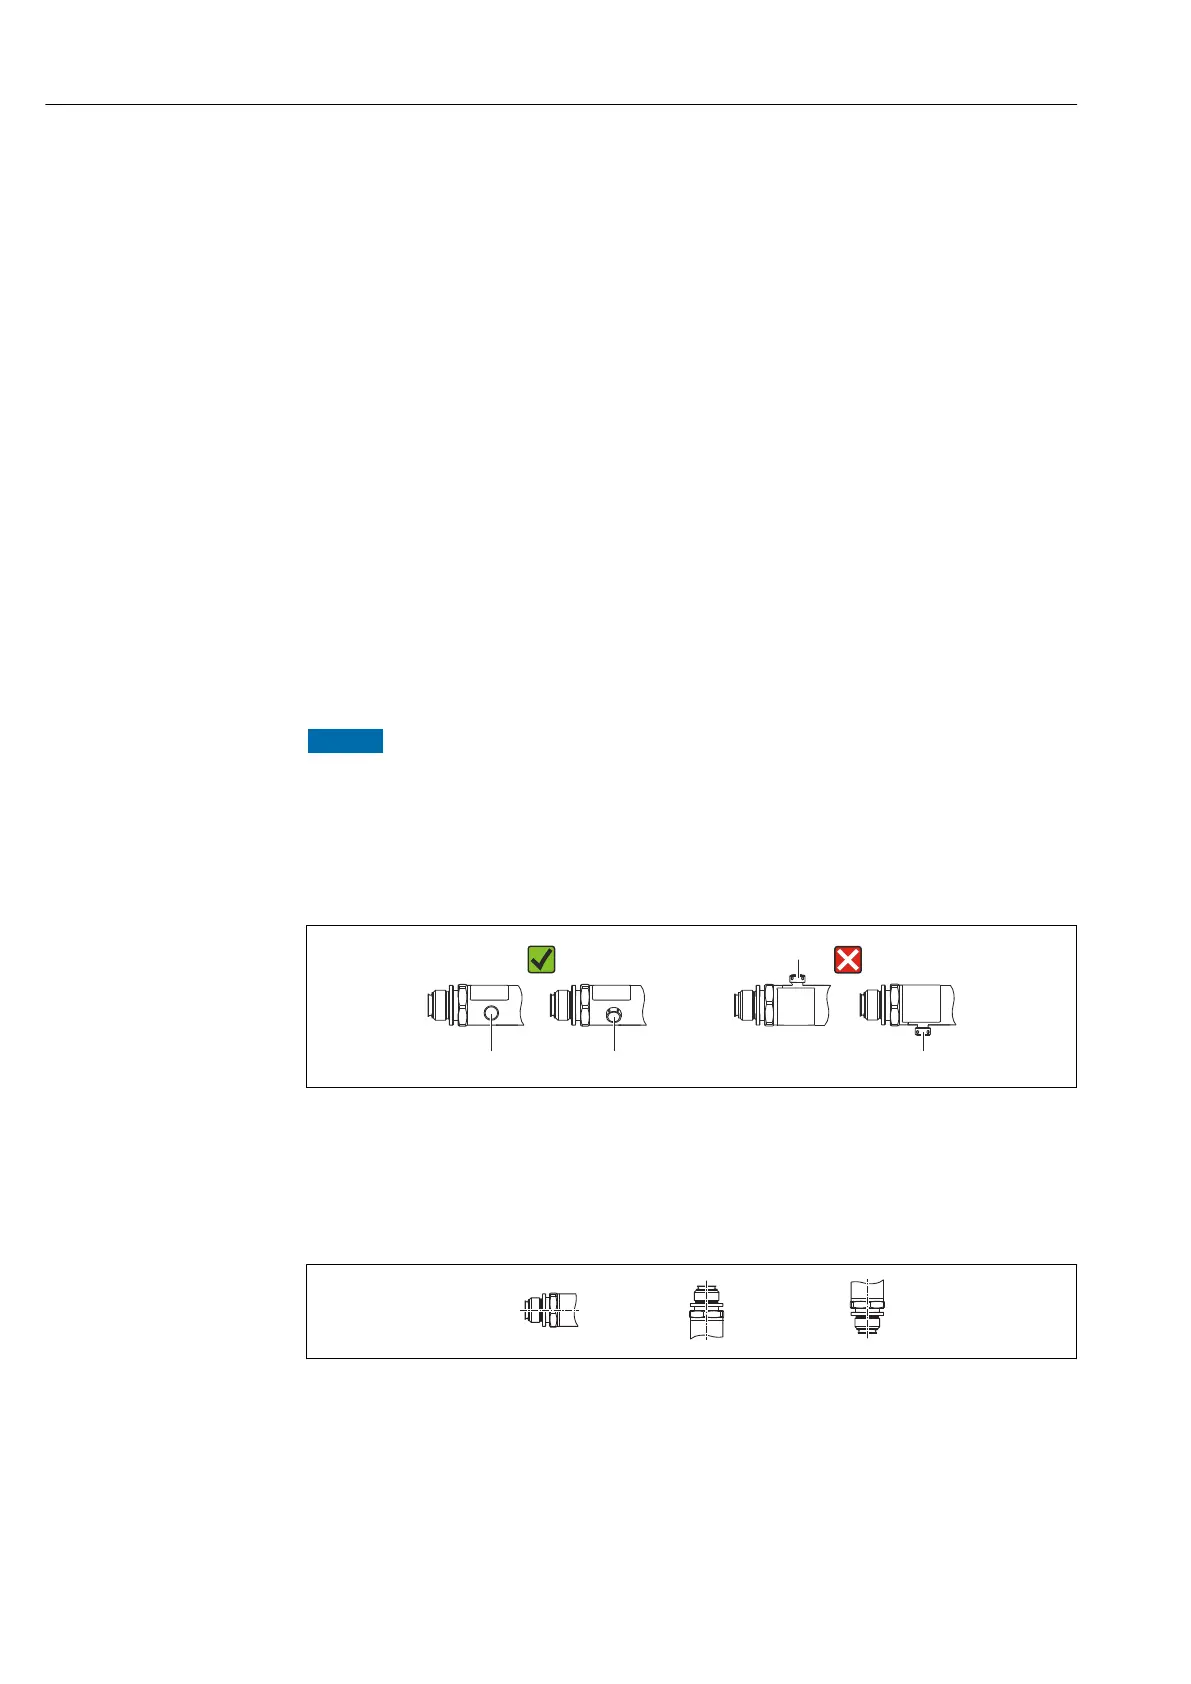
• The following instruction applies for devices with a gauge pressure sensor and M12 plug
or valve plug:
NOTICE
If a heated device is cooled during the cleaning process (e.g. by cold water), a vacuum
develops for a short time, whereby moisture can penetrate the sensor through the
pressure compensation element (1).
Device could be destroyed!
‣
In this case, mount the device with the pressure compensation element (1) pointing
diagonally downwards where possible or to the side.
A0022252
5.3 Influence of the installation position
Any orientation is possible. However, the orientation may cause a zero point shift i.e. the
measured value does not show zero when the vessel is empty or partially full.
A0024708