Page 22
Schedule
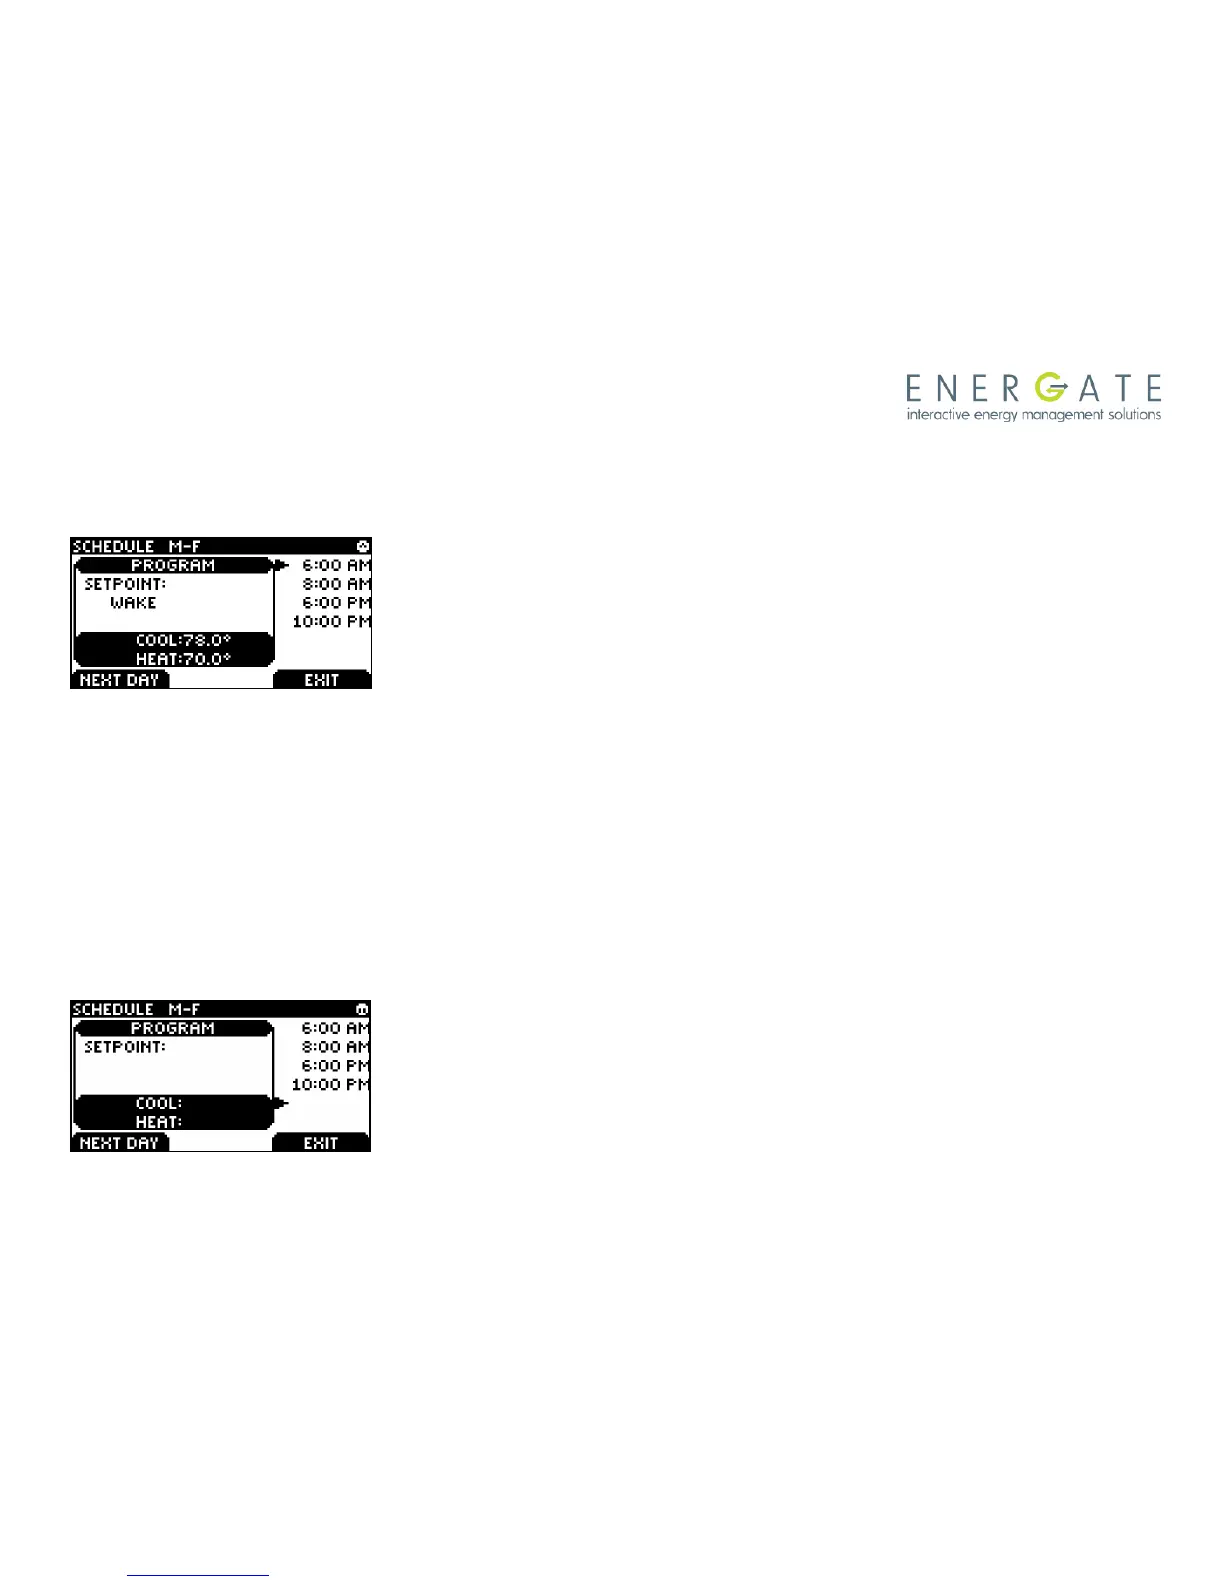
The SCHEDULE determines when a SETPOINT such as WAKE begins. Only the start times are
defined; the SETPOINT ends at the start of the next SETPOINT.
From the ADVANCED SCHEDULE menu, choose the menu item
SCHEDULE and press the MENU / SELECT button to view the
SCHEDULE screen. The PROGRAM window displays the
SETPOINT associated with the start time on the right. Adjust the
start time by pressing the MENU / SELECT button and SCROLLING
through the time. Press SAVE CHANGES. Press the MENU /
SELECT button to move inside the PROGRAM window. Here the
SETPOINT can be SCROLLED to choose the name of a different
SETPOINT. Press the MENU / SELECT button again to return to the
start times on the right.
Once you finished programming the schedule for a day, press NEXT
DAY to continue with the following day.
To delete a start time, SCROLL to the start time, press the MENU / SELECT button and the
selected start time will be underlined. Press again the MENU / SELECT button, which will cause the
corresponding SETPOINT to be underlined too. Press any of the SCROLL buttons until the screen
shows a blank SETPOINT. This deletes the start time.
To add a new start time (you can have up to 6 scheduled start
times), SCROLL to a blank row, SELECT it, and SCROLL to an
appropriate SETPOINT. Press MENU / SELECT to select it and to
go back to the start times. Change the start time to the desired one
and then press SAVE CHANGES.