6
Enertech Global IOM, XT Models
Pre-Installation
Special care should be taken in locating the
geothermal unit. Installation location chosen should
include adequate service clearance around
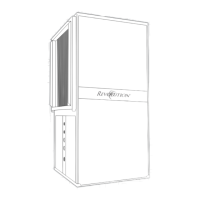
the unit. All vertical units should be placed on a
formed plastic air pad, or a high density, closed
cell polystyrene pad
slightly larger than the base of
the unit. Flex connectors should also be installed in
between the ductwork and the unit. All units should
be located in an indoor area where the ambient
temperature will remain above 55°F and should be
located in a way that piping and ductwork or other
permanently installed xtures do not have to be
removed for servicing and lter replacement.
Pre-Installation Steps
1. Compare the electrical data on the unit
nameplate with packing slip and ordering
information to verify that the correct unit has
been shipped.
2. Remove any packaging used to support or hold
the blower during shipping. Remove and discard
the blower motor armature shaft shipping
bracket from the rear of the blower.
3. Inspect all electrical connections
and wires. Connections must be clean and tight
at the terminals, and wires should not touch any
sharp edges or copper pipe.
4. Verify that all refrigerant tubing is free of dents
and kinks. Refrigerant tubing should not be
touching other unit components.
5. Before unit start-up, read all manuals and
become familiar with unit components and
operation. Thoroughly check the unit before
operating.
6. Determine discharge and return air patterns
prior to unit assembly and installation.
Section 2: Installation Introduction
Components
Master Contactor: Energizes Compressor and
optional Hydronic Pump and/or Desuperheater
package.
Logic Board: Logic Board operates the compressor
and protects unit by locking out when safety
switches are engaged. It also provides fault
indicator(s).
Terminal Strip: Provides connection to the thermostat
or other accessories to the low voltage circuit.
Transformer: Converts incoming (source) voltage to
24V AC.
Low Voltage Breaker: Attached directly to
transformer, protects the transformer and low
voltage circuit.
Reversing Valve: Controls the cycle of the
refrigerant system (heating or cooling). Energized in
cooling mode.
High Pressure Switch: Protects the refrigerant system
from high refrigerant pressure, by locking unit out if
pressure exceeds setting.
Low Pressure Switch: Protects the refrigerant system
from low suction pressure, if suction pressure falls
below setting.
Flow Switch (Freeze Protection Device): Protects the
water heat exchanger from freezing, by shutting
down compressor if water ow decreases.
Electric Heater: Provides auxiliary heat during cold
temperatures and provides electric backup if unit
malfunctions.
Blower Motor (ECM): ECM (Electronically
Commtated Motor) for variable fan speeds.
Compressor (Copeland Scroll): Pumps refrigerant
through the heat exchangers and pressurizes the
refrigerant, which increases the temperature of the
refrigerant.