21
IOM, XT Models Enertech Global
8. It may be necessary to add some water into
the reservoir to keep the water level above the
return tee so that the solution does not foam.
9. The system must be run for 3 to 4 hours to mix the
antifreeze and water in the reservoir. The uid
will not mix inside the loop.
10. Check the antifreeze level every so often to
insure that the proper amount was added to the
system (see antifreeze charging section).
Step 4: Final Pressurization of System
Once all of the air and debris has been removed,
and the antifreeze has been added and mixed, the
system is ready for nal pressurization.
1. Turn one of the 3-way valves so that it is open
to all 3 ports, the unit, loop, and ush port. Turn
the other valve so it is only open to the loop and
ush port (pressure is also applied to the hose kit
in this arrangement).
2. Turn the ush cart pump on and allow the system
to start circulating.
3. With the pump running, turn the return line ball
valve to the off position on the ush cart, “dead
heading” the pump.
4. There should be a maximum of 1” to 2” inches of
drop in the water level in the reservoir. This only
takes about 3-5 seconds.
5. Next, turn the supply line ball valve to the off
position on the ush cart (isolates the ow center
from the ush cart).
6. Now that the system is isolated from the reservoir
the pump can be turned off. Do not open the
main ush cart ball valves yet.
7. Connect the water supply back to the discharge
line hose connection, and open the ball valve.
Turn on the water supply and leave it on for 20 to
30 minutes. This will stretch the pipe properly to
insure that the system will not have a “at” loop
during cooling operation.
8. Once the loop is pressured (recommended
pressure on initial start up is 50 to 70 psi), turn
the water supply off. Turn off the discharge line
ball valve, and disconnect the water supply.
Maximum pressure should never exceed 100 psi
under any circumstance!
9. Turn the 3-way valves on the ow center back
to the normal operation mode, which closes the
ush port connections.
10. Open the ball valves on the ush cart to relieve
pressure on the hoses. Disconnect the hoses from
the ow center.
Note: Pressurized ow centers and Grundfos UP
series pumps need a minimum of 3psi on the suction
side of the pump to operate. Maximum operating
pressure is 100 psi.
Loop static pressure will uctuate with the seasons.
Pressures will be higher in the winter months than
during the summer months. In the cooling mode
the heat pump is rejecting heat, which relaxes
the pipe. This uctuation is normal and needs to
be considered when charging and pressuring the
system initially. Typical operating pressures of an
earth loop are 15 to 50 psi.
Note - Burping pump(s): On ow center initial start
up, the pumps must be bled of air. Start the system
and remove the bleed screw from the back side of
the pump(s). This allows any trapped air to bleed
out. It also oods the pump shaft, and keeps the
pump(s) cool. Failure to do this could result in
premature pump failure.
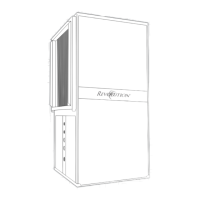
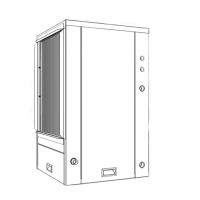
Typical Non-Pressurized Flow Center
Installation
Standing column ow centers are designed to
operate with no static pressure on the earth loop.
The design is such that the column of water in the
ow center is enough pressure to prime the pumps
for proper system operation and pump reliability.
The ow center does have a cap/seal, so it is still a
closed system, where the uid will not evaporate. If
the earth loop header is external, the loop system will
still need to be ushed with a purge cart. The non-
pressurized ow center needs to be isolated from the
ush cart during ushing because the ow center is
not designed to handle pressure. Since this is a non-
pressurized system, the interior piping can incorporate
all the above-mentioned pipe material options (see
interior piping), including PVC. The ow center can
be mounted to the wall with the included bracket
or mounted on the oor as long as it is properly
supported.
Section 5: Unit Piping Installation