SOLUTIONS
Page 23
Owner’s Manual
3. Plug the other end of the cable into the appropriate USB or Serial
port on your PC.
4. Run the Communication program and follow the instructions
shown on the computer screen.
Remote Monitoring & Modem Setup
Office personel using their modem equipped PC can call the phone
number of the site and connect to the
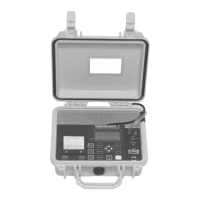
Omniguard 4
through its
optional External Modem.The modem plugs into the SERIAL port
and requires a standard RJ11 phone plug and a working telephone
line. Remote off-site monitoring of
Omniguard 4
is supported along
with remote job log transfers.
Caution: Transferring Job Logs to the PC via
modem may take up to 5 minutes (depending on
the modem speed and the size of the Job Logs
being transferred). The Omniguard 4 is not actively
monitoring during the log transfer. Once the
transfer is complete, the unit resumes monitoring
the pressure.
The external modem setup should be tested and its proper operation
confirmed before leaving the job site. Before performing the modem
test, use the Modem Setup menu item to configure the Omniguard
4 to work with the external modem you are using.
To configure and test the Modem setup --
1. Plug the modem cable into the SERIAL port and modem.
2. Plug the phone cable into the modem and a working telephone
line RJ11 phone jack. Turn the modem on.
3. Press MENU to view the Main Menu.
4. Highlight MODEM SETUP using ▲/▼ and press SELECT to view
or change the settings.
5. Press ▲/▼ to change the Init Command setting if necessary.
6. Press
/
to move to Dialing Prefix and change if necessary.
The Dialing Prefix should be set to None unless it is needed to
reach an outside line.
7. Press
/
to move to Test Modem and then press SELECT to
test the modem settings. The testing will start and its status will
be displayed on the screen. If an error message appears, a
suggested solution will also be made.
Testing: The Omniguard 4 will attempt to call a
special Test phone number set up by Engineering
Solutions. It will connect with a PC and confirm
the modem is operating correctly.
8. Press SAVE to save the settings and return to the Main Menu.
Pressing the
EXIT
key will return you to the Main Menu without
saving the updated settings.