roubleshooting with LED Error Indications 59
.
Table 3-20. Dot missing occur and it is not recovered with CL
Step
No.
Detail phenomenon Check point Remedy
2
In the CL sequence,
ink is ejected to the
Waste ink pad (this
means pump unit & cap
unit are working
correctly). But, the dot
missing is not solved at
the specific nozzles
even if the several CLs
are performed.
1. Check if the segment in
the nozzle check patter
is reduced every CL &
Nozzle check pattern
printing.
2. Check if any damage is
observed on the Head
FFC.
1. Replace the I/C with new
onein theI/Creplacement
sequence.
2. Replace the Head FFC
with the new one.
3. Replace the printhead
with new one.
3
In the CL sequence, ink
is ejected to the Waste
inkpad.But,dot
missingisoccurredon
all nozzlein theprinting
and is not solved in the
several CLs.
1. Check if the Head FFC
is connected to the CN8
and CN9 on the Main
boardorHeadFFC.
1. Connect the Head FFC
securely to the CN8 and
CN9 on the Main board or
Printhead.
2. Replace the Printhead
with new one.
3. Replace the Main board
with new one.
Table 3-21. Print quality is not good
Step
No.
Detail phenomenon Check point Remedy
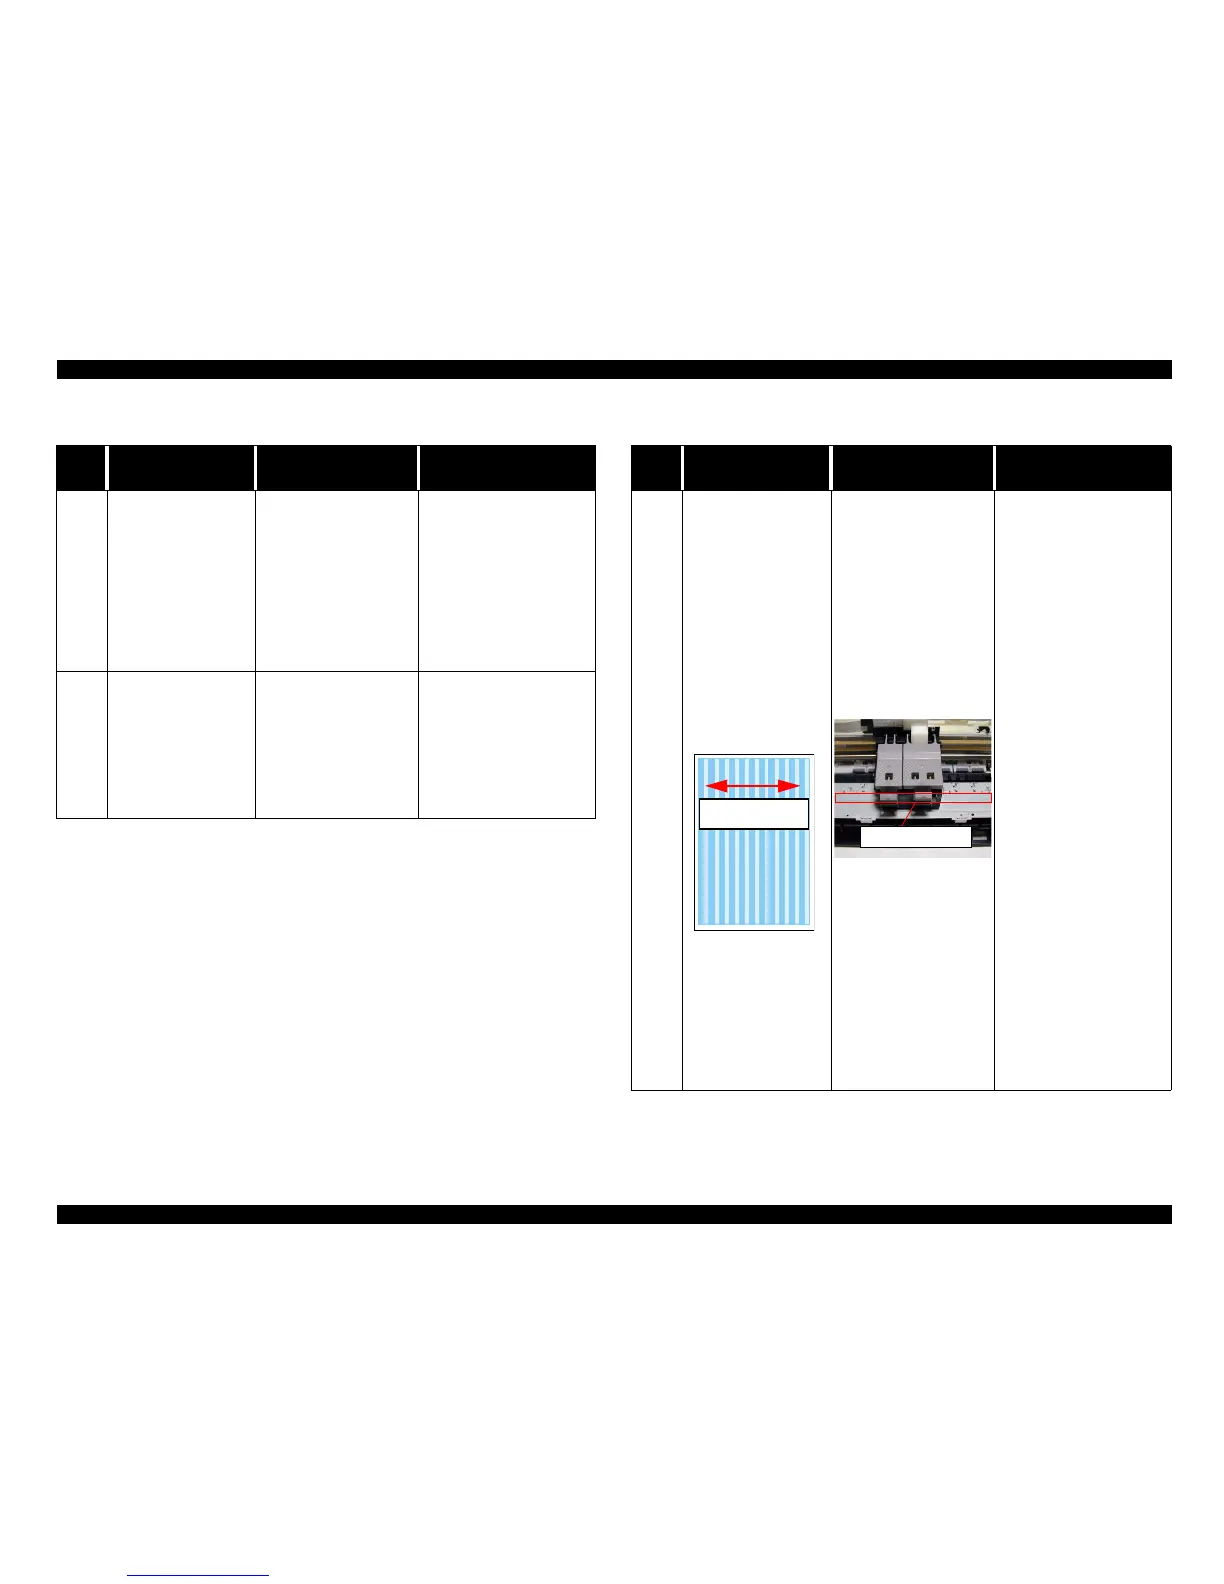
1
Vertical banding is
appearedagainstthe CR
movement direction.
Andit looks like uneven
printing.
1. Check if each segment
is printed correctly in
the nozzle check
pattern.
2. Check if the surface of
the CR guide shaft dose
not have any sever
stain.
3. Check if the surface of
the CR sliding portion
on the Paperejectframe
has enough oil.
4. Check if the CR guide
shaftis assembledinthe
correct portion
securely.
5. Check if the surface of
the CR guide shaft is
flat.
6. Check if the surface of
the Paper eject frame is
flat.
1. Perform the CL and check
the nozzle check pattern.
2. Clean the surface of the
CR guide shaft with the
dry soft cloth and
lubricate G-55 inside the
CR guide shaft.
3. Clean the surface of the
CR sliding portion on the
Paper eject frame and
lubricate specific amount
of the G-26.
4. Reassemble the CR guide
shaft into the mounting
slat on the both side frame
and secure it with Rod
spring.
5. Replace the CR guide
shaft with new one.
6. Replace the Paper eject
frame with new one.
CR movement
direction
G26 lubrication
 Loading...