D
David TaylorSep 18, 2025
What to do if lines of dots are missing in printout of Epson Printer?
- EEric JohnsonSep 18, 2025
Stop printing and contact your dealer to have the print head replaced on your Epson printer.
What to do if lines of dots are missing in printout of Epson Printer?
Stop printing and contact your dealer to have the print head replaced on your Epson printer.
How to fix pale printout on Epson LQ-690II Printer?
If the printout from your Epson printer is pale, the paper-thickness lever may be set incorrectly for your paper. Adjust the lever to the appropriate setting. Also, the ribbon may be worn out, so replace the ribbon cartridge.
Why is the printout faint on my Epson Printer?
If your Epson printer's printout is faint, it might be due to an incorrect paper-thickness lever setting. Adjust it to match your paper's thickness. Another possibility is a worn-out ribbon, which would require replacing the ribbon cartridge.
Why is part of the printout missing on my Epson LQ-690II?
If parts of the printout are missing, or dots are missing in random positions on your Epson printer, the ribbon may have too much slack, be loose, or the ribbon cartridge may not be installed correctly. Remove any slack by turning the ribbon-tightening knob, or reinstall the ribbon cartridge. Another cause could be a worn-out ribbon, in which case you should replace the ribbon cartridge.
How to fix extra blank lines between lines of text on Epson Printer?
Turn off the auto line feed setting in the Epson printer’s Default Setting mode.
How to fix all text printed on the same line on Epson LQ-690II?
Turn on the auto line feed setting using the Epson printer’s Default Setting mode so that the printer automatically adds a line feed code to each carriage return.
What to do if Epson Printer cover is open?
Close the printer cover on your Epson printer. The printer will resume printing automatically.
Why is my Epson LQ-690II Printer printing too high or low on the page?
If your printing appears too high or low on the page with your Epson printer, check the paper size setting in your application or printer driver to ensure it matches the size of the paper you are using.
Why does Epson Printer paper not eject properly?
If paper isn't ejecting properly from your Epson printer, ensure the page length is within the specified range. If using continuous paper, tear off the last printed page and press the Load/Eject button. If using labels, tear off the paper entering the printer and press the LF/FF button to feed the labels forward. Check that the paper size setting in your application or printer driver matches the paper you're using. Also, check for and clear any paper jams inside the printer.
What to do if Epson LQ-690II makes noise but doesn't print?
If your Epson printer is making noise but not printing, or if printing stops abruptly, the paper-thickness lever may be set incorrectly; adjust it to match your paper's thickness. Alternatively, the ribbon might have too much slack, be loose, or the cartridge might not be installed properly. Try removing slack with the ribbon-tightening knob or reinstall the ribbon cartridge.
Manuals provided with the Epson printer, including setup, user guide, and network guide.
Explains conventions for screenshots, illustrations, and model variations in the manual.
Lists supported Windows operating systems and versions covered in the manual.
Explains the meaning and importance of warnings, cautions, and notes in the manual.
Identifies the symbol for hot parts and advises caution when touching them.
General safety advice for using the printer, including setup precautions.
Covers printer placement, ventilation, power cord, and extension cord safety.
Outlines safety procedures for cleaning and servicing the printer, including when to seek professional help.
Advises on proper handling of paper to prevent jams and damage.
Instructions for safe operation, including power cycling and print head handling.
Details limitations on using the printer for high-reliability applications and country-specific notes.
Information on ZICTA type approval for users in Zambia, directing to a website.
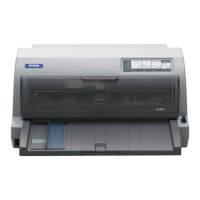
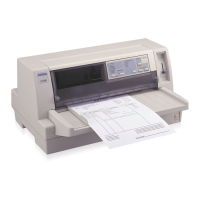
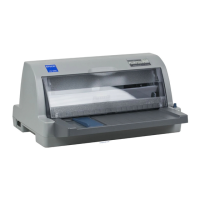
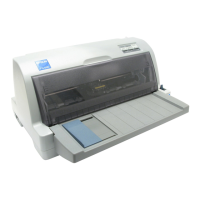
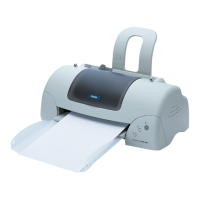
Identifies and describes the main external parts of the printer with numbered labels.
Identifies and describes the parallel, USB, and LAN ports on the printer.
Identifies and describes internal parts like ribbon cartridge, print head, paper bail, and thickness lever.
Explains the functions of buttons and indicator lights on the printer's control panel.
Details the functions of individual buttons (LF/FF, Load/Eject, Pause, Reset) and their corresponding lights.
Describes the purpose and placement of the decorative label with QR codes for quick access to procedures.
Guides on how to select printer fonts from the control panel, including bar code fonts.
Lists and explains default settings available in the Default Setting mode for printer configuration.
Details various default settings like packet mode, fonts, pitch, character tables, and buzzer.
Explains specific default settings such as Skip over perforation, Auto tear off, and Print direction.
Details software emulation modes, interface options (Parallel, USB, Auto), and bidirectional settings.
Explains settings like Auto CR, AGM, Font, Pitch, Character tables, Manual feed wait time, and Buzzer.
Provides step-by-step instructions on how to enter and change default settings via the control panel.
Explains how to restrict control panel button usage using the lock-out mode.
Details the steps to change lock-out mode settings, including button functions and saving changes.
Guides on selecting paper sources and loading various paper types, including continuous and single sheets.
Details paper types (continuous, single sheets, roll paper) and their corresponding paper paths and lever positions.
Instructions on adjusting the paper-thickness lever for optimal print quality with different paper types.
Provides tables showing recommended paper-thickness lever positions for ordinary and special papers.
Instructions on how to load continuous paper using the built-in tractor unit.
Step-by-step guide for loading continuous paper with the tractor, including lever and sprocket adjustments.
Continues the steps for loading continuous paper, including sprocket cover and center support placement.
Details how to position sprockets and lock levers for proper continuous paper feeding.
Explains how to use the tear off function for continuous paper to separate printed pages.
Describes methods for removing continuous paper using the Tear Off button or auto tear off mode.
Instructions on how to load single sheets of paper into the printer.
Step-by-step guide for inserting single sheets into the sheet guide, including edge guide and paper support.
Instructions for loading multipart forms (single-sheet and continuous) and cautions for their use.
Guides on how to load single-sheet and continuous labels, including cautions and software settings.
Instructions on how to load envelopes, emphasizing proper folding and orientation for printing.
Instructions on how to load postcards for printing, similar to single sheets.
Steps to switch from continuous paper to single sheets without removing paper from the tractor.
Steps to switch from single sheets back to continuous paper, including lever and thickness lever adjustments.
Explains how to use the Micro Adjust function to precisely align the tear-off position for continuous paper.
Guides on using Micro Adjust to set the precise starting position for printing on a page.
Introduces printer driver and EPSON Status Monitor 3, their functions, and installation notes.
Details how to access the printer driver settings from within Windows applications.
Explains how to navigate and use the Paper/Quality, Layout, and other tabs in the printer driver preferences.
Guides on accessing printer driver settings via the Windows Start menu and Control Panel.
Overview of the menus (Layout, Paper/Quality, etc.) available for changing printer driver settings.
Details common printer settings like Orientation, Page Order, and Pages per Sheet.
Explains advanced settings like Draw Borders, Paper Source, Offset, Print Speed, and Print Direction.
Covers printer font settings and custom paper size configuration.
Explains EPSON Status Monitor 3, Bi-D Adjustment, and Printer Setting utilities.
Step-by-step guide for installing the EPSON Status Monitor 3 software from the CD-ROM.
Instructions for setting up EPSON Status Monitor 3, including notification and shared printer monitoring.
Describes methods to access EPSON Status Monitor 3, including taskbar icon and utility menu.
Introduces the Bi-D Adjustment utility for correcting vertical line misalignments.
Detailed steps for making Bi-D adjustments by printing and selecting alignment patterns.
Explains the Printer Setting utility for displaying, changing, and saving printer settings.
Instructions on how to change printer settings using the Printer Setting utility.
Guides on how to set up the printer server to share the printer on a Windows network.
Details how to enable printer sharing, set a share name, and handle firewall settings for sharing.
Instructions for setting up client computers to access a shared printer, including driver installation.
Explains how to access printer properties on client computers to configure shared printer access.
Details how to add a local port for a shared printer on client computers.
Steps to install the printer driver on client machines from the CD-ROM when using different OS.
Instructions on how to cancel printing jobs from the computer via the printer icon.
Guides on uninstalling printer driver and EPSON Status Monitor 3.
Detailed steps for uninstalling printer software and utilities through the Windows Control Panel.
Guides on checking printer status using error indicators, beep patterns, and general problem-solving.
Provides an overview of common printer problems and directs users to specific sections for solutions.
Addresses issues related to power supply, such as the control panel not lighting up or the printer not working.
Covers problems like the printer not printing, noise, or abrupt stops, and connectivity issues.
Details issues related to printout quality, such as pale or faint prints, missing dots, or text on a single line.
Discusses issues with printing position, strange symbols, and vertical line alignment.
Covers problems with paper feeding, jams, and alignment of vertical lines.
Troubleshooting continuous paper not feeding, including lever and sprocket settings.
Provides solutions for difficulties encountered when using a USB connection with the printer.
Step-by-step guide for clearing paper jams when using continuous paper.
Step-by-step guide for clearing paper jams when using single sheet paper.
Instructions for removing any remaining paper after clearing a jam.
Single sheet jam removal, including lever and bail adjustments.
Further steps for removing single sheet jams, including ribbon cartridge and paper bail.
Procedures for removing paper that remains inside the printer after other jam clearing steps.
Guides on using bidirectional adjustment mode to correct misaligned vertical lines in printouts.
Details the process of performing bidirectional adjustment by comparing alignment patterns.
Instructions on how to perform a printer self test to diagnose problems.
Explains how to print a hexadecimal dump for isolating communication problems.
Information on accessing Epson's support website for drivers, FAQs, and manuals.
Details information and services available from Epson Singapore, including website and helpdesk.
Information on contacting Epson in Indonesia, including website, hotline, and service centers.
Lists Epson service center addresses, phone numbers, and email for various Indonesian cities.
Continues listing Indonesian service center details and provides a hotline for other cities.
Contact information for Epson Philippines Corporation, including customer care and corporate contacts.
Step-by-step guide for replacing the printer's ribbon cartridge.
Detailed steps for replacing the ribbon cartridge, including safety precautions for hot print heads.
Steps for removing the old ribbon cartridge and installing a new one, including securing it.
Instructions on attaching the ribbon guide and tightening the ribbon for proper operation.
Information about the optional roll paper holder and instructions for its assembly.
Step-by-step guide for assembling the roll paper holder components.
Steps for installing the assembled roll paper holder onto the printer.
Instructions on how to load roll paper into the printer using the installed roll paper holder.
Instructions on how to remove roll paper from the printer.
Details mechanical specs (method, speed, reliability) and other physical characteristics.
Covers electronic specs like interfaces, buffer, and acoustic noise.
Lists printer fonts, character tables, and international character sets.
Details character tables and international character sets available for the printer.
Covers electrical specifications and environmental conditions for operation and storage.
Details specifications for single sheet paper, including width, length, thickness, weight, and quality.
Outlines specifications for continuous paper, including width, length, copies, and thickness.
Details specifications for multipart forms, including joining methods and quality.
Provides specifications for labels, including attachment, backing sheet conditions, and wrapping parameters.
Details backing sheet width, label dimensions, weight, and thickness.
Lists specifications for envelopes (size, thickness, weight, quality) and postcards (width, length, thickness, weight, quality).
Defines the printable area and margins for single sheets and single sheet multipart forms.
Defines printable areas and margins for continuous paper, continuous labels, envelopes, postcards, and roll paper.
Lists system requirements and safety/EMC approvals for the printer.
Provides instructions for cleaning the printer's exterior and internal components safely.
Steps for safely packing and transporting the printer using original materials.
Details on securing the paper bail and attaching packing material to protect the print head.
Final steps for repacking the printer, sheet guide, ribbon cartridge, and power cord.
| Color | No |
|---|---|
| Character sets | ISO 8859-15, Italic, PC437, PC708, PC720, PC850, PC858, PC864, PCAR864, Roman 8 |
| Built-in barcodes | CODABAR (NW-7), Code 39, Code-128 Codabar Library, EAN128, EAN13, Industrial 2/5, Interleaved 2/5, Matrix 2/5, POSTNET, UPC-A, UPC-E |
| Maximum resolution | 4800 x 1200 DPI |
| Maximum number of copies | 7 copies |
| Maximum print speed (LQ) | 121 cps |
| Maximum print speed (draft) | 366 cps |
| Maximum printing width (columns) | 106 |
| Mean time between failures (MTBF) | 20000 h |
| Standard interfaces | Parallel, USB 2.0 |
| Product color | Black, White |
| Country of origin | Indonesia |
| Page description languages | - |
| Sound pressure level (printing) | 59 dB |
| Bundled software | Epson Status Monitor |
| Windows operating systems supported | Yes |
| Power consumption (standby) | 3 W |
| Power consumption (typical) | 38 W |
| Operating temperature (T-T) | 5 - 35 °C |
| Paper feed | Manual, Pull tractor |
| Label thickness range | 0.16 - 0.19 mm |
| Paper tray media types | Envelopes, Labels, Plain paper, Roll |
| Single sheet thickness range | 0.065 - 0.15 mm |
| Continuous paper thickness range | 0.065 - 0.49 mm |
| Multi-part paper thickness range | 0.12 - 0.49 mm |
| Depth | 301 mm |
|---|---|
| Width | 480 mm |
| Height | 211 mm |