EPSON AcuLaser C1900/AcuLaser C900 Revision B
Disassembly and Assembly Main Unit Disassembly 172
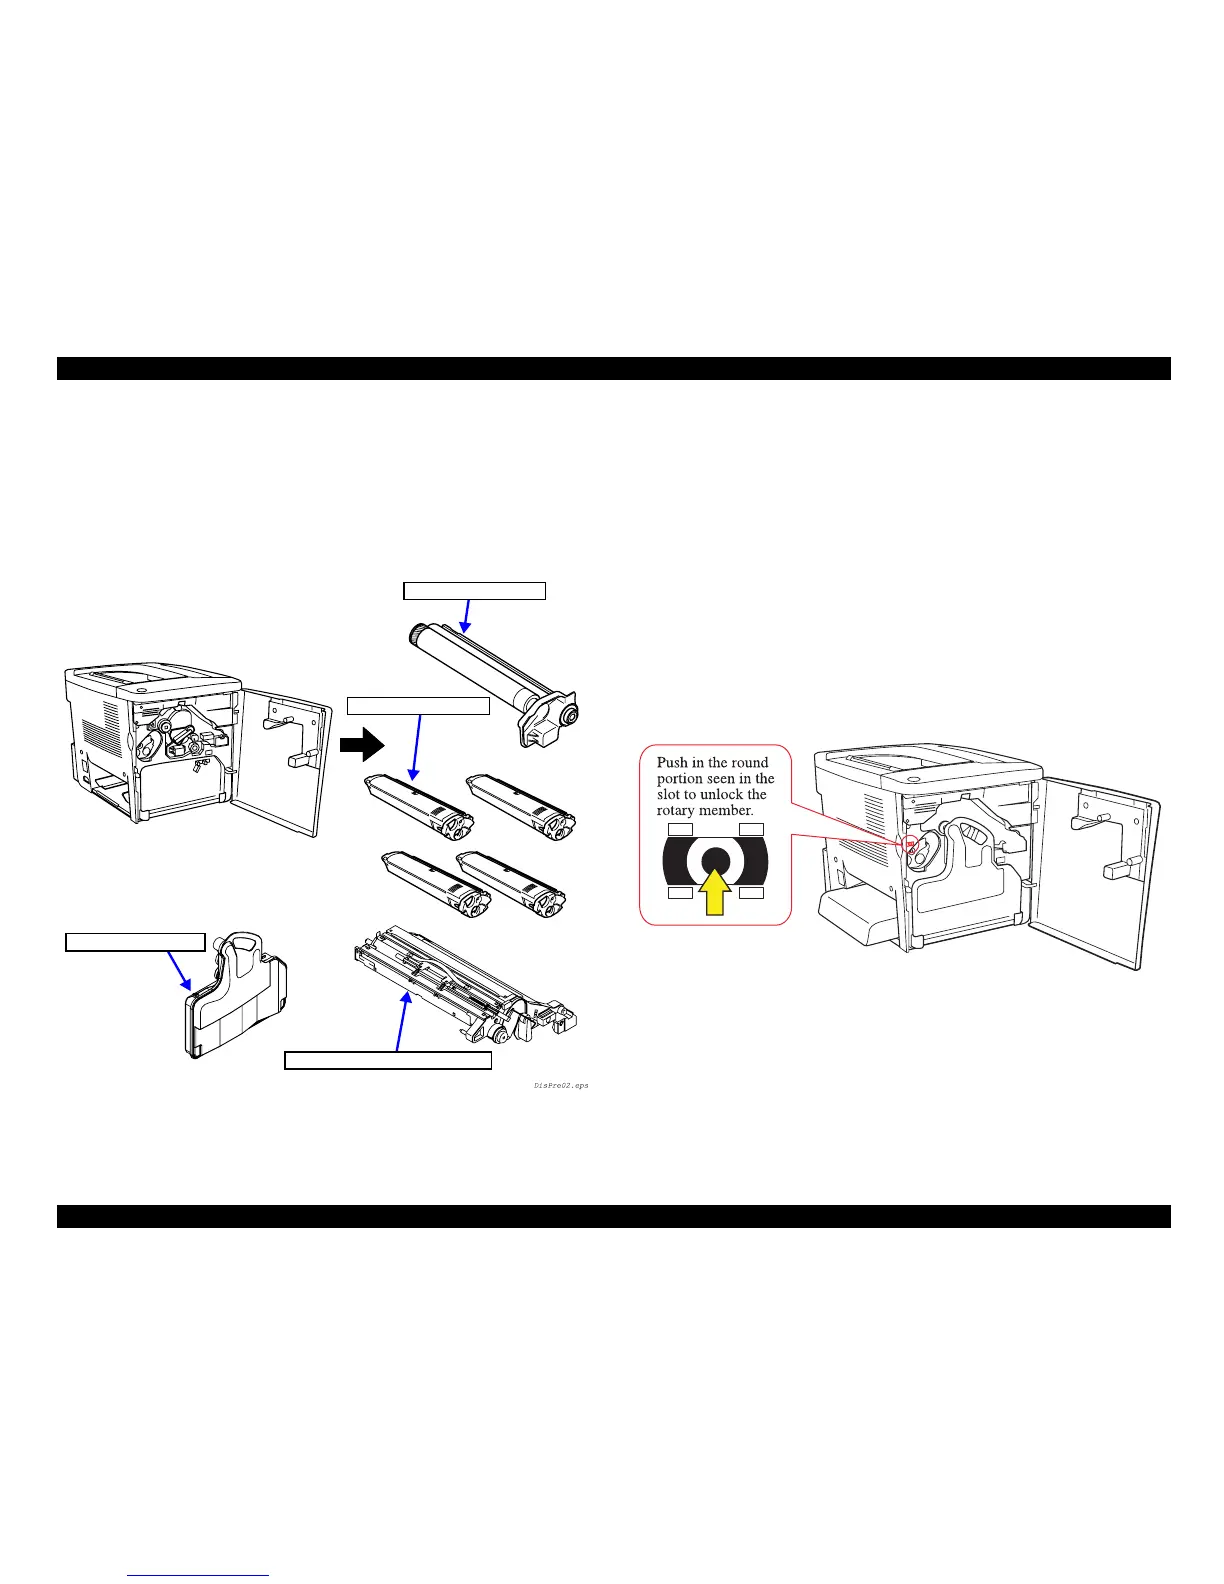
4.2.1 Before Disassembling the Printer
Be sure to remove the following units before disassembling the printer.
Waste Toner Box
Photoconductor Unit
Toner Cartridge (4 colors)
Transfer Belt Unit
Figure 4-1. Units to be Removed before Disassembling the Printer
4.2.1.1 Toner Cartridge Removal
With AcuLaser C1900/AcuLaser C900, removing the toner cartridges must be
generally performed with the printer in the ready-to-print status, since the removal and
installation of toner cartridges require control by the printer driver. On the repair site,
however, follow the following procedure:
1. Open the Front Cover.
2. Pull off the toner cartridge which is seen in the opening for mounting toner cartridges.
3. Next, with a thin screwdriver, push in the round portion seen in the slot which is
located to the left of the opening for mounting toner cartridges. At the same time, by
holding the tab on the toner cartridge, turn the rotary member counterclockwise until
the toner cartridge to be removed next is seen in the opening.
4. Release the pushed-in round portion back and pull off the toner cartridge.
5. Repeat steps 3 to 4 above until all the toner cartridges have been removed.
Photoconductor unit
Toner Cartridge × 4
Waste Toner Box
Transfer Belt Unit
 Loading...


