Maintenance 9. Replacing Arm #1
152 G3 Rev.14
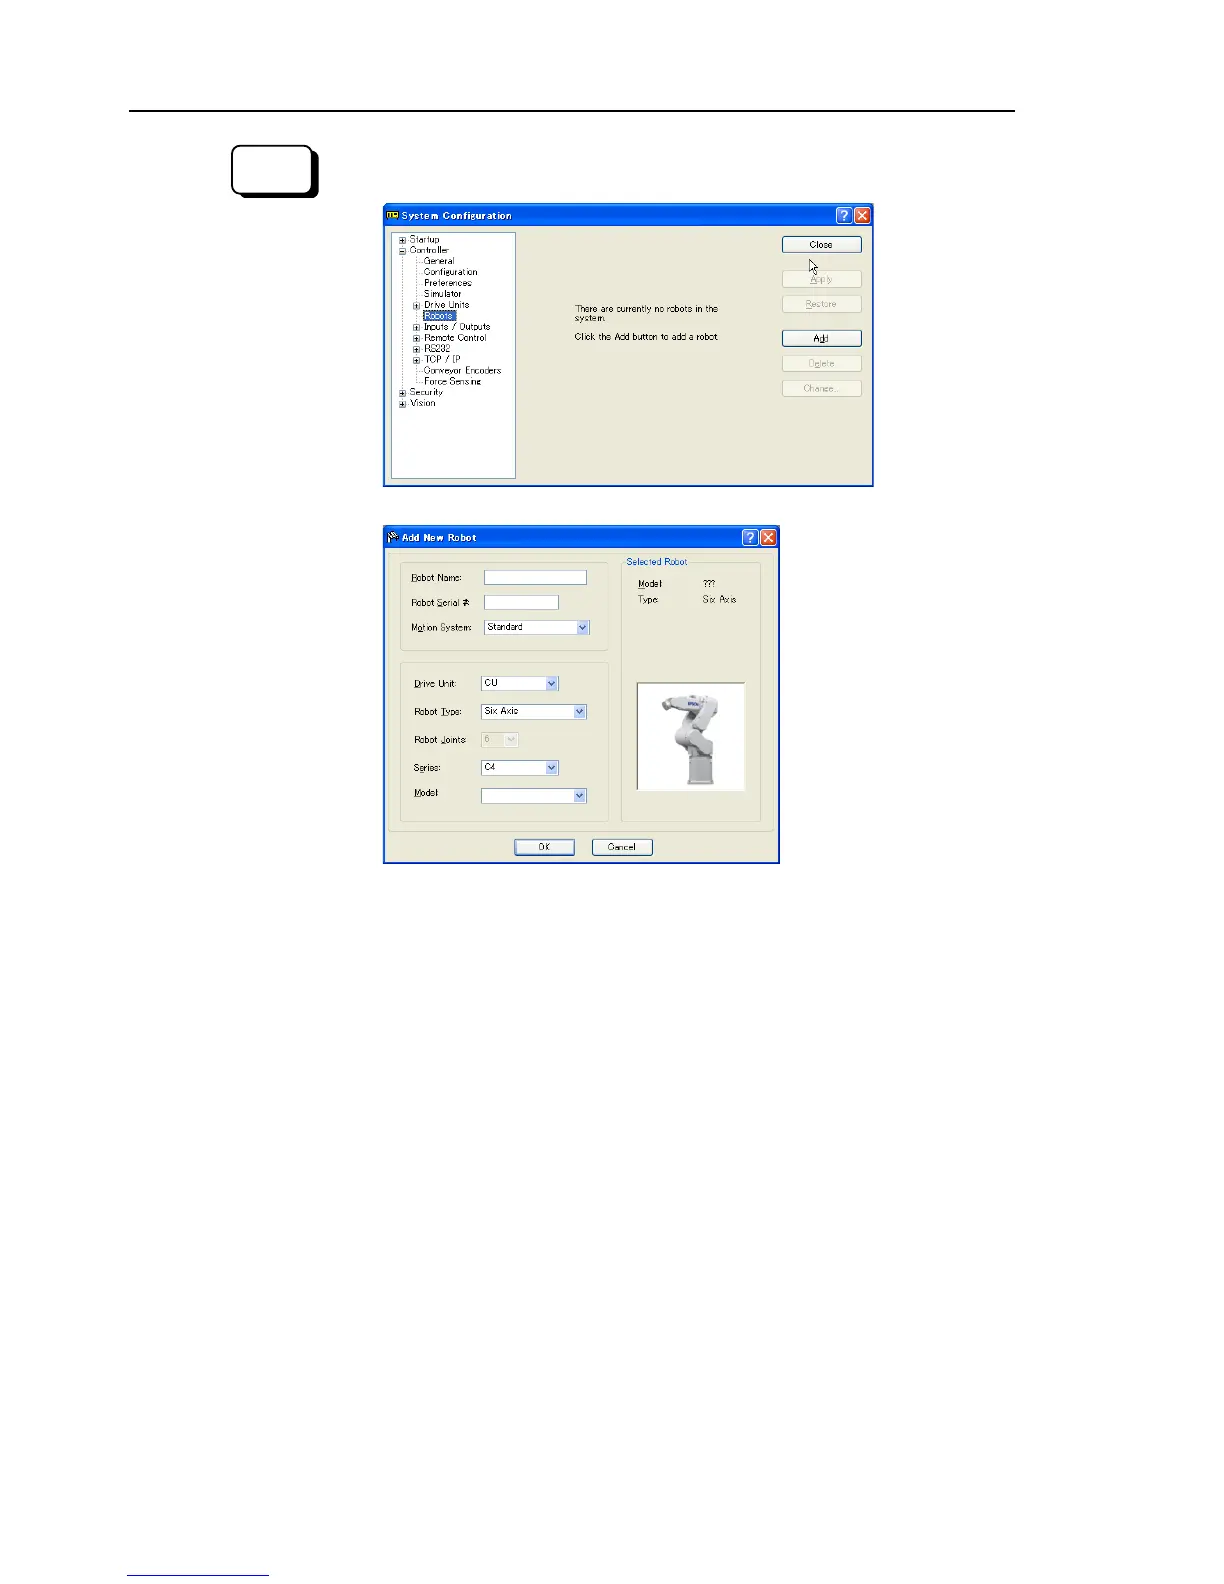
(9)-1 From the Setup Menu, select System Configuration.
(9)-2 Click [Robots] in the tree on the left.
(9)-3 Click <Add> and the following dialog box will appear.
(9)-4
Type in a name for the new manipulator and enter the serial number on the
s nameplate. Any serial number can be used, but it is
recommended that you use the number that is stamped on the manipulator.
(9)-5 Select a motion system to use from the [Motion System] dropdown list
there are no other motion systems installed, then “Standard” will already
selected.
(9)-6 Select a Drive Unit for your manipulator from the [Drive Unit] dropdown list.
(9)-7 Select a manipulator type from the [Robot type] box.
(9)-8 Select a manipulator series from the [Series] dropdown list.
(9)-9 Select a manipulator model from the [Model] dropdown list.
After you select a manipulator model, all manipulators available
motor driver currently installed in the controller will be displayed. If you use
[Dry run], all robots selected in step 9 will be shown.
-10 Click <OK> and the controller will be rebooted.
Perform the calibration of Joint
For details, refer to Maintenance: 14. Calibration.

 Loading...


