EPSON Stylus C50/C60/C61/C62 Revision C
Disassembly and Assembly Disassembly 116
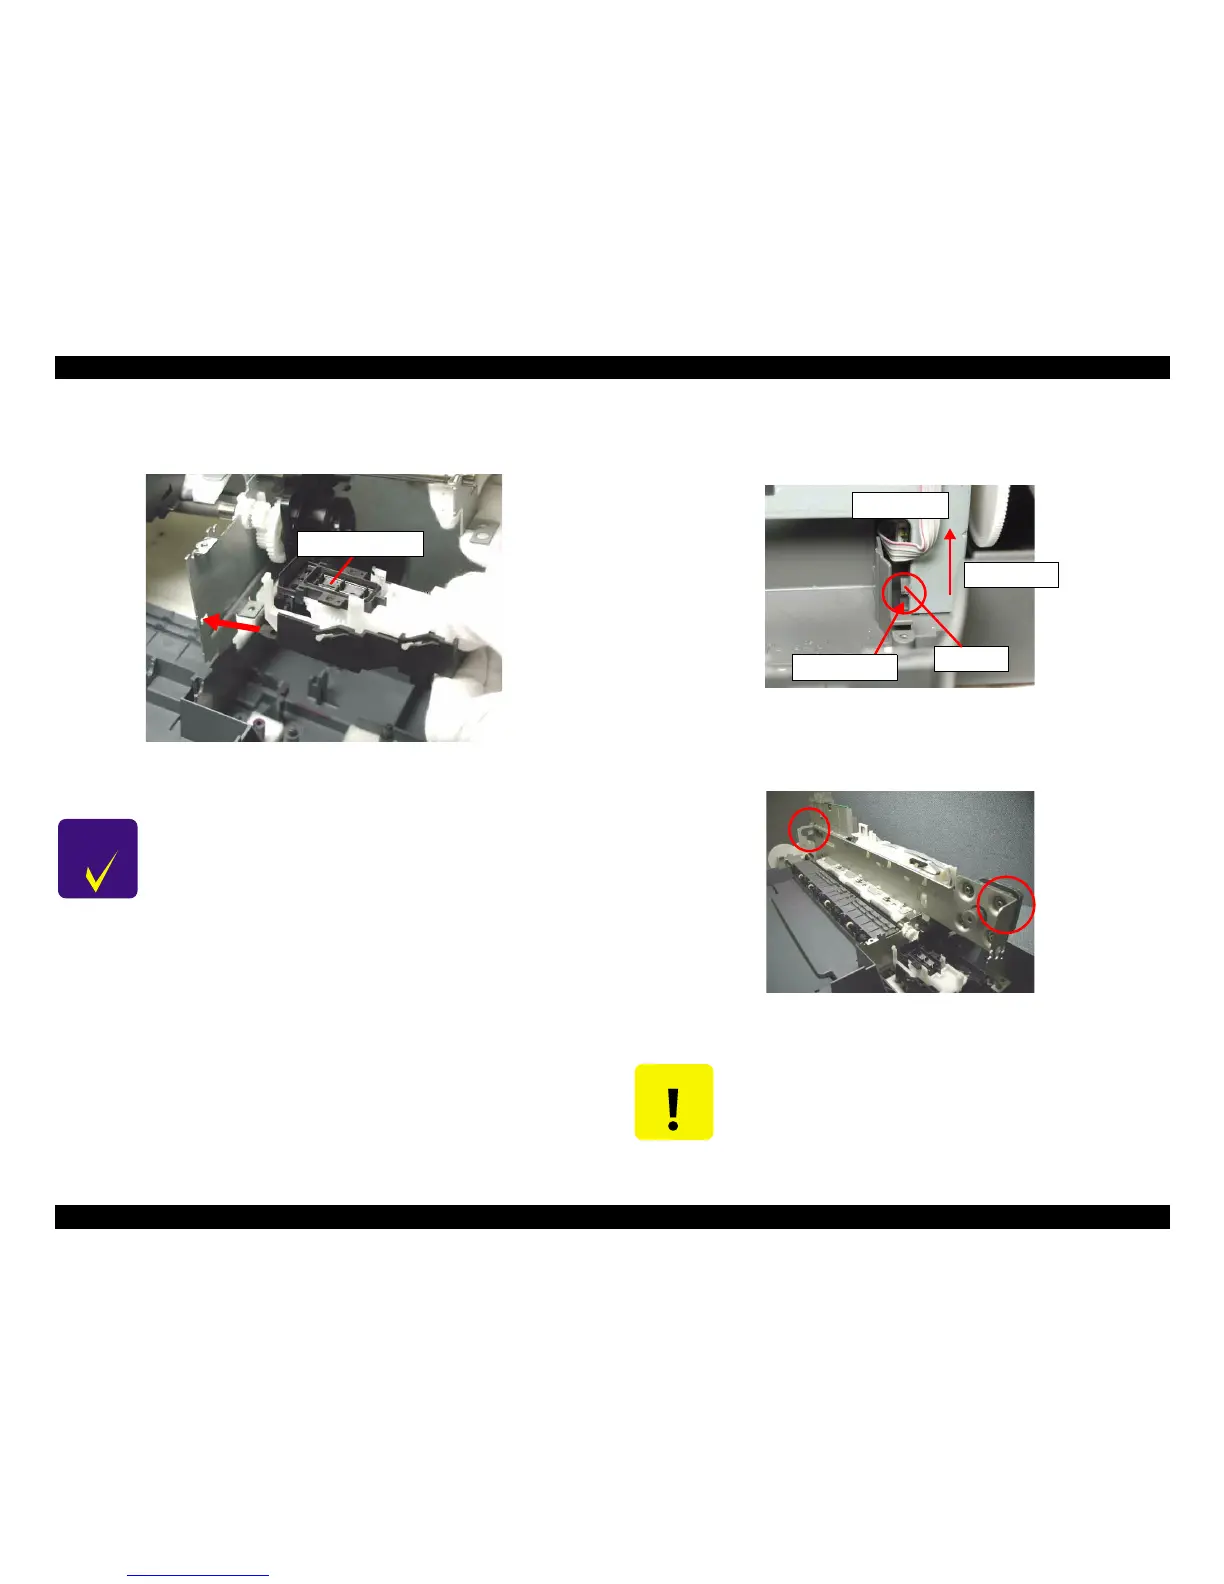
10. Insert the protrusion of the Cap unit into the cutout portion of the Main frame as
shown figure below.
Figure 4-54. Cap unit setting position
11. Lift the right side of the Printer mechanism carefully while releasing one hook for
securing the Printer mechanism to the Lower housing from the backside of the
Printer by using the tweezers.
Figure 4-55. Printer mechanism removal (2)
12. Remove the Printer mechanism by lifting it at the points shown below (In this
time, the Paper eject roller is also removed with the Printer mechanism).
Figure 4-56. Printer mechanism removal
CHECK
PO INT
Do not touch the sealing rubber portion and the cleaner head of
the Cap unit when inserting the Cap unit to the Main frame.
Cap unit
When lifting the Printer mechanism from the Lower housing, be
careful not to drip off the ink from the end (Waste drain ink pad
side) of the ink tube.
Do not remove the Printer mechanism upward by lifting it at the
unspecified position to avoid the deformation of the Main frame.
Step2)
Lift up
Hooks
Step1)
Push
Backside
 Loading...