EasyManuals Logo

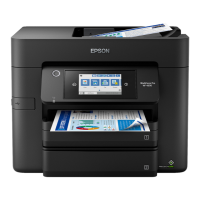
Epson WF-4830 Series User Manual

Epson WF-4830 Series
387 pages
To Next Page IconTo Next Page
To Previous Page IconTo Previous Page
Page #162 background imageLoading...
Page #162 background image
162
8. On the Driver Software Installation screen, make sure your product is listed as Ready to use. Then
click Close.
9. Do one of the following:
• Windows 7: Click and select Devices and Printers.
• Windows Vista: Click Start and select Control Panel > Hardware and Sound > Printers.
10. Make sure that an icon appears for your product's name on the network.
When you use WSD, select your product name to scan over the network.
Parent topic: Starting a Scan Using the Product Control Panel
Related references
Control Panel Scanning Options
Related topics
Placing Originals on the Product
Scanning to the Cloud
You can use the control panel to send your scanned files to a destination that you have registered with
Epson Connect.
Note: Make sure to set up your product using Epson Connect before using this feature.
1. Place your original on the product for scanning.
2. Press the home icon, if necessary.
3. Select Scan.
Table of Contents

Other manuals for Epson WF-4830 Series

Questions and Answers:

Question and Answer IconNeed help?

Do you have a question about the Epson WF-4830 Series and is the answer not in the manual?

Epson WF-4830 Series Specifications

General IconGeneral
Print TechnologyInkjet
Duplex PrintingYes
ConnectivityUSB, Ethernet, Wi-Fi, Wi-Fi Direct
Scanner TypeFlatbed, ADF
Scan Resolution1200 x 2400 dpi
Display4.3" color touchscreen
FunctionsPrint, Copy, Scan, Fax
Fax Speed33.6 Kbps
ADF Capacity50 sheets
Paper Capacity250 sheets
Paper Sizes SupportedA4, A6, Executive, 4" x 6", 5" x 7", 8" x 10"
Mobile PrintingApple AirPrint, Android Printing, Mopria Print Service
Ink CartridgesBlack, Cyan, Magenta, Yellow
Print ResolutionUp to 4800 x 2400 dpi
Max Print Speed25 ppm (black), 12 ppm (color)

Related product manuals