EasyManuals Logo

Epson WF-C20750 User Manual

Epson WF-C20750
446 pages
To Next Page IconTo Next Page
To Previous Page IconTo Previous Page
Page #268 background imageLoading...
Page #268 background image
268
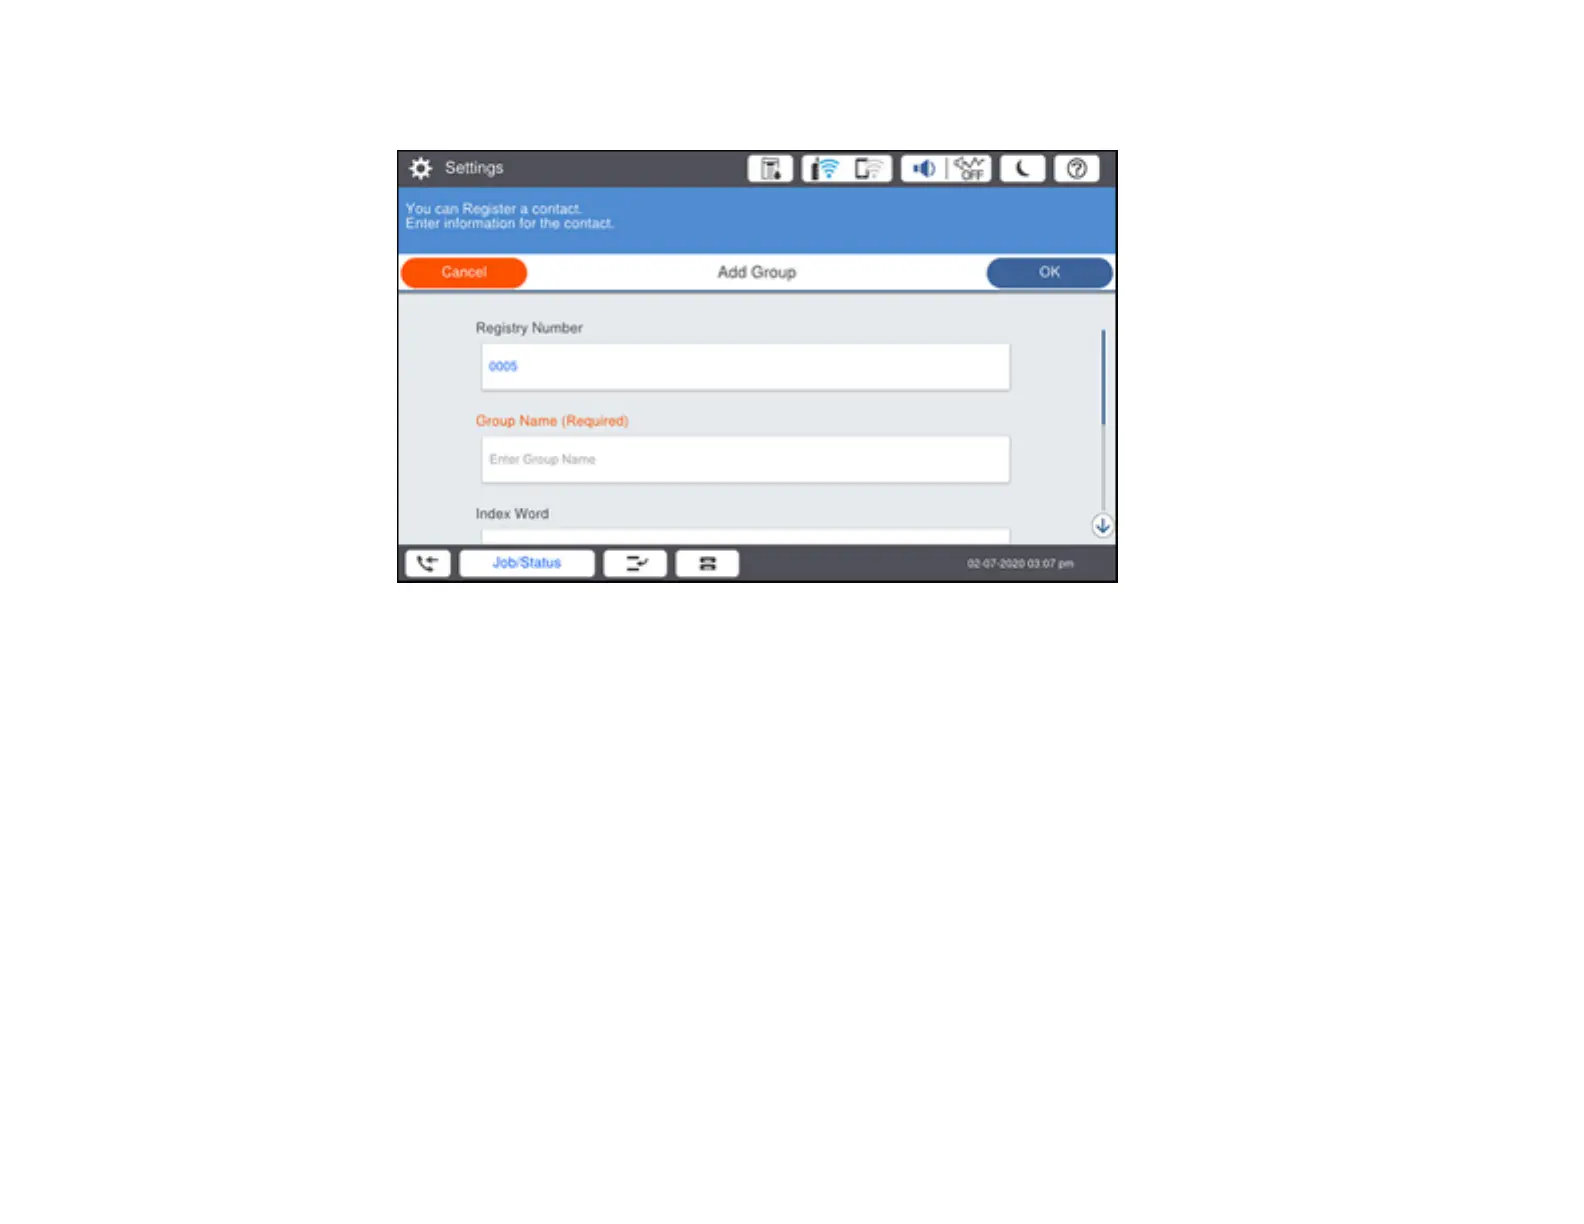
You see a screen like this:
6. Select the registry number you want to use for the group you are adding.
7. Select the Group Name field, use the displayed keyboard to enter the group name (up to 30
characters), and select OK.
8. Select the Index Word field, use the displayed keyboard to enter a word to use when searching for a
group (up to 30 characters), and select OK.
Note: This field is automatically populated after you enter the group name. This field is optional.
9. Select Contact(s) Added to the Group.
You see your contacts list.
10. Select each contact you want to include in your group.
Each selected contact is highlighted.
11. Select Close.
12. Set Assign to Frequent Use to On if you want the group to appear on the Frequent tab.
13. Select OK.

Table of Contents

Questions and Answers:

Question and Answer IconNeed help?

Do you have a question about the Epson WF-C20750 and is the answer not in the manual?

Epson WF-C20750 Specifications

General IconGeneral
CategoryAll in One Printer
Max Print Resolution4800 x 1200 dpi
Duplex PrintingYes
ConnectivityUSB, Ethernet, Wi-Fi, Wi-Fi Direct
Scanner TypeFlatbed, ADF
Max Scan Resolution600 dpi
FunctionsPrint, Copy, Scan, Fax
Fax Speed33.6 Kbps
Print TechnologyPrecisionCore
Mobile PrintingEpson Connect, Apple AirPrint, Google Cloud Print
Display4.3" touchscreen

Related product manuals