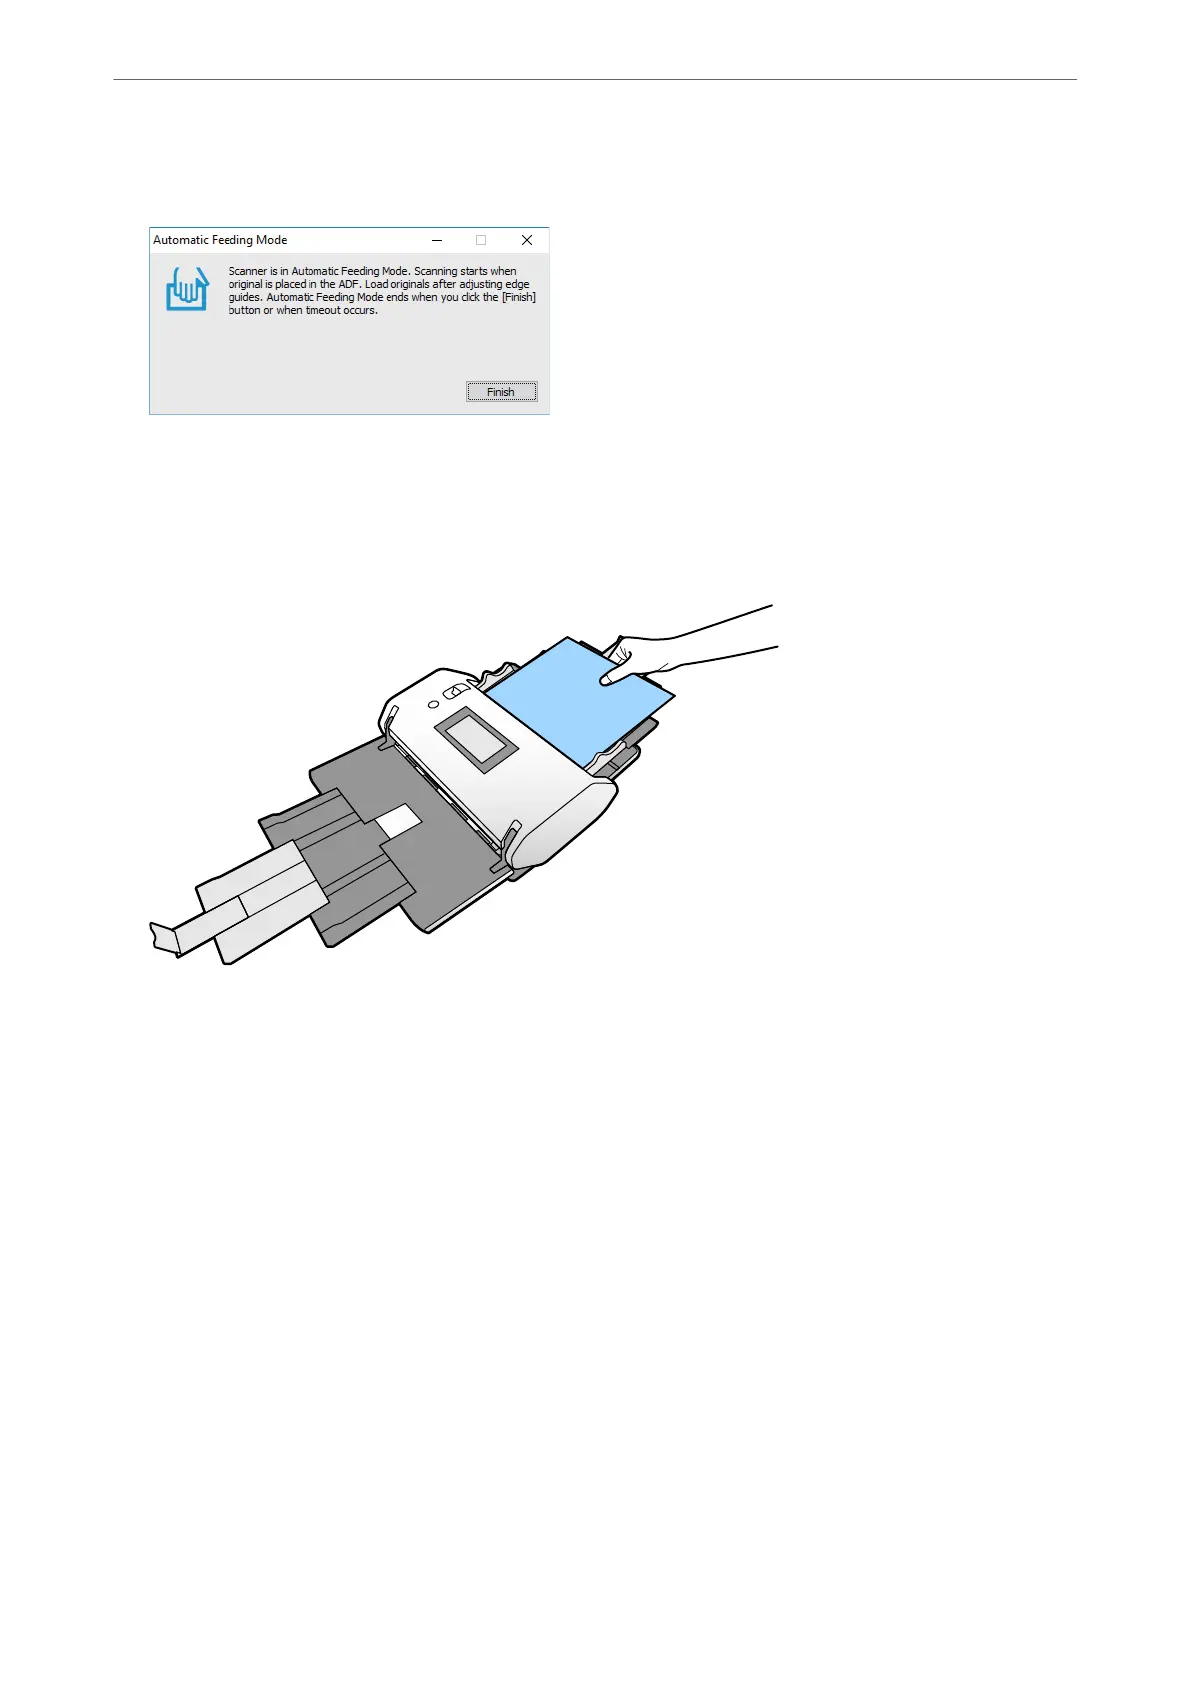
e Automatic Feeding Mode window is displayed on your computer and the scanner.
6.
Adjust the edge guides, and then place the original in the ADF.
Note:
❏ Be careful not to load the originals skewed; otherwise, the originals may be fed skewed and damaged.
❏ Be careful not to push the originals in too forcefully; otherwise, the originals could get jammed.
Scanning starts automatically.
7.
Aer scanning ends, place the next original in the ADF.
Repeat this procedure until you have scanned all originals.
8.
Aer
you have scanned all originals, exit Automatic Feeding Mode.
e scanned image is saved to the folder you specied.
Note:
❏ If the timeout is reached, Automatic Feeding Mode ends and the scanned image is saved to the folder you specied.
❏ When Glass surface dirt alert is enabled, Glass surface dirt alert operates aer Automatic Feeding Mode ends. If
dirt on the glass is detected, check any problem on the image scanned in Automatic Feeding Mode.
Related Information
& “Items Not Available in Portrait Display” on page 116
is section lists the items that are not available in portrait display.
& “Screen Orientation” on page 115
Scanning
>
Scanning by Manual Feed in Automatic Feeding Mode(Continuous)
104