P24/62 T-IM114b
Gently insert the section pins into the tabletop and slide
the section into the tabletop evenly until the locking
catches engage with an audible click. The section will
slide in easily if the weight of the section is gently
supported with both hands. Take care not to trap anything
(especially fingers) between the section and the tabletop.
Check that the section is fully inserted and the safety catches
have engaged by gently pulling on the section. Both release
buttons (items 6 and 8, Fig. 2.1) should be out when the
section has been correctly located and locked.
5.2.3 Removing a tabletop section
When removing a tabletop section (e.g. a head or leg
section) ensure that it is horizontal before removal as
this will aid later replacement (pins will be aligned with
the section). If the section is not horizontal adjust it to
horizontal before removal (see section 5.2.4).
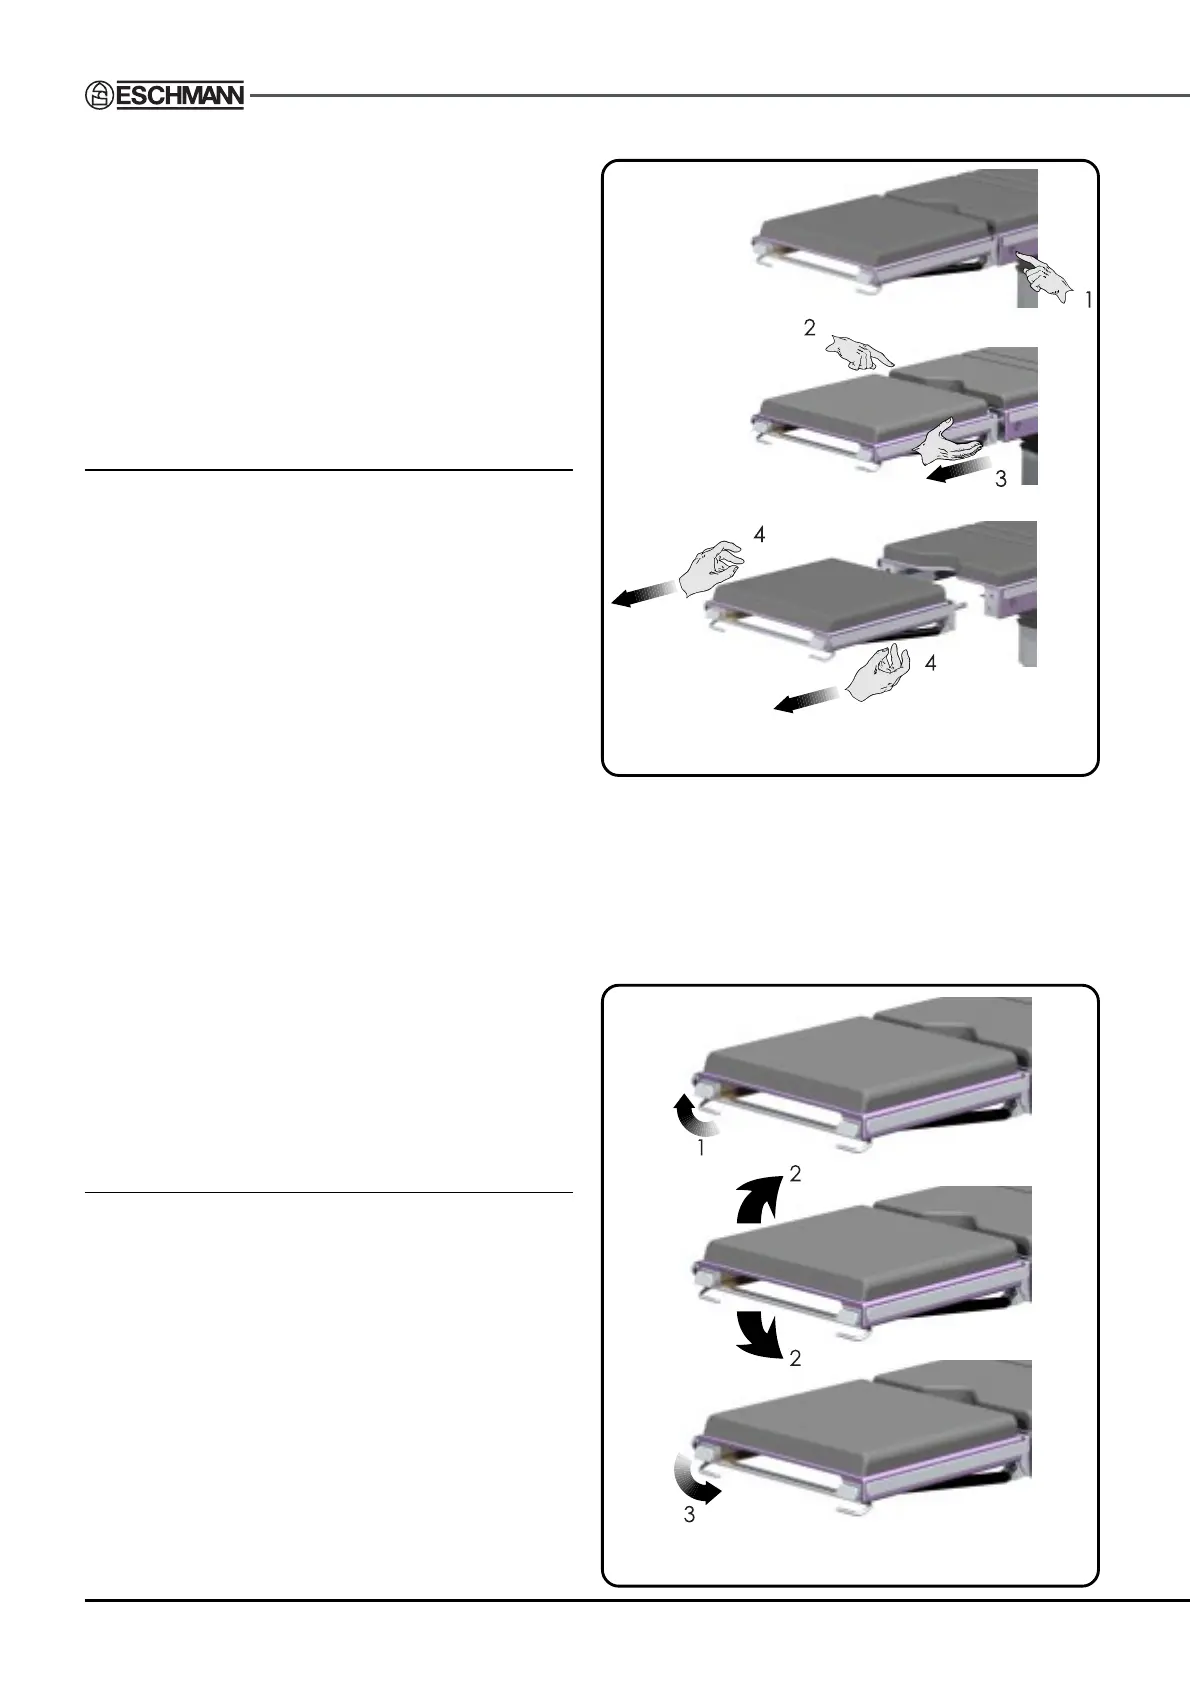
Remove the section from the tabletop by supporting the
section’s weight and pressing in the right-hand trunk
section button (viewed from end of table) as indicated by
1 in Fig. 5.8. The button will stay in when pressed correctly.
Press in and hold in the left-hand trunk section button
(viewed from end of table) as indicated by 2 in Fig. 5.8
whilst pulling the section evenly away from the fixed
section about 2 - 3cm (see 3, Fig. 5.8). When employing
two people one should press the button whilst the other
pulls the section out the 2 - 3cm. Gently supporting the
weight of the section (i.e. slightly lifting whilst pulling)
will make this action easier. Then release the left-hand
trunk section button.
Now using both hands (one on each side of the section
as shown in 4 of Fig. 5.8) continue to gently pull the section
out evenly from the trunk section until the guide pins are
free. Again gently lifting and supporting the weight of the
section will make this action easier. When employing two
people, one should hold the second button in whilst the
other pulls the section out evenly, both can then support
the weight when the pins are free.
5.2.4 Removable section adjustment
The head and leg sections are operated in the same way.
The section’s weight is supported during adjustment and
held locked in position by two gas springs (items 5 and
11, Fig. 2.1). Lowering the section’s release handle during
adjustment automatically locks the section in place.
To adjust either section (having noted the warnings at
the beginning of section 5.2) grasp the end of the section
on both sides with thumbs up and the finger tips resting
on the release handle (items 10 or 12, Fig. 2.1) underneath
the section. Whilst supporting the section in place (it may
move when the release handle is raised), gently lift the
release handle with the finger tips until the section is free
to move up or down (see 1, Fig. 5.9).
Fig. 5.8 Removing a table section
When raising the section the gas springs will assist the
movement, when lowering the section gentle pressure may
be required to overcome slight resistance of the gas
springs. Adjust the section by rotating it up or down to the
required position (see 2, Fig. 5.9). When the correct position
has been obtained release the locking bar. The section is
now locked in place automatically by the gas springs (see 3,
Fig. 5.9).
Fig. 5.9 Adjusting a head or leg section
 Loading...

