6.13 Equipotential bonding and installing other solar panels
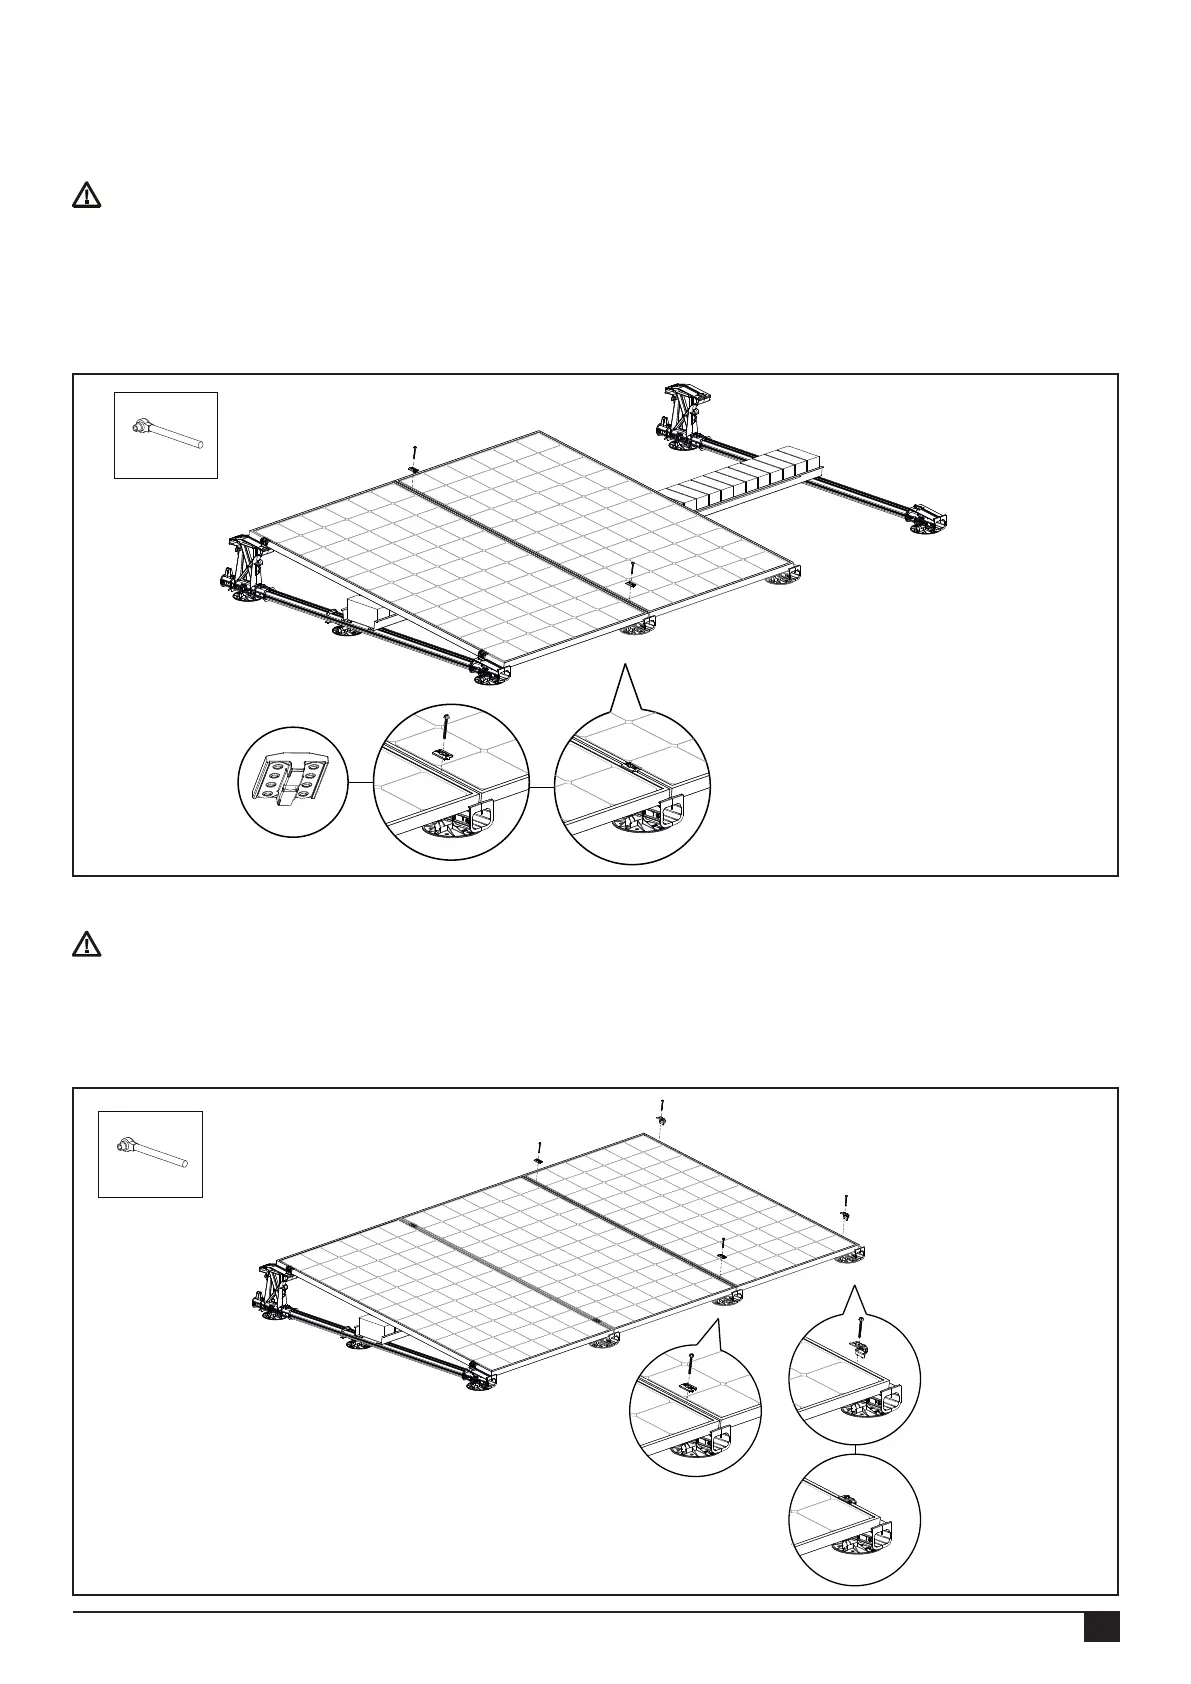
Place the second solar panel on the base elements so that it lies between the upright lugs.
Make sure that the solar panels are properly aligned. Then screw the mounting screw with a module clamp into the
mounting holes of the base elements.
The module clamp has an integrated equipotential bonding function so that the panels are equipotential bonded with each
other, after which the entire row can be equipotential bonded to the earth rail. NOTE! See schematic representation in
annex section 7.3.2
NOTE! The minimum tightening torque of the screw connection on clamps (10044xx) is 9Nm (maximum 10Nm).
Refer to your tool manual to set it to the correct torque. Repeat the above steps for the other panels located between.
17
Rev. 08.08.23 MANUAL FOR FLATFIX FUSION MOUNTING SYSTEM FOR FLAT ROOFS
Place the last solar panel of the row on the base elements so that it lies between the upright lugs.
Make sure that the solar panels are properly aligned. Then screw the mounting screw with a module clamp into the
mounting holes of the bases. Then screw the two end clamps with the mounting screw into the mounting hole. Make sure
that the solar panels are completely straight before tightening the screw!
NOTE! The minimum tightening torque of the screw connection on clamps (10044xx) is 9Nm (maximum 10Nm).
Refer to your tool manual to set it to the correct torque. Repeat the above steps for the other panels located between.