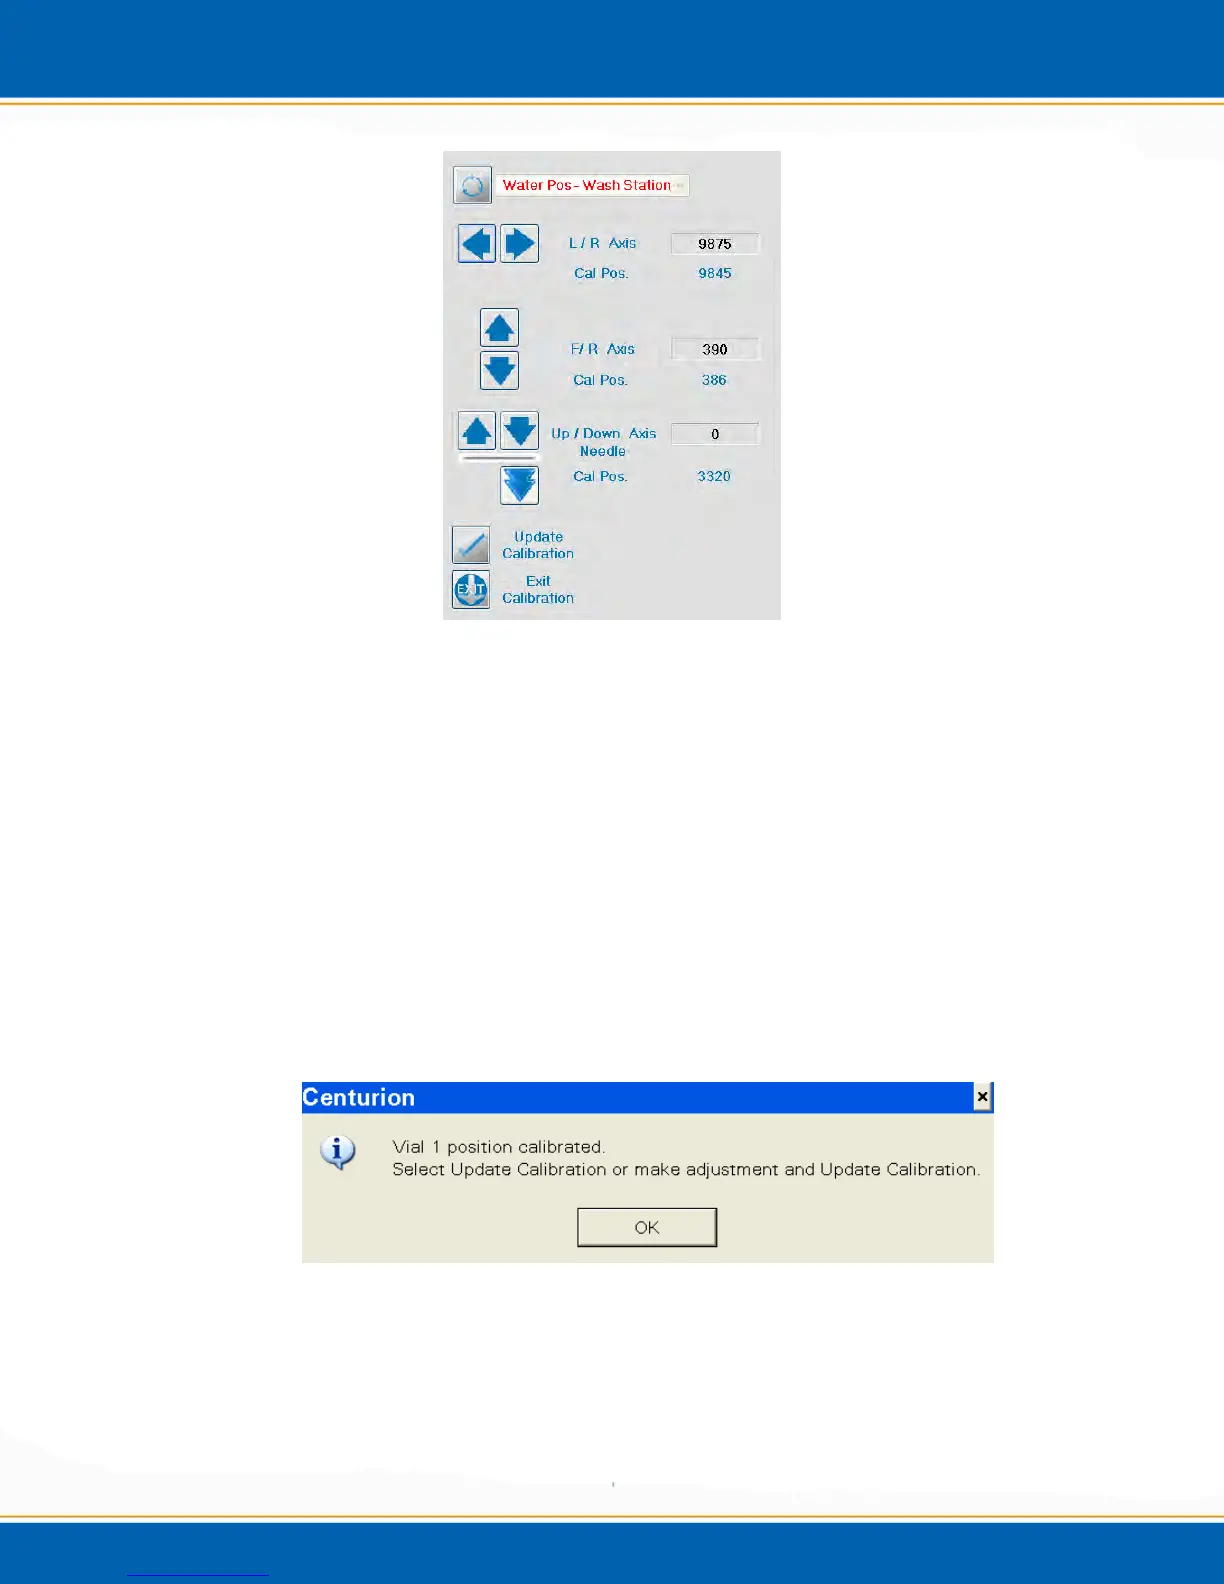
Figure 4ii: Wash Station Calibration Screen
10. The Left/Right (L/R), Front/Rear (F/R) or Up/Down arrows are to the left of the
screen. One click of the L/R or F/R arrow will move the needle 20 steps in the
corresponding direction. While clicking the Down arrow will move 100 steps and the
Up arrow will move 20 steps. (Note: 20 steps = 0.5mm). In order to move the
needle axis into the calibration position <click> on the double arrow.
11. When the needle is calibrated in the wash station, <click> Update Calibration. See
Figure 4ii.
12. When Update Calibration is clicked the software will automatically proceed to the
next step in the calibration routine.
13. The next step is Vial 1 position calibration. The needle will move to vial position 1
and the software will prompt you with a pop-up, see Figure 4jj.
Figure 4jj: Vial 1 Calibration Pop-up
14. <click> OK and the needle position over Vial 1 can be calibrated.
15. The center point of Vial 1 is based off of the center point of the wash station
calibration. If this needs to be adjusted, the position arrows can be adjusted as they