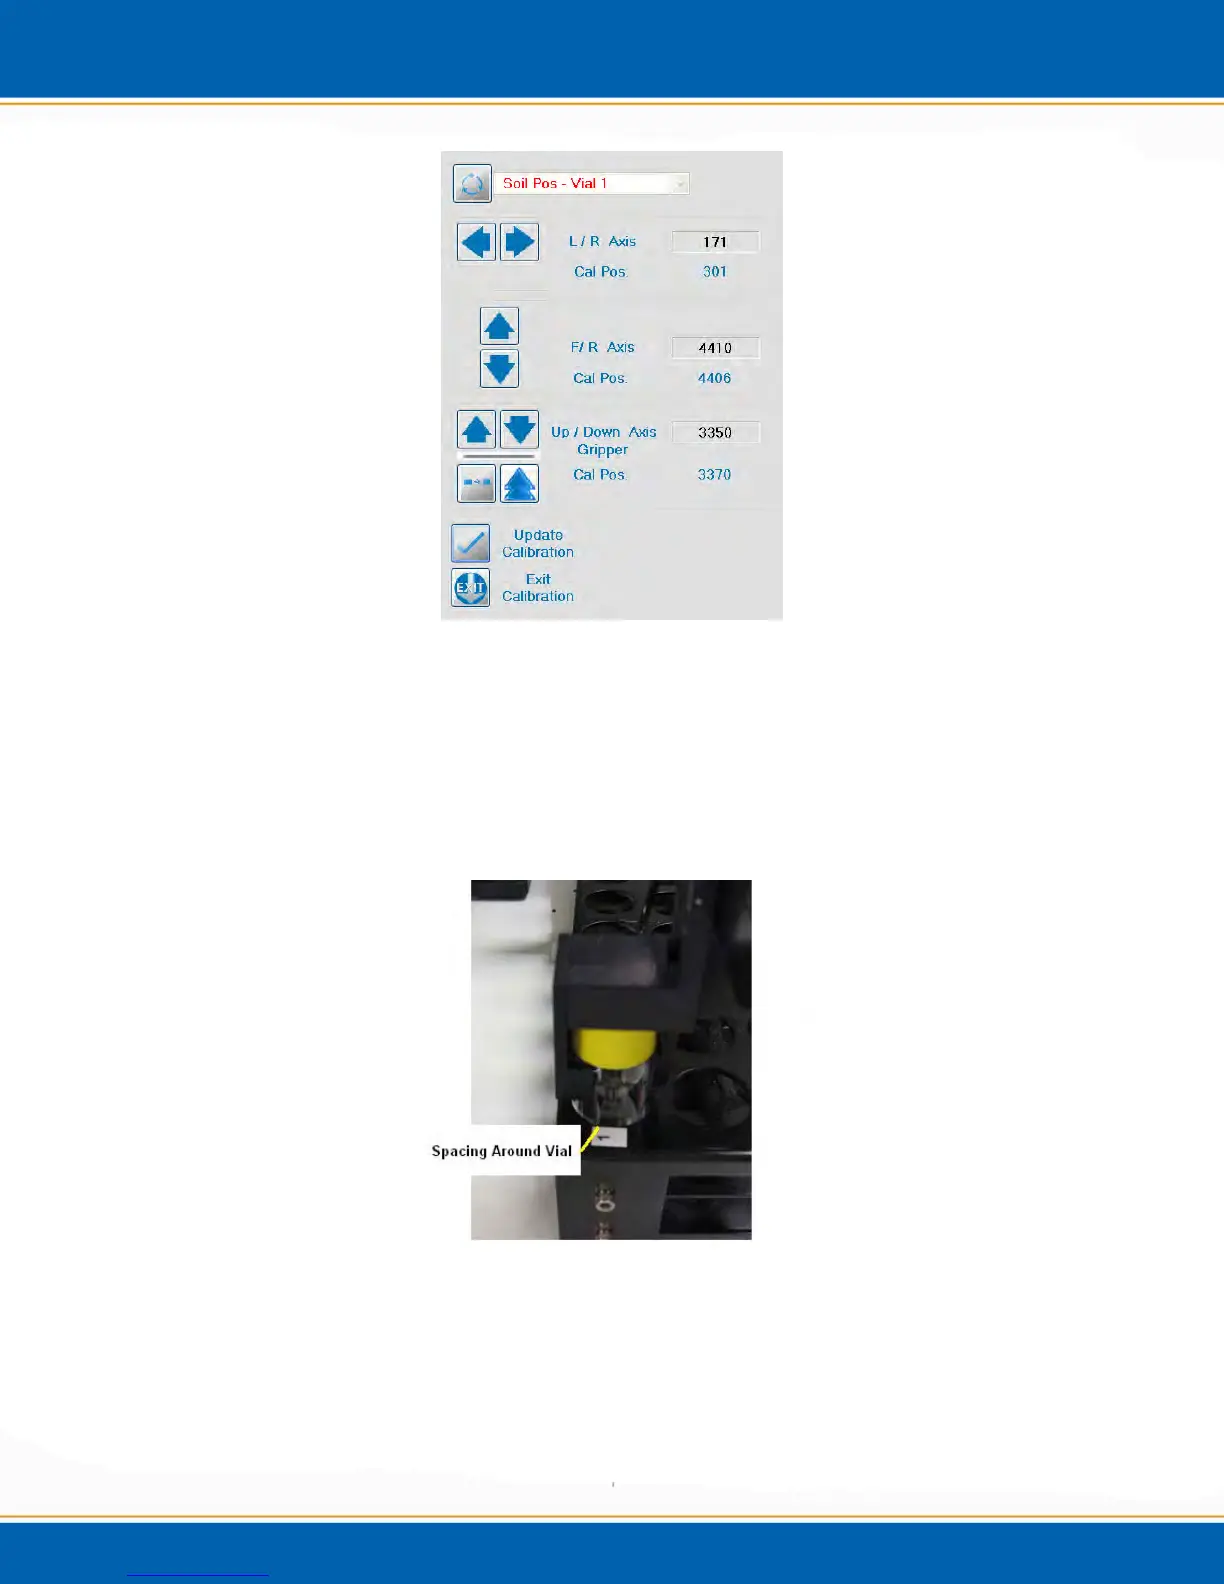
Figure 4qq: Vial 1/Tray Position Calibration Screen
25. Make note of the tray spacing around the vial. The goal is to have even spacing
around the vial in the tray by using the L/R and F/R buttons on the calibration screen.
See step 10 for axis adjustments.
26. When the position is calibrated, <click> Update Calibration. See Figure 4rr for
image of vial spacing in the sample tray.
Figure 4rr: Vial Centered in Tray Position 1
27. After the Vial position in the tray is calibrated, the software will prompt you to
calibrate the gripper axis. See Figure 4ss.