6. Verify the Encon Evolution is free of leaks by performing a Leak Check routine
discussed later in this Chapter.
7. Condition the new trap by performing the single button ‘Trap Bake’ routine discussed
later in this Chapter. Please use recommended conditions outlined by the trap
manufacturer. These conditions are included with the new trap.
8. Update the ‘Install Trap’ function in the ‘Options’ page of the Encon Evolution
program and set the reminder to the next scheduled replacement. Refer to the
Operations Chapter for further instructions.
NOTE: Be sure the analytical trap is installed properly with the markings and the
pre-swaged ferrule at the top.
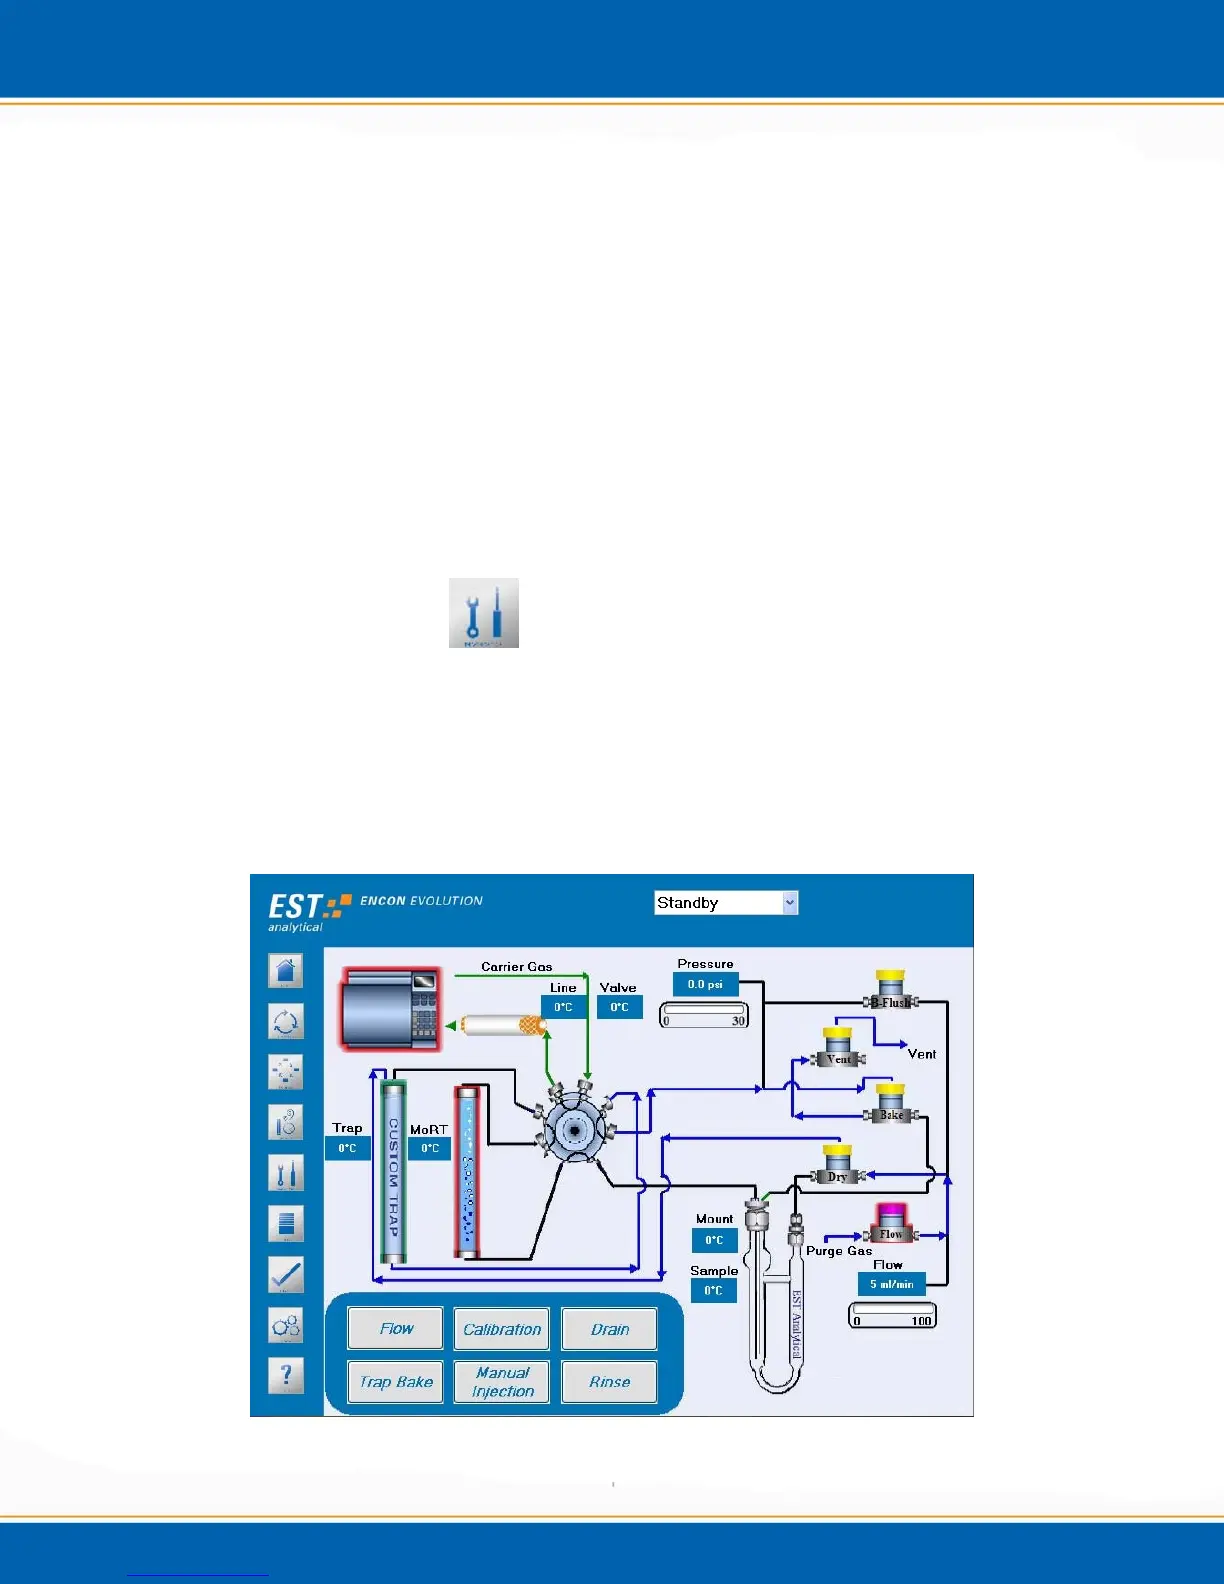
4.4 Diagnostics Screen
<click> the Diagnostics screen icon. The Diagnostics screen will be displayed as shown
in Figure 4a. The Diagnostics screen contains the settings and controls necessary to
manually operate and trouble shoot the Encon EV. It enables the user to leak and flow
check the concentrator. It also displays the various flow pathways. Other functions
include manual activation of the solenoid valves and manual temperature control of the
heated zones.
Figure 4a: Diagnostics screen