© Boule Medical AB, March 2018. Article no. 1504496 Page 57
7. Menu Structure and Advanced Setup
Advanced Parameter Setup
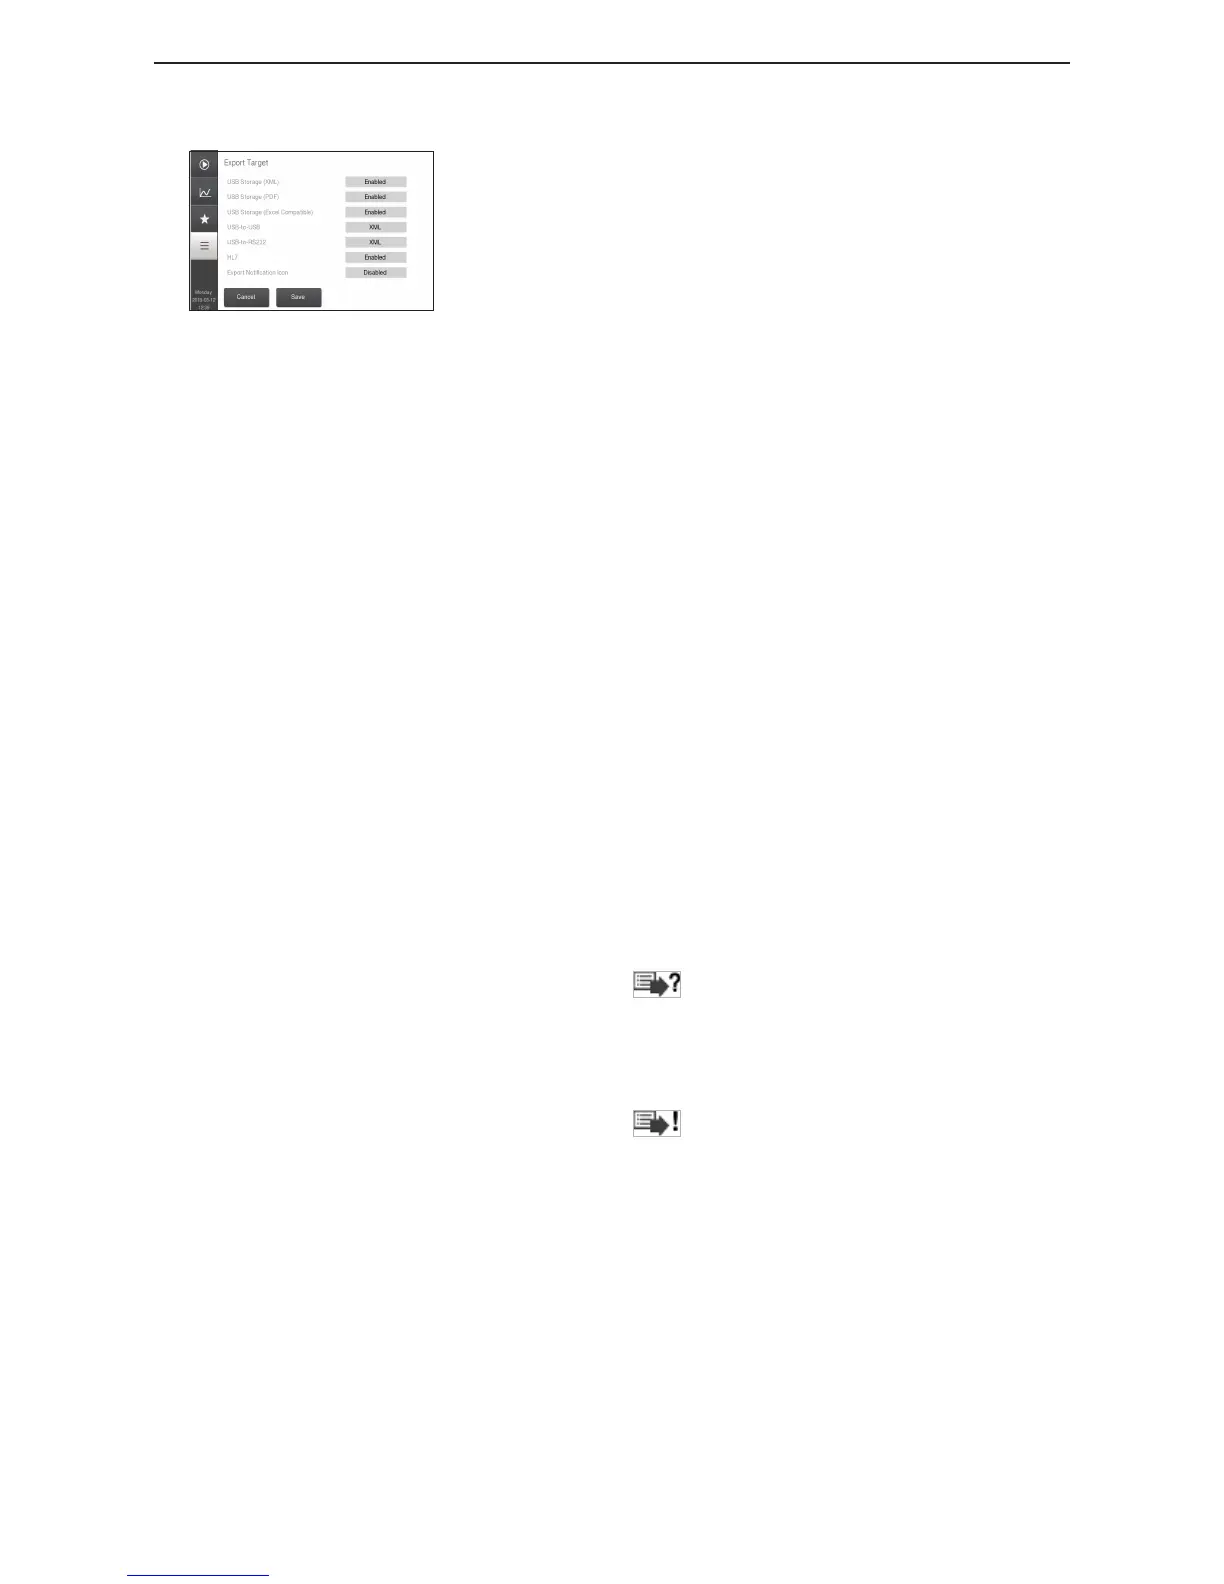
Figure 92: Export Target Setup
Export Target
This function allows the user to choose how and where data is
exported.
USB Storage (XML) – To activate the export of data to a
USB memory stick, choose USB Storage (XML) button,
then Enabled, and then press Save.
USB Storage (PDF) allows a single sample result to be
exported to a single PDF le.
USB Storage (Excel Compatible) exports sample results to
an Excel compatible CSV le. All samples exported on a
specic day will be stored on a single CSV le.
USB-to-USB – To activate the export of data to a host
computer via USB, choose USB-to-USB button, then select
XML or HL7, and press Save.
USB-to-RS232 – To activate the export of data to a host
computer via RS232, choose USB-to-RS232 button, then
select XML or HL7, and press Save.
HL7 – Check with Service Contact for more information.
Export Notication Icon – Allows the user to specify
whether or not to see if a sample has been exported to a
specic target or not.
− To activate the export icon, choose Export Notication
Icon button, then choose the export target to be tracked,
and then press Save.
− There are two dierent icons that can show up in the
Result List for each sample when this function is
activated:
Samples prior to activation are indicated with the
icon which indicates that it is unknown if the
user wants to export them or not.
After the setting is enabled, all samples successfully
exported will have no indication, while samples
where the export has failed will be indicated with the
icon .
Note: Restart of instrument can be required if USB memory is removed during export.


 To Next Page